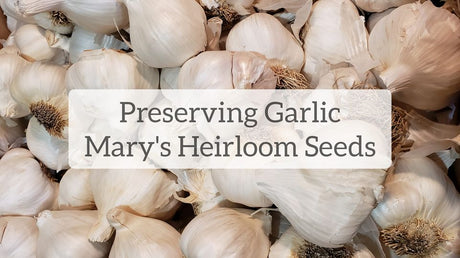
News

Preserving Garlic Posted on 24 Dec 09:05 , 1 comment

Earlier this year during a live chat we discussed different ways to preserve garlic.

It is important to mention that after you harvest garlic from your garden, it is important to properly cure it before storing. If you're not sure, please read Harvesting & Curing Organic Garlic.


There are quite a few options to preserve your garlic. My favorite is freezing with herbs and oil. Another option is dehydrating. Below is a recap from the video and a link to the video.

If your garlic is dirty from the garden, peel off the outer papery husk prior to getting started. I usually do this outside so I'm not bringing in too much dirt into the kitchen. The extra papery part of the bulbs can be tossed into the compost.

Before you use any preservation method, it is important to clean your garlic cloves well.

Ways to Preserve Garlic:
Refrigerator Pickled Garlic
Dehydrator
Freeze Dry
Mix with Oil and freeze
Freeze whole cloves


Ready for my recipes?

Refrigerator Pickled Garlic

*This is not a shelf stable recipe* The National Center for Home Food Preservation states that the garlic and vinegar mixture may be refrigerated for up to 4 months. 

Brine recipe:

1/4 cup canning salt or sea salt

5 cups white vinegar

2 pounds fresh garlic peeled

2 cups fresh dill

Combine canning salt and vinegar in a large saucepan. Bring to boil; reduce heat and simmer 10 minutes (180 degrees). Meanwhile, pack garlic into 4 sterilized pint jars (about 8 ounces per jar) leaving 1/2-inch of headspace. Add 1 dill to each jar.


Oil & Herb Garlic Cubes

This is an easy recipe and only requires a blender. You can use just oil and garlic or add any herbs you'd like. Keep in mind that this is a very strong (concentrated) garlic recipe so you'll want to adjust accordingly when you defrost.

Ingredients:

2 cups garlic cloves

2 cups olive oil (or avocado oil)

1 cup water

1 teaspoon sea salt

herbs of your choice (fresh from the garden oregano, Rosemary and thyme is my favorite combination)

Add all ingredients to your blender and blend until smooth.

Pour the mixture into ice cube trays and freeze. Once the cubes are fully frozen, remove and store in a freezer safe container.


How do you like to preserve your garlic?


If you have additional questions, please feel free to ask!
Email: mary@marysheirloomseeds.com
HAPPY PLANTING!


http://www.facebook.com/pages/Marys-Heirloom-Seeds/229833070442449


Garlic Growing Tips Posted on 24 Sep 12:44 , 2 comments

Garlic is another easy crop that can be grown in just about any type of garden. It takes a little bit of planning ahead but it's pretty low maintenance.

At the bottom of this tutorial, you'll find a few videos about planting and growing garlic.

Instead of growing garlic from seeds, it is easier and more economical to grow from "seed garlic" which is actually cloves.

What is "seed garlic" you ask?

Seed Garlic differs from culinary garlic as it is usually larger and often times certified disease free. A Bulb is the entire head of garlic but the individual cloves are planted to form (grow) a completely new bulb.

Clove (left), Bulb (right)


Fall is the time to plant for best yields and highest quality bulbs. Generally plant in September–January. In very cold areas, plant by mid-October, and protect your crop with a thick layer of mulch such as straw. Expect to harvest it in June–July.  One lb of garlic seed equals approx. a 25' row with 4" spacing between plants. For most garlic, expect up to 10 lb yield for every lb planted under optimal conditions.

HARDNECK
Rocambole garlic has wrappers that are can be in color, such as German Red.  However, color is not the only requirement for this category, as some varieties may be white or purple colored. Rocambole scapes are more tightly curled than other varieties.  Most rocambole varieties produce 8 to 10 cloves per head.


SOFTNECK

Softneck garlic, also called artichoke garlic due to their numerous cloves that give them an appearance similar to the “petals” of an artichoke head, is the most common garlic due to its excellent storage characteristics.  This is the kind you will find in grocery stores. 
Softnecks are the most heat tolerant of garlic, and have a sweeter, milder flavor than hardnecks.  If you’re looking to make garlic braids, this is the type to grow. 


Garlic is usually ignored by wildlife (pests) such as squirrels and rabbits as they do not like the scent.

Preparing your Garden for Garlic

I have grown garlic in-ground, in raised beds and containers. While I prefer raised beds, it is possible to grow in just about any type of garden.

Before you get started, find a spot that will go undisturbed for for 6 months. October is a favorite month to plant garlic and we do not harvest until late June to July. It is best to rotate your planting area so this spot should not have had garlic growing there in the last 3 years. If that's not possible, be sure to amend the soil.

If you prepare in advance, it is recommended to amend the soil with aged compost and/or aged manure during the summer. Worm castings are another popular soil amendment.


Planting Your Garlic

Planting at the right time is definitely a bonus with garlic. If you wait until Spring, you might have smaller, immature bulbs if you harvest in July.

October and November are common times to plant garlic. If you live in a colder region, you might be planting in September.

As a general rule, plant your seed garlic 1-6 weeks before your first frost. Garlic is pretty forgiving and will tolerate frost and snow if properly cared for and mulched.

I found that I have harvested larger, healthier bulbs when grown in raised beds.

-Break apart cloves from bulb a few days before planting, but keep the papery husk on each individual clove.

-Ensure soil is well-drained with plenty of organic matter. Select a sunny spot.

-Place cloves 4 inches apart and 2 inches deep, in their upright position (the wide root side facing down and pointed end facing up).

Optional: soak cloves in kelp tea or worm tea 2 hours prior to planting

Caring for Garlic

In areas with heavy snow, mulch heavily with straw for overwintering. Mulch should be removed in the spring after the threat of frost has passed. (Young shoots can't survive in temps below 20°F on their own. Keep them under cover.)

Cut off any flower shoots that emerge in spring. These may decrease bulb size.

Weeds should not be a problem until the spring. Weed as needed.

Garlic requires adequate levels of nitrogen. Fertilize accordingly, especially if you see yellowing leaves.

Water every 3 to 5 days during bulbing (mid-May through June).

A note on garlic scapes: Some folks love cooking the scapes (the tops of hardneck garlic). Whether you trim the scapes or let them keep growing is your preference.

I love to cook up scapes with eggs or make garlic scape pesto. Yum!

 Once you've grown your garlic and you're ready to harvest, hop on over to my article about Harvesting & Curing Garlic.


If you have additional questions, please feel free to ask!
Email: mary@marysheirloomseeds.com
HAPPY PLANTING!


http://www.facebook.com/pages/Marys-Heirloom-Seeds/229833070442449


Perennial Veggies & Herb Info Posted on 27 Aug 07:07 , 0 comments

Here's the latest from Mary @ Mary's Heirloom Seeds!

There's still time to order Your ORGANIC GARLIC before we are all sold out!  We just added 2 new varieties!


colorful-flowers-banner.jpg
Mary's Heirloom Seeds
Quick Links
Join Our List
August 27, 2016
We're shared about Perennial veggies a few times over the years and thought it would be good to share a bit more.

below you'll find a bit more of an in depth explanation of Perennial Veggies and how to grow some of them.

If you have additional questions, please ask!

Perennial Vegetables 
What is a Perennial? 
A perennial plant or simply perennial is a plant that lives for more than two years.  Some perennials grow for decades!

"It's as close to zero-work gardening as you can get," says Eric Toensmeier, author of Perennial Vegetables. "Our perennial vegetable beds planted 11 years ago still bear food, and all we do is add compost and mulch once a year."

From The Self Sufficient Homeacre, "Are you interested in growing your own healthy food, becoming more self reliant, saving money, and planning for the future? Then you should be interested in perennial crops. Your initial investment of time and money will reward you for years to come. Prepare your perennial beds properly, water and weed your plants, top dress with compost, and you will harvest fresh food for your table year after year."
Just a few from Mary's Heirloom Seeds,
Grow artichoke (Cynara scolymus) in full sun and moist, well-drained soil. Artichokes require ample, consistent moisture for best growth. They survive drought but don't produce as well in dry conditions.
Plant 24-36 inches apart in rows about 36 inches apart. Amend the soil prior to planting with 2 inches of compost. Fertilize monthly with a high-nitrogen fertilizer. When growing artichoke as a perennial, amend the soil around plants each spring with a 1- to 2-inch layer of compost.  
Artichoke plants should produce for about 3 - 5 years. At that time, you should notice side shoots at the base of the plant. You can lift, divide and replant the new shoots.
This hardy crop lasts for decades in the garden and is one of the first vegetables that can be harvested in spring. Plant asparagus (Asparagus officinalis) in full sun and moist, well-drained soil. Mix a 2-inch-thick layer of compost into the planting site. Because asparagus is long-lived, it's important to adequately prepare the soil before planting.  
In the second year after planting, harvest for only two weeks. By the third year, harvest for the usual five to eight weeks. Start harvesting when the spears are 1/2 inch in diameter 
This sharp-flavor vegetable is technically a hardy biennial, meaning it grows for two years. It is a type of chicory and is related to Belgian endive. Dark red leaves with white veins form into a tightly clumped head that resembles cabbage or romaine lettuce. Grow radicchio (Cichorium intybus) in fertile, well-drained soil in full sun. Sow seeds in spring or autumn, then harvest the inner heads in late fall when they are firm and have the deepest color of white and red, leaving the roots in the ground to produce another crop.
Though many people treat it like a fruit, rhubarb (Rheum rhabarbarum) is actually a hardy perennial vegetable (because you eat the stems, not the plant's fruits).
Plant rhubarb in full sun and moist, well-drained soil. Locate it where it won't be disturbed because it will be productive for many years.
Apply a balanced fertilizer in early spring. After harvest, spread a 2-inch layer of compost around plants. When the stalks become thin, usually after six to eight years, dig and divide the plant in spring or fall.  Leave first-year plants unharvested. By the third year, harvest all stalks larger than 1 inch wide for as long as eight weeks. Use only the stems; the leaves contain oxalic acid and are poisonous. 


Some eggplants will continue to grow for up to 3 years.  This takes propper care and the right conditions.  The greatest bloom is usually observed in the indeterminate, with fruit and seed production starting in the year round and continuing until year round. Leaves are retained year to year. The Eggplant has a short life span relative to most other plant species and a rapid growth rate. At maturity, the typical Eggplant  will reach up to 4 feet high.
To grow sorrel, sow seeds directly in the garden in full sun and average soil 6-8 inches apart in rows 2 feet apart. Established plants may be divided.
Certain varieties of pepper can grow for several years.  Perennial Peppers include:
Scotch Bonnet (special order) 
Habanero
Tabasco
Ghost
The young leaves and stems of this 6-foot-tall perennial are an excellent substitute for celery in springtime soups. The seeds and roots are also edible, and the umbel flowers attract beneficial insects. Lovage thrives in average garden soil, in sun or partial shade. 


These are different than herb varieties that self-seed or re-seed such as Basil and Cilantro.

ROSEMARY is a perennial herb. 
I've seen them grow over 5 feet tall and over 8 years old.  Rosemary is an excellent choice for a "plant it once" kinda garden!

Additional Perennial Herbs include: 
Sage
Lavender
Lemonbalm
Lemongrass
Oregano
Thyme

If you are going to have both perennials and annuals in your garden, it's wise to keep them in separate areas to make planting annuals easier, as well as cleaning up at the end of the growing season.
Be warned that some perennials can be so hardy that they are actually spreading and invasive. Everbearing strawberry plants and blackberry vines are known to spread and spread. You may want to plant them in containers to control them.


We are now past the date for Pre-orders and almost sold out of our current availability of organic garlic.

However, we were able to add 2 NEW varieties of Organic garlic.
**PLEASE READ the ordering info prior to making your purchase**


ORGANIC GARLIC

 CURRENT AVAILABLE
ORGANIC GARLIC VARIETIES:

INCHELIUM RED

RED CHESNOK

*new*

GERMAN RED
If you have additional questions please feel free to ask. 
Happy Planting,
Mary's Heirloom Seeds, P. O. Box 3763, Ramona, CA 92065

http://www.facebook.com/pages/Marys-Heirloom-Seeds/229833070442449

Sign up for our E-Newsletter


5 Reasons to Grow Your Own Garlic Posted on 29 Jun 10:36 , 0 comments

We grow as much of our own organic food as we have the resources to produce and it still isn't 100%.  What we do not grow we try to find locally and organic.  Organic Garlic is our most recent crop harvest and IT IS AMAZING!  I've cooked with it almost daily and I know we'll run out eventually so we savor every bit.

5 Reasons to Grow Your Own Garlic
 
1.  TASTE
When you grow your own organic garlic, you know exactly how it was grown and when it was harvested.  Fresh, unadulterated Garlic is amazing.  It's robust smell and flavor are a welcome addition to our kitchen.
Last month I used store bought garlic with a simple recipe: 
1 zucchini, chopped 
3 cloves garlic, chopped
1 tablespoon coconut oil
Saute all ingredients and serve hot
 
The recipe was good.  THIS MONTH I made the same recipe with homegrown garlic and it was SPECTACULAR!!!!  I have shared some of my garlic with friends and family and they all agree that homegrown is so much more flavorful.
2. FRESHNESS
Store-bought foods travel an average of 1,500 miles to reach your plate.  There's no telling how long those items sit on store shelves before you purchase them.  Fresh is best!  Once Organic Garlic is harvested, curing takes approx 3 weeks.  You can skip the curing process if you want to consume right away.  Curing can extend the shelf life of your garlic.
**If you store garlic in the refrigerator, it will sprout quickly.  Store garlic in a cool, dry place (not in the fridge) and it will last longer**
 
3.   IT'S EASY!
Growing Organic Garlic is easy.  Garlic is one of the most low maintenance crops to grow if you plan ahead.   After preparing our 4 ft X 8 ft beds, it took approx 10 minutes to plant our organic garlic.  I used food grade DE once on the bed to keep bugs from eating our cloves.  After that, I watered every 3-4 days when it wasn't raining.  I watered with organic kelp tea twice during the 7 months of growth.  THAT'S IT!!!  We had no pest issues and harvested almost 10 pounds of garlic when we planted 1 pound of Organic Garlic Cloves.
 
If you are looking for an easy crop, Organic Garlic is a great choice!

4. Avoiding Filth and Contamination
In case you missed my latest article, Are your Eating Toxic Garlic
Chinese Garlic accounts for over 75% of the world's garlic supply.
Garlic can be whitened by using chlorine or with a mixture of sulphur and wood ash. Whitening garlic helps to make it look healthier and more attractive to consumers. In fact this obsession with white foods has lead to the bleaching of many food products (flour, salt, sugar) using chlorine dioxide or benzoyl peroxide.

Growth inhibitors are used to stop garlic from sprouting and can be made from hormones or chemicals. When garlic begins to sprout, the garlic clove loses much of its potency. Growth inhibitors together with gamma irradiation extend the shelf life of garlic.
Gamma radiation is also used to sterilize many products, and in Australia, this treatment is not accepted for foodstuffs. This does not prevent food treated by gamma radiation to enter the country."
Many of China’s farms and food processors are situated in heavily industrialized regions where water, air, and soil are contaminated by industrial effluents and vehicle exhaust
 
5.  Organic Garlic is Good for your Health
-Garlic can Combat Sickness
-The active compounds in Garlic can Reduce Blood Pressure
-Garlic Improves cholesterol, which may lower the risk of heart disease
-Garlic contains anti-oxidants
-Garlic can help detoxify heavy metals in the body
**Keep in mind that consuming organic garlic is your best option.  Consuming pesticide-laden garlic may have adverse affects on your health**


I hope you have enjoyed another educational article.  if you have additional questions, please leave a comment below or send an email to mary@marysheirloomseeds.com


http://www.facebook.com/pages/Marys-Heirloom-Seeds/229833070442449

Sign up for our E-Newsletter


Kelp Tea Recipe for your Garden Posted on 22 Jun 13:29 , 3 comments

We've already shared our Alfalfa Meal tea so today we're making KELP tea.  This is especially important if you plan on planting Organic Garlic this year.

  What is KELP and What does Kelp Tea do for plants?

Kelp is derived from sea plants and is sustainable.  Kelp Meal contains only small amount of N, P, and K (highest in Potash) but adds valuable micronutrients.  Kelp Meal also contains vitamins that help increase yields, improve soil structure, reduce plant stress from drought, and increase frost tolerance.

From our website,
Organic Kelp Meal (1-0-2) is dried and ground Rock Weed (Ascophyllum Nodosum), which grows in the cold clean waters along the New England coast, and is known as the best marine plant available for agriculture today

Full of trace Minerals, Carbohydrates and Amino Acids, helping create a strong root systems and makes a very healthy plant

It should be tilled in the soil before planting or can be top dressed, incorporated into potting soils, seed beds and composting material.
Organic kelp meal is ascophyllum nodosum, which is widely recognized as one of the finest marine plants available for agriculture today
It is a natural and cost effective enhancement to any soil fertilization and conditioning program
It is suitable for all crops and applications, and can be mixed with most soil conditioners and fertilizers

BONUS:  Sprinkle a small handful of kelp meal early in the growing season around and on the base of squash plants to help deter squash bugs.  Do this every 10 days where squash bugs are a problem.


RECIPE:
Easy kelp meal tea:  
Add 1/2 cup of kelp meal to 1-5 gallons water.   Let steep for 1-3 days and agitate daily.

*1 gallon of water will give you a very strong tea

*5 gallons of water will give you a very weak tea

Ways to Use Kelp Tea

-Soak Garlic Cloves in kelp tea for 1 to 2 hours before planting

-Use Kelp Tea as a foliar spray to help protect plants from cold and hot temperatures.

-Soak seeds in Kelp Tea before planting to boost germination

-Apply to soil after transplanting to reduce shock

-Water plant with Kelp Tea once a month.  Stimulates soil microbial activity

http://www.facebook.com/pages/Marys-Heirloom-Seeds/229833070442449

Sign up for our E-Newsletter


Harvesting & Curing Organic Garlic Posted on 22 Jun 12:06 , 3 comments

Welcome to our 3rd installment of our Growing Organic Garlic series for 2016.  First we shared How to Plant Organic Garlic and then When to Plant Garlic.

Growing Garlic is no simple, quick tasks.  However, it is possibly THE most low maintenance variety growing in the garden.  It take planning and preparation in order to plant and then it takes serious patience.  Growing garlic takes 6 to 8 months depending on the variety and your growing region.

In our region, we usually plant in late October.  Last year I had a late start and planted Garlic in early November.  Harvest times vary once planted but we harvested in June.  I could have left them longer but I was a bit anxious to see how we did this year in our new spot.

Most “experts” say to harvest when several of the lower leaves go brown, but five or six up top are still green

Harvesting garlic couldn’t be easier, as long as you remember one thing: Though tempting, do not try pulling the bulbs out by the above-ground stems, or at least without first loosening the soil alongside each row with a spading fork (not too close to the heads). Garlic stores best when cured with its leaves on.


Brush off the dirt or gently rinse of the dirt from garlic bulbs and bring inside, away from direct sunlight.  Garlic will blanch and burn in the sun. Put the freshly dug unwashed bulbs in a dark, dry place as soon as possible


CURING YOUR GARLIC HARVEST

Curing allows the layers to dry out forming a protective cover around the bulb. Curing can take a month or more, depending on the humidity level.  

If you have a cool, dry area you can lay them out or hang them to cure.  I was short on space this year so we hung our first batch of harvested garlic in the laundry room until I could make space.
**I used string and binder clips for this first batch.  I just had to use what I had on hand**


An alternative is to tie the top of the stalks with string in bundles of five to ten and hang them bulb down in a dark, dry and well-ventilated place for about three weeks.

Once your garlic is cured, snip off the stalk about an inch above the bulb.  Snip the roots off, then wipe off the dirt with your fingers or a soft brush, being careful not to remove too many layers of skin. **I add the stalks and snipped roots to my compost bin**

 
Select out any bulbs that are quite small or have nicks in them to eat first!


There you have it!  Growing Organic Garlic from Clove to Harvest!


If you have additional questions, please feel free to ask!
Email: mary@marysheirloomseeds.com
HAPPY PLANTING!


http://www.facebook.com/pages/Marys-Heirloom-Seeds/229833070442449


When to Plant Garlic Posted on 22 Jun 10:50 , 10 comments

2017

If you're new to growing Garlic, you might want to read our first article How to Plant Organic Garlic.  One important factor in planting garlic is PLANNING AHEAD.  First, because garlic takes 6 months or more to grow so you'll need a suitable spot.  Second because  garlic bulbs are not available year-round.  There is usually a short window to purchase "seed garlic" and then it's gone.

At Mary's Heirloom Seeds we usually offer "pre-orders" of Seed Garlic from July thru August 20th.  This allows customers to reserve their garlic in advance before we have a chance to sell out.  We continue to accept orders of Organic Garlic thru October 15th (or until we run out) but there is always a chance that we'll sell out before that date.


From our article How to Plant Organic Garlic,

"Fall is the time to plant for best yields and highest quality bulbs. Generally plant in September–January. In very cold areas, plant by mid-October, and protect your crop with a thick layer of mulch such as straw. Expect to harvest it in June–July.  One lb of garlic seed equals approx. a 25' row with 4" spacing between plants. For most garlic varieties, expect an optimum 10 lb yield for each pound planted."

SUGGESTED PLANTING TIME FOR GARLIC

Please remember that these are "suggested" dates. You'll find that different sources might have different dates.  I tend to be a bit of a rebel gardener so I sometimes plant earlier and sometimes later.


Central Midwest: October
Gulf Coast: October thru November
Maritime Canada & New England: October
Mid Atlantic: October
North Central & Rockies: Late September and into October
Pacific Northwest: Late September and into October.  Early November in a pinch
Southern Interior: October
Southwest: October thru November

Alaska: September
Hawaii: Late September thru October
San Diego: October thru November


North Florida: October thru February
Central Florida: October thru February
South Florida: October thru February
**October thru December might give you a better chance at a successful crop**

Stay tuned for our next article about growing Organic Garlic.  We're going to share about the different types of garlic and give you a few extra tips about growing them in your backyard food garden!


Sign up for our E-Newsletter


How to Plant Organic Garlic Posted on 20 Jun 20:52 , 9 comments

2017

It's that time to start thinking about GARLIC.  This is our third year of offering several varieties of Garlic Seed at Mary's Heirloom Seeds.  The first 2 years we sold out within 2 months so we're increasing our supply this year!


Fall is the time to plant for best yields and highest quality bulbs. Generally plant in September–January. In very cold areas, plant by mid-October, and protect your crop with a thick layer of mulch such as straw. Expect to harvest it in June–July.  One lb of garlic seed equals approx. a 25' row with 4" spacing between plants. For most garlic varieties, expect an optimum 10 lb yield for each pound planted.

First, let's talk terminology

Below is a single CLOVE of garlic.


If you break up a head of garlic, you get lots of smaller cloves

Below is a BULB of garlic and is often referred to as a head of garlic.


From a customer, "In Spanish, a clove is called a diente (tooth), and the head is called cabeza (head)!"
 
HARDNECK
Rocambole garlic has wrappers that are typically reddish in color, such as Killarney Red.  However, color is not the only requirement for this category, as some varieties may be white or purple colored. Rocambole scapes are more tightly curled than other varieties.  Most rocambole varieties produce 8 to 10 cloves per head.

SOFTNECK

Softneck garlic, also called artichoke garlic due to their numerous cloves that give them an appearance similar to the “petals” of an artichoke head, is the most common garlic due to its excellent storage characteristics.  This is the kind you will find in grocery stores. 
Softnecks are the most heat tolerant of garlic, and have a sweeter, milder flavor than hardnecks.  If you’re looking to make garlic braids, this is the type to grow. 


JUST A TIP: Soak garlic cloves in Organic Kelp Meal and water for 2 hours before planting.

We offer Organic Kelp Meal at Mary's Heirloom Seeds to make your own Kelp Tea!


From The Old Farmer's Almanac,

Planting

  • Garlic can be planted in the spring as soon as the ground can be worked, but fall planting is recommended for most gardeners. Plant in the fall and you'll find that your bulbs are bigger and more flavorful when you harvest the next summer.
  • In areas that get a hard frost, plant garlic 6 to 8 weeks before that frost. In southern areas, February or March is a better time to plant.
  • Break apart cloves from bulb a few days before planting, but keep the papery husk on each individual clove.
  • Plant cloves about one month before the ground freezes. 
  • Do not plant cloves from the grocery store. They may be unsuited varieties for your area, and most are treated to make their shelf life longer, making them harder to grow. Instead, get cloves from a mail order seed company or a local nursery.
  • Ensure soil is well-drained with plenty of organic matter. Select a sunny spot.
  • Place cloves 4 inches apart and 2 inches deep, in their upright position (the wide root side facing down and pointed end facing up).
  • In the spring, as warmer temperatures come, shoots will emerge through the ground.

Care

  • Northern gardeners should mulch heavily with straw for overwintering.
  • Mulch should be removed in the spring after the threat of frost has passed. (Young shoots can't survive in temps below 20°F on their own. Keep them under cover.)
  • Cut off any flower shoots that emerge in spring. These may decrease bulb size.
  • Weeds should not be a problem until the spring. Weed as needed.
  • Garlic requires adequate levels of nitrogen. Fertilize accordingly, especially if you see yellowing leaves.
  • Water every 3 to 5 days during bulbing (mid-May through June).
  • A note on garlic scapes: Some folks love cooking the scapes (the tops of hardneck garlic). Whether you trim the scapes or let them keep growing is your preference. We like to stir fry scapes the way we cook green beans—similar with a spicy kick!

Break apart cloves from bulb a few days before planting, but keep the papery husk on each individual clove

 OPTIONAL:
Break a garlic bulb apart into individual cloves, being careful to keep the papery skins covering each clove intact. Then fill a quart jar with water and mix in 1 tablespoon of liquid seaweed. Soak the cloves in this mixture for 2 hours prior to planting to prevent fungal disease and encourage vigorous growth.

Place cloves 4 inches apart and 2 inches deep, in their upright position (the wide root side facing down and pointed end facing up)


In the spring, as warmer temperatures come, shoots will emerge through the ground

Garlic is almost ready to harvest!

 
Freshly harvested Organic Garlic!


From Organic Gardening,
Planting Garlic: Step 1
Break a garlic bulb apart into individual cloves, being careful to keep the papery skins covering each clove intact. Then fill a quart jar with water and mix in 1 tablespoon of baking soda and 1 tablespoon of liquid seaweed. Soak the cloves in this mixture for 2 hours prior to planting to prevent fungal disease and encourage vigorous growth.

Planting Garlic: Step 2
In the meantime, prepare your bed for planting. Garlic grows best in rich, well-drained soil that is free of weeds. Dig a furrow about 3 inches deep. Place the presoaked cloves into the furrow, spacing them 6 to 8 inches apart. Be sure the flat root end is down and the pointy end is up.

Planting Garlic: Step 3
Cover the cloves with 2 inches of soil and side-dress the furrow with compost or scratch in granulated organic fertilizer. Water the bed in well and cover it with 6 to 8 inches of straw mulch. You should see shoots poking through the mulch in 4 to 6 weeks. The garlic stops growing in the winter months and resumes in spring.

 THAT my friends is how it's done!  Are you ready to plant organic garlic?


I hope you have enjoyed another educational article.  if you have additional questions, please leave a comment below or send an email to mary@marysheirloomseeds.com

http://www.facebook.com/pages/Marys-Heirloom-Seeds/229833070442449

Sign up for our E-Newsletter


Growing Organic Garlic from Seed (cloves) Posted on 29 Aug 08:01 , 1 comment

It's that time to start thinking about GARLIC.  This is our second year of offering several varieties of Organic Garlic Seed at Mary's Heirloom Seeds.  Pre-Orders of Garlic is still available for a limited time (August 20th).  Orders ship out after September 19th.

Red Chesnok Garlic (hardneck)
Fall is the time to plant for best yields and highest quality bulbs. Generally plant in September–January. In very cold areas, plant by mid-October, and protect your crop with a thick layer of mulch such as straw. Expect to harvest it in June–July.  One lb of garlic seed equals approx. a 25' row with 4" spacing between plants. For most garlics, expect an optimum 10 lb yield for every lb planted.

Before we get started...A garlic Clove is a garlic SEED.

HARDNECK
Rocambole garlic has wrappers that are typically reddish in color, such as Killarney Red.  However, color is not the only requirement for this category, as some varieties may be white or purple colored. Rocambole scapes are more tightly curled than other varieties.  Most rocambole varieties produce 8 to 10 cloves per head.

SOFTNECK

Softneck garlic, also called artichoke garlic due to their numerous cloves that give them an appearance similar to the “petals” of an artichoke head, is the most common garlic due to its excellent storage characteristics.  This is the kind you will find in grocery stores. 
Softnecks are the most heat tolerant of garlic, and have a sweeter, milder flavor than hardnecks.  If you’re looking to make garlic braids, this is the type to grow. 
 
Inchelium Red (softneck)


From The Old Farmer's Almanac,

Planting

  • Garlic can be planted in the spring as soon as the ground can be worked, but fall planting is recommended for most gardeners. Plant in the fall and you'll find that your bulbs are bigger and more flavorful when you harvest the next summer.
  • In areas that get a hard frost, plant garlic 6 to 8 weeks before that frost. In southern areas, February or March is a better time to plant.
  • Break apart cloves from bulb a few days before planting, but keep the papery husk on each individual clove.
  • Plant cloves about one month before the ground freezes. 
  • Do not plant cloves from the grocery store. They may be unsuited varieties for your area, and most are treated to make their shelf life longer, making them harder to grow. Instead, get cloves from a mail order seed company or a local nursery.
  • Ensure soil is well-drained with plenty of organic matter. Select a sunny spot.
  • Place cloves 4 inches apart and 2 inches deep, in their upright position (the wide root side facing down and pointed end facing up).
  • In the spring, as warmer temperatures come, shoots will emerge through the ground.

Care

  • Northern gardeners should mulch heavily with straw for overwintering.
  • Mulch should be removed in the spring after the threat of frost has passed. (Young shoots can't survive in temps below 20°F on their own. Keep them under cover.)
  • Cut off any flower shoots that emerge in spring. These may decrease bulb size.
  • Weeds should not be a problem until the spring. Weed as needed.
  • Garlic requires adequate levels of nitrogen. Fertilize accordingly, especially if you see yellowing leaves.
  • Water every 3 to 5 days during bulbing (mid-May through June).
  • A note on garlic scapes: Some folks love cooking the scapes (the tops of hardneck garlic). Whether you trim the scapes or let them keep growing is your preference. We like to stir fry scapes the way we cook green beans—similar with a spicy kick!

 From Organic Gardening,

Planting Garlic: Step 1
Break a garlic bulb apart into individual cloves, being careful to keep the papery skins covering each clove intact. Then fill a quart jar with water and 1 tablespoon of liquid seaweed. Soak the cloves in this mixture for 2 hours prior to planting to prevent fungal disease and encourage vigorous growth.

Planting Garlic: Step 2
In the meantime, prepare your bed for planting. Garlic grows best in rich, well-drained soil that is free of weeds. Dig a furrow about 3 inches deep. Place the presoaked cloves into the furrow, spacing them 6 to 8 inches apart. Be sure the flat root end is down and the pointy end is up.

Planting Garlic: Step 3
Cover the cloves with 2 inches of soil and side-dress the furrow with compost or scratch in granulated organic fertilizer. Water the bed in well and cover it with 6 to 8 inches of straw mulch. You should see shoots poking through the mulch in 4 to 6 weeks. The garlic stops growing in the winter months and resumes in spring.

 THAT my friends is how it's done!  Are you ready to plant organic garlic?


http://www.facebook.com/pages/Marys-Heirloom-Seeds/229833070442449

Sign up for our E-Newsletter


Organic Garlic Now Available as a Pre-Order Posted on 10 Jul 17:16 , 0 comments


Mary's Heirloom Seeds
Quick Links
Join Our List
July 10, 2015

Are you ready to start planning your FALL Garden?  Organic Garlic is one of the many varieties to start in the fall.
Requests for Organic Garlic have been pouring in and we're finally able to announce early Pre-Order varieties. Enjoy!


DON'T MISS OUT ON 
Last year we sold out Quick!
 
All of our Garlic varieties are Certified Organic and
grown in the USA


Calculating Garlic Seed
One pound of Garlic seed equal approx  a 25 ft row with 4 inch spacing between plants.   
For most garlic, expect an optimum 10 pound yield for each one pound planted.
Garlic is best planted in Fall.  In general, it is best to plant Garlic between late-September thru January.  By mid-October for colder climates.  Expect to harvest around June-July.
It is best to plant Organic Garlic in a place you have not previously planted in 3 years to avoid disease.  Organic Garlic needs fertile soil with plenty of drainage.
Recent Articles:
If you have additional questions please feel free to ask. 
Happy Planting,