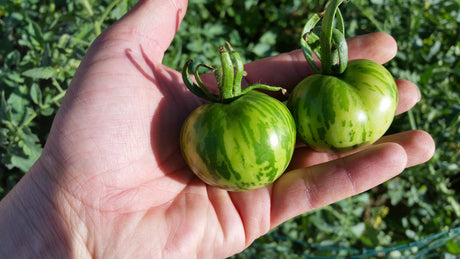
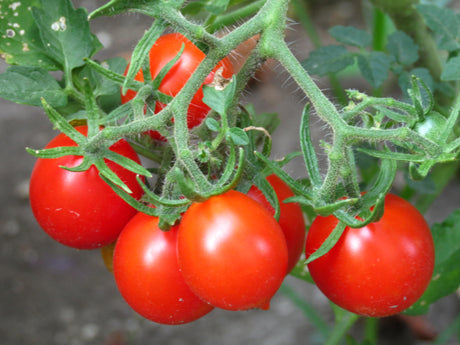
Directions: Use an ample sized soaking container to re-hydrate your compressed brick. Soak your compressed coir brick for a minimum of fifteen minutes before attempting to use the product.
Start with 2 liters of water per brick (specific to this kit). If your brick is not fully hydrated then add more water.
Once your coconut coir is fully hydrated, add the coir to the non-woven starter bags provided. Make sure to pack each pod gently but firmly. Plant seeds accordingly in each pod.
Keep moist but not in standing water.
We recommend using the pods for your heirloom tomato seeds and direct sow the companion planting seeds. When you're ready to plant your seeds, it is best to only plant 1 or 2 seeds per pod. Too many seeds per pod (image below) will cause seedlings to be overcrowded and possibly not grow as healthy as possible.
The Mountain Flower Compost Tea can be used once your tomato seedlings have their second set of leaves. I recommend using half the packet (1/2 tablespoon) in 1/2 gallon of water for the first feeding. You can dilute even more if you prefer.
New Planting for individual plants, mix 1-2 tablespoons
into soil when planting.
Transplanting: mix 1-2 tablespoons into soil when planting.
Established Plants: Add 2 tablespoons per gallon of water. "Brew" for 12-24 hours and feed 1/4-1/2 gallon per plant
The Nitrogen Boost Fish Food can be used at any time after transplanting. A diluted solution can be used right after transplanting to reduce shock. The smell is very strong so we do not recommend using it indoors.
The second half of the Mountain Flower Compost tea can be used in between or monthly after transplanting.
SEED PLANTING
For tomatoes, you can soak seeds for 24 hours prior to planting but this is optional. Sow approx 1/8-1/4 inch deep into moist soil/growing medium.
For your companion seeds, direct sow in your prepared garden bed, container or plot. These can be inter-planted with your tomatoes.
Borage: Plant seeds 1/8 - 1/4 inch deep into moist soil/growing medium.
Basil: don't plant these tiny seeds too deep. I prefer to place them on the top of the soil and gently tamp down into the soil.
Nasturtium: the seed coats are fairly hard so it would be a great idea to soak these for 24 hours prior to planting. Plant seeds 1/4 - 1/2 inch deep into moist soil/growing medium
Marigolds: Plant seeds 1/4 - 1/2 inch deep into moist soil/growing medium
Tomatillo is an often overlooked heirloom variety. Native to Mexico and domesticated by the Aztecs around 800 B.C., the tomatillo is one of our most ancient food bearing plants.
Growing Tomatillo is similar to growing tomatoes but isn't as heavy a feeder as tomatoes.
Select a growing area with full sun exposure and well-drained, moderately rich soil.
The rule of thumb for sowing seeds is to plant the seed twice as deep as it is wide (or twice as deep as the diameter of the seed). Tomatillo seeds are really small, so don’t plant them very deep – they only need to be planted 1/8″ – 1/4″ deep. Grow at least 2 plants at a time, more if you plan to make a bit of salsa.
My personal rule of thumb is to always plant more than you think you'll will need. This will come in handy if you have pest issues such as bugs, birds, squirrels and even cats. If you produce more than you need or use, you can always store for later or share with friends and family.
Similar to growing tomatoes, Tomatillo sprouts roots along the stems, so it does well when planted deep in the soil. Tomatillo plants grow 3 to 4 feet tall and about the same in width, so space the plants 3 feet apart in rows 3 to 4 feet apart. Plan to give them support in the form of gardening trellises or tomato cages.
Tomatillo will continue to produce until frost takes over. Although moderately drought-tolerant, tomatillos do best with an inch or so of water per week (more if you live in a very hot climate).
Companion Planting for Tomatillo
We use the same companion planting info for Tomatoes when we plant Tomatillos.
Friends of tomatoes are many and include: asparagus,basil, bean, carrots, celery, chive, cucumber, garlic, head lettuce, marigold, mint, nasturtium, onion, parsley, pea, pepper,marigold, pot marigold and sow thistle. One drawback with tomatoes and carrots: tomato plants can stunt the growth of your carrots but the carrots will still be of good flavor. Basil repels flies and mosquitoes, improves growth and flavor.Borage deters tomato worm.
You know a tomatillo is ready to be cut from the plant when the fruit has filled out the husk. Left to ripen further, the fruit will frequently split the husk and turn yellow or purple depending on its genetics.
We hope you have enjoyed yet another informative growing article here at Mary's Heirloom Seeds. If you have additional questions please ask!
There are two Types of Heirloom Tomatoes: Determinate and Indeterminate.
Determinate tomatoes produce the fruit all at once. These are typically bush tomatoes, and make the best tomatoes for container gardening. Since all the tomatoes are ripe within a short period of time, these are great plant choices if you plan to can or have a short tomato growing season.
Inderterminate tomatoes grow on a vine. If properly cared for, will produce all season until frost.
**From there you have characteristic-based types of tomatoes such as cherry, beefsteak, purple, green, etc**
Tomatoes love sun, and lots of it. Determinate or bush tomato plants work best for tomato container gardening. Soil should be rich in organic matter. Compost works best mixed in with the soil, and is a great organic fertilizer. Tomatoes tend to do well in soil that is a little acidic. Get a soil pH tester if you are unsure of your soil's pH level. One of the easiest way to acidify your soil is to add coffee grounds or brewed coffee.
Mulch will be important around tomato plants. Since tomato plants prefer full sun, the soil will dry out. Mulch will help retain moisture in the soil.
Starting Tomatoes from Seeds
I recommend soaking your seeds in water for up to 24 hours. This can increase the amount of seeds that germinate and how quickly they sprout. Use organic potting soil OR Organic Coconut Coir if you are seed-starting indoors or in small containers to be transplanted outside. Whether you direct sow or plant in containers, plant tomato seeds approx 1/4 inch below the soil.
Seeds can germinate in as few as 3 days (when I soak) and as many as 14 days.
How to Plant Tomatoes
Space out tomato plants 13 - 17 inches apart. Really just follow the planting instructions with the variety you choose. It will all depend on the variety of tomato you grow. You just want to make sure they will have enough room to grow and the roots not compete with each other. You can plant tomato seedlings after the last frost. Seeds can be started just before the last frost.
Tomatoes do well in raised beds. Rows should be 4-5 feet apart. But, don't forget that determinate tomato varieties grow well in containers, too!
Companion Plants for Tomatoes
Growing these companion plants around tomatoes will be helpful: Basil, chives,oregano, parsley, onions, carrots, asparagus, marigolds, celery, Nasturtiums and geraniums. Borage can deter tomato hornworms and is a must in my garden!
Some plants actually are bad to the health of tomato plants.
Avoid these plants around tomatoes: black walnut, corn, cabbage, potatoes, kale, and rosemary.
It's a good idea to use organic fertilizer in your garden, and avoid the chemicals around your food. Typically, tomatoes are fertilized every 3-4 weeks, with the first fertilization at planting. Tomatoes are considered "heavy feeders" but there is a delicate balance between too much nutrients and not enough. For more detailed info, read Organic Plant Food-Feeding Your Plants
Not sure what to do in the meantime? You will most likely need to stake your tomatoes. Again, depends on the variety. Bush tomatoes may need to be staked or caged for support. But, indeterminate tomatoes, or vine tomatoes, will definitely need support since they continue to grow all season. A trellis works nicely with vine tomatoes or a tomato cage.
Should you prune tomatoes? Depends on who you ask! Suckers, or side shoots, grow in the "v" of the stem and branch. You can pinch them off or leave them. Leaving the suckers on produces more tomatoes. But these will be smaller tomatoes. If you have a large tomato plant, like the indeterminate, you might want to prune the side shoots here and there. But don't go too prune-crazy, you want these plants to produce.
When to Harvest Tomatoes
Tomatoes usually take 60-80 days from transplant to harvest. Just pick them when they have turned their full color. You can pick them early and let them ripen in the windowsill. But, the best tomato flavor is one that has ripened on the vine.
Keep an eye out for tomato hornworms. They are the large, beautiful (ugly) green worms that blend nicely with the stems. Plant borage to deter these worms. Diatomaceous Earth is another great Organic solution to pest control. Sprinkle DE around the base of the plant as well as on the leaves. Do not use DE on flowers or flowering plants. Organic Neem Oil can be used against "muching insects" but should be applied in the evening or early morning (according to the instructions provided).
If you have additional questions about getting started or would like more info please feel free to ask. As always, I am happy to help. If you'd like to check out some of our gardening tips, check out our fb page.
It's a never-ending adventure here on the homestead and at Mary's Heirloom Seeds. We are constantly working to share education, DIY info while providing tip-top customer service and AMAZING seeds! This is an older blog post from Back to the Basics that we decided to re-vamp and share with you. We love EASY DIY projects!
Materials
To get started, you'll need: 1- 50 foot root of fencing material or chicken wire 1 pack of electrical ties (5-8 per tomato cage) wire cutters measuring tape
I started with a 50 foot roll of fencing material then cut 5 foot long pieces to make cages 18 inches in diameter. Instead of bending the ends to make hooks to hold them together I used electrical ties. When I am done using the cages I can simply cut the electrical ties (I call them zip ties) and store the cages easier.
I snipped the ends off when I was finished.
Thanks to Doc who is super handy, no one was seriously injured during this process.
Beautiful ROMA TOMATOES growing with our tomato cages
We used these cages in Florida and they were very easy to break down (snip the electrical ties) and move to our next homestead.
*UPDATE*
In order to keep these cages from tipping over, we trimmed the bottom "ring" of the chicken wire, leaving just the spikes. Shove the spiked ends into the ground and they'll stay upright. IF you live in very windy areas, you can secure them with tent spikes (or something like it)
I hope you have enjoyed another educational article. If you have additional questions, please leave a comment below or send an email to mary@marysheirloomseeds.com