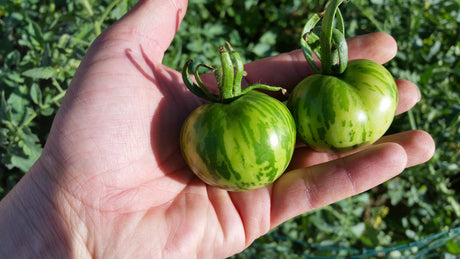
News

Growing Tomatillo from Seed to Harvest Posted on 19 Jul 09:29 , 1 comment

Tomatillo is an often overlooked heirloom variety.  Native to Mexico and domesticated by the Aztecs around 800 B.C., the tomatillo is one of our most ancient food bearing plants.

Growing Tomatillo is similar to growing tomatoes but isn't as heavy a feeder as tomatoes.

Select a growing area with full sun exposure and well-drained, moderately rich soil.

The rule of thumb for sowing seeds is to plant the seed twice as deep as it is wide (or twice as deep as the diameter of the seed). Tomatillo seeds are really small, so don’t plant them very deep – they only need to be planted 1/8″ – 1/4″ deep.  Grow at least 2 plants at a time, more if you plan to make a bit of salsa.

My personal rule of thumb is to always plant more than you think you'll will need.  This will come in handy if you have pest issues such as bugs, birds, squirrels and even cats.  If you produce more than you need or use, you can always store for later or share with friends and family.


Similar to growing tomatoes, Tomatillo sprouts roots along the stems, so it does well when planted deep in the soil. Tomatillo plants grow 3 to 4 feet tall and about the same in width, so space the plants 3 feet apart in rows 3 to 4 feet apart. Plan to give them support in the form of gardening trellises or tomato cages.

Tomatillo will continue to produce until frost takes over.  Although moderately drought-tolerant, tomatillos do best with an inch or so of water per week (more if you live in a very hot climate).


Companion Planting for Tomatillo

We use the same companion planting info for Tomatoes when we plant Tomatillos.

Friends of tomatoes are many and include: asparagus, basil, bean, carrots, celery, chive, cucumber, garlic, head lettuce, marigold, mint, nasturtium, onion, parsley, pea, pepper, marigold, pot marigold and sow thistle. One drawback with tomatoes and carrots: tomato plants can stunt the growth of your carrots but the carrots will still be of good flavor. Basil repels flies and mosquitoes, improves growth and flavor. Borage deters tomato worm.


You know a tomatillo is ready to be cut from the plant when the fruit has filled out the husk. Left to ripen further, the fruit will frequently split the husk and turn yellow or purple depending on its genetics.


We hope you have enjoyed yet another informative growing article here at Mary's Heirloom Seeds.  If you have additional questions please ask!


http://www.facebook.com/pages/Marys-Heirloom-Seeds/229833070442449

Sign up for our E-Newsletter


JUNE PLANTING GUIDE FOR THE US Posted on 25 May 08:36 , 0 comments

JUNE is time to plant PUMPKIN 
in time for OCTOBER - NOVEMBER

If you're looking to plant this month and SAVE on seeds,

SAN DIEGO 

Arugula, Bush & Pole Beans, Lima Beans, Beets, Brussels Sprouts, Carrots, Chard, Sweet Corn, Cucumber, Dwarf Cabbage, Endive, Gourds (Louffa), Kale, Lettuce, Melons, Mustard, Okra, Onions, Peas, Peppers,  Pumpkin, Radish, Radicchio, Rutabaga, Scallion, Sorrel, Summer Squash & Winter Squash, Tomato and Watermelon.
Herbs: Anise, Basil, Borage, Calendula, Catnip, Chamomile, Caraway, Chives, Comfrey, Dill, Echinacea, Lavender,  Lemon Bee Balm, Lemonbalm, Lemongrass, Mugwort, Oregano, Parsley, Sage, Tarragon, Toothache Plant, Thyme and Yarrow
Pretty much EVERY  Herb!! Don't forget the   Wildflowers!


Arugula, Bush & Pole Beans, Lima Beans, Cantaloupe, Carrots, Sweet Corn, Cucumber, Endive, Gourds (Louffa), Lettuce, Melons, Okra, Southern Peas, Peppers, Sweet Potato, Radish, Radicchio and Watermelon.
Herbs: Anise, Basil, Borage, Calendula, Catnip, Chamomile, Caraway, Chives, Comfrey, Dill, Echinacea, Lavender,  Lemon Bee Balm, Lemonbalm, Lemongrass, Mugwort, Oregano, Parsley, Sage, Tarragon, Toothache Plant, Thyme and Yarrow
Pretty much EVERY  Herb!! Don't forget the   Wildflowers!

 
Arugula, Beans, Beets, Dwarf Cabbage, Corn, Cucumber, Endive, Eggplant, Gourds (louffa),  Lettuce, Kale, Melons, Okra, Peas, Peppers, Pumpkin, Radish, Radicchio, Rutabaga, Scallions, SorrelSummer Squash, Swiss Chard, Tomatoes, Turnips and Watermelon. 
 Herbs: Anise, Basil, Borage, Calendula, Catnip, Chamomile, Caraway, Chives, Cilantro, Comfrey, Dill, Echinacea, Lavender,  Lemon Bee Balm, Lemonbalm, Lemongrass, Mugwort, Oregano, Parsley, Sage, Tarragon, Toothache Plant, Thyme and Yarrow 
Pretty much EVERY Herb!!
Don't forget the  Wildflowers!  
  

Arugula, Beans, Collards, Corn, Cucumber, Gourds (Louffa), Endive, Leeks, Lettuce, Melons, Mustard, Okra, Peas, Peppers, Pumpkin, Radish, Radicchio, Rutabaga, Scallions, Sorrel, Summer Squash, Swiss Chard, Tomatoes, Turnips and Watermelon. 
Herbs: Anise, Basil, Borage, Calendula, Catnip, Chamomile, Caraway, Chives, Cilantro, Comfrey, Dill, Echinacea, Lavender,  Lemon Bee Balm, Lemonbalm, Lemongrass, Mugwort, Oregano, Parsley, Sage, Tarragon, Toothache Plant, Thyme and Yarrow
Pretty much EVERY  Herb!!
Don't forget the  Wildflowers


Arugula, Beans, Beets, Collards, Corn, Cucumber, Gourds (Louffa), Leeks, Lettuce, Melons, Mustard, Okra, Onions, Peas, Peppers, Pumpkin, Radish, Radicchio, Rutabaga, Scallions, Sorrel, Summer Squash, Swiss Chard, Cherry Tomatoes, Turnips and Watermelon. 
Herbs: Anise, Basil, Borage, Calendula, Catnip, Chamomile, Caraway, Chives, Cilantro, Comfrey, Dill, Echinacea, Lavender,  Lemon Bee Balm, Lemonbalm, Lemongrass, Mugwort, Oregano, Parsley, Sage, Tarragon, Toothache Plant, Thyme and Yarrow.
Pretty much EVERY Herb!!
Don't forget the  Wildflowers!    


Arugula, Beans, Beets, Calabrese Broccoli,
Dwarf Cabbage, Carrots, Corn, Cucumber,
Eggplant (transplant), Endive, Gourds (louffa), Lettuce, Kale, Melons, Mustard, Okra, Onions, Peas, Peppers, Radish, Radicchio, Rutabaga, Scallions, Sorrel, Spinach, Summer Squash, Swiss Chard, Tomatoes, Turnips and Watemelon.
 Herbs: Anise, Basil, Borage, Calendula, Catnip, Chamomile, Caraway, Chives, Cilantro, Comfrey, Dill, Echinacea, Lavender,  Lemon Bee Balm, Lemonbalm, Lemongrass, Mugwort, Oregano, Parsley, Sage, Tarragon, Toothache Plant, Thyme and Yarrow
Pretty much EVERY  Herb!
Don't forget the   Wildflowers!  


Arugula, Beans, Beets, Broccoli, Cabbage, Carrots, Corn, Cucumber, Eggplant, Endive, Gourds (Louffa), Leeks, Lettuce, Kale, Kohlrabi, Melons, Mustard, Okra, Onions, Peas, Peppers, Pumpkin, Radish, Radicchio, Rutabaga, Scallions, Sorrel, Summer Squash, Winter Squash, Swiss Chard, Tomatoes, Turnips and Watermelon. 
Herbs: Anise, Basil, Borage, Calendula, Catnip, Chamomile, Caraway, Chives, Cilantro, Comfrey, Dill, Echinacea, Lavender,  Lemon Bee Balm, Lemonbalm, Lemongrass, Mugwort, Oregano, Parsley, Sage, Tarragon, Toothache Plant, Thyme and Yarrow
Pretty much EVERY  Herb!!
Don't forget the  Wildflowers!    


Arugula, Beans, Beets, Broccoli, Cabbage, Carrots, Cauliflower, Corn, Cucumber, Gourds (Louffa), Endive, Eggplant (transplant), Leeks, Lettuce, Kale, Melons, Mustard, Okra, Onions, Peas, Peppers, Radish, Scallions, Sorrel, Spinach, Summer Squash,
 Swiss Chard, Tomatoes and Turnips 
Herbs: Anise, Basil, Borage, Calendula, Catnip, Chamomile, Caraway, Chives, Cilantro, Comfrey, Dill, Echinacea, Lavender,  Lemon Bee Balm, Lemonbalm, Lemongrass, Mugwort, Oregano, Parsley, Sage, Tarragon, Toothache Plant, Thyme and Yarrow
Pretty much EVERY Herb!!
Don't forget the   Wildflowers!   

 
Arugula, Beans, Collards, Corn, Cucumber, Endive, Lettuce, Melons, Mustard, OKRA, Peas, Peppers, Pumpkins, Radish, Radicchio, Rutabaga, Scallion, Sorrel, Squash, Swiss Chard, Tomatoes, Turnips and Watermelon. 
  Herbs: Anise, Basil, Borage, Calendula, Catnip, Chamomile, Caraway, Chives, Comfrey, Dill, Echinacea, Lavender,  Lemon Bee Balm, Lemonbalm, Lemongrass, Mugwort, Oregano, Parsley, Sage, Tarragon, Toothache Plant, Thyme and Yarrow
Pretty much EVERY  Herb!!!
Don't forget the  Wildflowers


Arugula,  Beans, Collards, Corn, Endive, Melon, Mustard, Okra, Onions, Peas, Peppers, Radish, Radicchio, Rutabaga, Sorrel, Summer Squash, Swiss Chard, Tomatoes, Turnips and Watermelon. 
Herbs: Anise, Basil, Borage, Calendula, Catnip, Chamomile, Caraway, Chives, Comfrey, Dill, Echinacea, Lavender,  Lemon Bee Balm, Lemonbalm, Lemongrass, Mugwort, Oregano, Parsley, Sage, Tarragon, Toothache Plant, Thyme and Yarrow
Pretty much EVERY  Herb!!! 
Don't forget  WILDFLOWERS!  


Arugula, Beans, Beets, Calabrese Broccoli, Cabbage, Carrots, Corn, Endive, Lettuce, Kale, Melon, Mustard, Okra, Peas, Peppers, Radish, Scallions, Sorrel, Spinach, Summer Squash, Swiss Chard and Tomatoes

Herbs: Anise, Basil, Borage, Calendula, Catnip, Chamomile, Caraway, Chives, Cilantro, Comfrey, Dill, Echinacea, Lavender,  Lemon Bee Balm, Lemonbalm, Lemongrass, Mugwort, Oregano, Parsley, Sage, Tarragon, Toothache Plant, Thyme and Yarrow
Pretty much EVERY Herb!!
Don't forget the    Wildflowers


Sow Outdoors: Arugula, Basil, Beans, Beets, Calendula flowerCarrots, Celery, Chard, Cilantro, Corn, Cucumbers, Dill, Eggplant, Endive, Kale, Lettuce, Melons, Okra, Onion, Peas, transplant Peppers, Pumpkins, Radish, Scallions, Spinach, Squash (summer & winter), transplant Tomatoes and Watermelon 


NEW MEXICO
Arugula, Beans, Beets, Broccoli, Calendula flower, Carrots, Celery, Corn, Cucumber, Lettuce, Melon, Okra, Onions, Parsnips, Peas, Peppers, Potatoes, Pumpkins, Radish, Spinach, Summer Squash, Swiss Chard, Tomatoes, Turnips and Watermelon
Plant Herbs and Wildflowers


Sow Outdoors: Arugula, Basil, Beans, Beets, Calendula flowerCarrots, Celery, Chard, Cilantro, Corn, Cucumbers, Dill, Eggplant, Endive, Kale, Lettuce, Melons, Okra, Onion, Peas, Peppers, Pumpkins, Radish, Scallions, Spinach, Squash (summer & winter), Tomatoes and Watermelon


Arugula, OKRA, Southern Peas, Peppers, Radish and Swiss Chard. Heat loving herbs such as Basil, Tarragon, Summer Savory Cumin and Rosemary.
 
Arugula, OKRA, Southern Peas, Peppers, Radish and Swiss Chard. Heat loving herbs such as Basil, Tarragon, Summer Savory Cumin and Rosemary.
 
Arugula, OKRA, Southern Peas, Peppers, Radish and Swiss Chard. Heat loving herbs such as Basil, Tarragon, Summer Savory Cumin and Rosemary.


http://www.facebook.com/pages/Marys-Heirloom-Seeds/229833070442449

Sign up for our E-Newsletter


Day 10 & 11 Using Coconut Coir in the Garden Posted on 23 May 07:30 , 1 comment

Unfortunately, We were not able to post yesterday so today we're sharing our Coconut Coir info for day 10 & 11.  Thank you for joining us for another post in our series, Grow Your Own Food in 100 days or less with Mary's Heirloom Seeds  

We've mentioned a few times about using coconut coir in the garden so today we;re sharing about the WHY and the HOW.  Here's our video we posted yesterday


We use Coconut Coir Pellets sometimes when we start seeds.
 

We use Coconut Coir Bricks when we plant in containers or seed-starter pots.


From Using Coconut Coir in the Garden
"Coconut coir growing medium comes from the coconut's fibrous husk (known as coir) that is bound together by lignin (known as pith). After the husk is immersed in water for 6 weeks, the fiber is extracted mechanically, and the pith is left behind as a waste product and stored in heaps to age. Since the pith comes from the fruit, it is quite naturally rich in nutrients. Coconut coir growing mediums are dehydrated and compressed into a compact form for easy handling. With the addition of water, coir expands to an easy to work with growing medium. 

The addition of water increases the volume 3 to 9 times, depending on the packaging of products. This process results in a 100% organic, biodegradable growing medium, making it a natural and safe growth medium of choice for growers.
1.5 pounds compressed brick
Add water to increase volume 3 to 9 times!
"  Use Coconut Coir in compost or worm bins About Coconut Coir


-Coir improves soil drainage in the bed while also helping to retain moisture in quick-draining soils. Since coir breaks down slowly, much like peat, it creates air pockets in the soil that allow excess moisture to drain away from plant roots. The coir itself holds onto some moisture so the drainage doesn't occur too quickly and the soil doesn't dry out completely. These dual drainage and retention properties allow coir to improve moisture management in both heavy clay soils and dry, sandy beds.  


From Seed Starting With Coconut Coir


Common Seed-Starting Issues

GERMINATION

-Incorrect Temperature. Different seeds have different needs.

-Old Seeds. When properly stored seeds can have a very long shelf life. But the older they get, your germination rate will begin to reduce

-Incorrect Watering. Water in a necessity for all plants. In the germination stage you need to make sure you keep the soil evenly moist. If you water too much, you run the risk of your seeds rotting before they germinate. If you let them dry out, they will either never germinate or die trying!

-Planting Depth/Light. When you plant your seeds pay attention to your planting depth. This is important because if planted too deep you plants could run out of energy before reaching sunlight. Planting too shallow can lead to drying out. Some seeds actually need some light to germinate, so instead of digging them down you just press them into your soil.

MOLD or ROTTING
Dampening off, is probably the most common disease when starting seeds. It’s a fungus that can attack the seeds as soon as they germinate or after the seedling has emerged. You will know this is what killed your seedlings when you notice dark spots on the stem right at the soil level and the seedling topples over and withers away.

-Don't over water

-Provide air movement. A small fan will work

-Nutrients: Use a half-strength, organic fertilizer with tiny seedling. Our DIY Kelp Meal Tea is a great option for tiny seedling. You can use this as a foliar feed as well.


OVERCROWDING
For coconut coir pellets, plant no more than 2 seeds per pellet for small seeds and only one per pellet for larger seeds. If both seeds germinate, do not pull one out.

Pinch off one of the seedlings at the base to remove. This will give the remaining seedling a chance to survive and thrive.

Once your seedlings are strong and roots start to grow out of the mesh, it's time to transplant them into the garden or into your containers.


Thank you for joining us for another day of Grow Your Own Food in 100 Days or Less.  If you have additional questions please send an email to mary@marysheirloomseeds.com

Happy Planting!


http://www.facebook.com/pages/Marys-Heirloom-Seeds/229833070442449

Sign up for our E-Newsletter


Day 8 Transplanting Seedlings Posted on 20 May 08:20 , 0 comments

We're so excited to be Transplanting Seedlings today into our garden. 

Thank you for joining us for Day 8 of our series Grow Your Own Food in 100 Days or Less at Mary's Heirloom Seeds.

Today we have a 4x8 raised bed that has already been filled with aged manure and soil.  We're transplanting Dakota Black Popcorn, Blue Lake Bush Beans and Yellow Scallop Squash.  **Once we finished filming we also planted Genovese basil**

Here's our video to get started


Transplanting Seedlings
Since our seedlings were grown outside 100% of the time, we did not need to harden off before transplanting.  If you are transplanting seedlings that were grown indoors, I recommend starting with our article Day 7 Hardening Off Seedlings

First, whether you're planting in-ground, in containers or raised beds,water the garden area BEFORE you transplant seedlings.  I like to give it a good soaking.

Plan out what seedlings you want to transplant and where they're going.

When we transplant I use 2 soil amendments, Mountain Flower Root Boost (5-4-2) and Micronized Azomite.  Another option would be to feed and Organic Liquid fertilizer or Kelp Tea.  We do this to cut down on shock to the plants.

For this, I used approximately 1 tablespoon Mountain Flower Root Boost and 2 tablespoons Azomite in each hole before transplanting.  Prior to transplanting I did not add fertilizer to the bed.  You'll need to adjust your own garden accordingly

Gently squeeze the bottom of the cup/container to loosen soil and roots.

Do not pull on the stem to remove the seedling from the container.  I prefer to tip over in my hand and loosen the seedling from the base of the container

If you are transplanting seedlings in Coconut Coir Pellets, do not remove the outer mesh.  Transplant the entire pellet into the soil and cover completely.

Once you've placed the seedling in the hole, gently cover with soil and water very well.


All of our starter cups and containers are washed and re-used for our next planting.  You can use almost any recycled container to start seedlings.


Stay tuned for more info on growing your own food!
Thank you for joining us for another day of Grow Your Own Food in 100 Days or Less.  If you have additional questions please send an email to mary@marysheirloomseeds.com

Happy Planting!


http://www.facebook.com/pages/Marys-Heirloom-Seeds/229833070442449

Sign up for our E-Newsletter


Day 7: Hardening Off Seedlings Posted on 20 May 07:34 , 0 comments

Welcome to Day 7 of our series Grow Your Own Food in 100 days or Less at Mary's Heirloom Seeds!


These are the extra Heirloom Corn seedlings that didn't make it into our Mother's Day Garden

So far we have planted heirloom seeds in our raised bed, planned out our garden, watered our seeds and applied cayenne pepper to deter gophers.  If you start seeds indoors and plan to transplant seedling into the garden, it is important to harden off your seedlings.

No video today but we have pictures!

What does it mean to "Harden Off" seedlings?
From our article Hardening Off Seedlings before Transplanting

Hardening off gradually exposes the tender plants to wind, sun and rain and toughens them up by thickening the cuticle on the leaves so that the leaves lose less water. This helps prevent transplant shock; seedlings that languish, become stunted or die from sudden changes in temperature.

Hardening off times depend on the type of plants you are growing and the temperature and temperature fluctuations. So be flexible when hardening off your seedlings and be prepared to whisk them indoors if there's a late freeze and snow.
 

Jarrhadale Pumpkin Seedlings happily growing outside


If you're growing seedlings indoors, they might have been pampered all winter/spring.  Aside from the random cat attack or possibly too much watering, they have been relatively safe compared to the dangers that await them in the great outdoors.


This was taken at one of our school garden volunteer days
How to Harden Off Seedlings
Start by putting your seedlings outside 7-10 days prior to transplanting.  In the beginning, give them shelter and plenty of water.  You can strengthen stem of indoor seedling by adding a fan while they're indoor.  This will help to prepare them for windy days outside.

Start by leaving them outdoors for 3 - 4 hours and gradually increase the time spent outside by 1 - 2 hours per day.  Bring the plants back indoors, or somewhere warm like a heated garage or porch, each night.
If temperatures remain warm both day and night,  the plants should be able to handle the sun all day and stay out at night after about 7 days, Keep an eye out that the soil doesn't dry in their small pots and bake the plants if the weather should suddenly turn warmer.
If you've planted in Cococut Coir pellets, pay extra attention to moisture levels.  Coconut coir can dry out faster and might need to be watered daily when outdoors.
If you opt to gradually expose your plants to longer periods of time outdoors, the moving in and out process can be made easier by putting your plants on a wagon or wheelbarrow and simply wheel them into the garage for the night.
Hardening off is an important step is you choose to grow seedlings indoors.  It's a bit of work but can be worth it if you want to get a head start on planting if you live in cool/cold climates.
All of my seedling this year are grown outside on a covered patio.  That means I don't have to harden them off before transplanting. Unfortunately, we lost a few to earwigs.  Fortunately, I planned a head and planted more than I thought I would need so there are extras to make up for any eaten seedlings.

Thank you for joining us for another day of Grow Your Own Food in 100 Days or Less.  If you have additional questions please send an email to mary@marysheirloomseeds.com

Happy Planting!


http://www.facebook.com/pages/Marys-Heirloom-Seeds/229833070442449

Sign up for our E-Newsletter


Day 5-Basic Nutrient Requirements Posted on 17 May 13:24 , 0 comments

Welcome to Day 5 of our series Grow Your Own Food in 100 Days or Less.

WE HAVE GERMINATION!


Actually, we had germination of the Early Scarlet Globe radish on Day 4 (3 days to germinate) but I'm sharing the update today.  Here's our video update for the day.  Today topic is Basic Nutrient Requirements to Grow Veggies


Basic Nutrient Requirements to Grow Veggies

Well-balanced soil in the vegetable garden will contain a mix of several important nutrients: nitrogen, phosphorus, and potassium.  I call those the basics.  However, there are 12 essential nutrients that all plants require to grow.  Six of these are needed in larger amounts and are called macronutrients.  These include Nitrogen (N), Phosphorus (P), Calcium (K), Calcium (Ca), Magnesium (Mg) and Sulfur (S).  The other six are called micronutrients and they are iron, copper, zinc, boron, manganese and molybdenum.  While these are considered minor, there is nothing unimportant about them.


From an older post "Feeding Your Plants"

What does each nutrient do? 
In addition to other properties, Nitrogen helps plant foliage to grow strong. Phosphorous helps roots and flowers grow and develop. Potassium (Potash) is important for overall plant health.


We've grown HUGE, organic zucchini using our own recipe for Liquid Fertilizer!


Liquid Fertilizers are favored by most gardeners, regardless of what they are growing. We use our own DIY Liquid Fertilizer mix.  Most liquid fertilizers can be applied as a foliar feeding directly to the leaves, hand applied to secondary roots, and included in the water supply of drip or other irrigation systems.

Aside from cost(and it is not that much), liquid fertilizers have almost no downside. They include all the macronutrients  and micronutrients needed for good growth. In addition, because they are in a water soluble state, they can easily be absorbed by the plant.
 

Here's our video for our DIY Organic Liquid Fertilizer recipe


What do the Macronutrients do for plants?

Nitrogen (N)
Nitrogen is the fuel that makes plants go. It’s used to synthesize amino acids, proteins, chlorophyll, nucleic acids, and enzymes. Plants need more nitrogen than any other element. It’s the nutrient we most often have to apply.  Compost and manure are "free" ways to add nitrogen to your soil


Phosphorus (P)
Phosphorus is the nutrient responsible for plant rooting, flowering and fruiting.  Bone meal is one form of Phosporus that can be added to your garden soil.


Potassium (K)
Potassium is important to plant growth and development. Potassium helps: Plants grow faster, Use water better and be more drought resistant, Fight off disease, Grow stronger and even Produce more crops


Calcium (Ca)
Calcium helps to retain and transport other nutrients by providing strength and structure through its cell walls.  Oyster Shell is an easy option to add to your soil to increase calcium
 

Magnesium (Mg)
Helps activate plants enzymes and part of chlorophyll and photosynthesis. Magnesium works in conjunction with calcium


Sulfur (S)

Sulfur is essential for the production of protein and chlorophyll.


A great "all-in-one" is our Mary's Organic Plant Food or our Vegan Plant Food. From there, you can choose any "extras" you'd like to add such as Endo-Mycorrhizae, Micronized Azomite or Mountain Flower Root Boost.


Thank you for joining us for another day of Grow Your Own Food in 100 Days or Less.  If you have additional questions please send an email to mary@marysheirloomseeds.com

Happy Planting!


http://www.facebook.com/pages/Marys-Heirloom-Seeds/229833070442449

Sign up for our E-Newsletter


Day 3-Grow Your Own Food in 100 Days or Less Posted on 15 May 20:10 , 0 comments

Day 3 of our Series Grow Your Own Food in 100 Days or Less is underway!


Water is an important aspect of any veggies garden.  Whether you're using coconut coir pellets, containers, growing in ground or in raised beds, it is very important to water the garden.


University of California recommends:


"For vegetables in the summer, we recommend applying about 1 inch of water over the surface area of the garden bed per week. That is equivalent to 0.623 gallons per sq ft."


If you're in a HOT climate you might like our article Heat Tolerant Veggies and More 


To conserve water, add rich compost to your soil.


Layout your vegetable garden so that plants with similar water requirements are grouped together. For example, cucumbers, zucchini, and squash all have similar water needs. Focus on vegetables that produce abundant crops like tomatoes, squash, peppers and eggplants.


Thank you for joining us for another day day of Grow Your Own Food in 100 Days or Less.  If you have additional questions please send an email to mary@marysheirloomseeds.com


Happy Planting!


http://www.facebook.com/pages/Marys-Heirloom-Seeds/229833070442449

Sign up for our E-Newsletter


Day 2-Grow Your Own Food in 100 Days or Less Posted on 14 May 07:19 , 0 comments

Thank you for joining us for Day 2 of our series Grow Your Own Food in 100 Days or Less at Mary's Heirloom Seeds.

Yesterday we jumped in and planted seeds.  On our homestead we already have quite a few established raised beds ready for planting.  If you're just getting started you'll need to do a bit of planning first.  Let's get planning!

Here's our video to get you started on Day 2!


First decide if you're planting in the ground, in Raised Beds or in Containers.  You can plant in a combination of the 3 if you have lots of garden space.


In Ground
Planting in the ground sometimes requires less "extras" if the soil is fertile.  If you have hard clay or sandy soil you'll want to amend your soil with compost, manure and even coconut coir.  Some people use a no-till method of planting and others prefer tilling the soil each season.  Whichever you choose, find a spot for your garden and measure it out.

Raised Beds
Planting in Raised beds is a great way to avoid certain garden pests such as gophers, rabbits and squirrels.  Raised beds also help keep out weeds and usually use less water.  If you decide to plant in a raised beds, check out our tutorial to Build Your Own Raised Beds.  You can purchase kits but building your own is usually less expensive.

To FILL you're raised beds, If you're buying soil, you'll need to figure out how many cubic yards or dirt you'll need.  *We always add nutrients, compost and "fluff" like coconut coir to our raised bed soil*

Raised Bed Sizes in feet, at a height of of 12 inches with Soil Requirements
2x2 = 0.15 cu. yards
4x4 = 0.59 cu. yards
4x8 = 1.19 cu. yards


Containers
If you're limited on time, space and resources then container gardening is a great option.  Be aware that containers tend to dry out much faster so you need to watch them closely.  A few years ago we started a Bucket Garden Project to show how easy and inexpensive it is to grow using recycled buckets.  You'll need "potting soil" instead of of "topsoil" and a well drained container.  You can grow herbs in smaller containers and larger plants like squash and tomatoes in a 5 or 8 gallon container.


Heirloom Radish is an easy, fast maturing crop


Plant Spacing
Most plant spacing charts are just a guide.  You can plant closer together or farther apart and experiment with what works.  Especially if you are in a humid climate, air flow is very important to deter plant diseases like powdery mildew.  We have to charts to help you map out your garden

Plant Spacing Chart for Veggies


Square Foot Garden Plant Spacing Chart


Plant What you Like
Especially if you are limited on space, it is important to plant what you know you like or that your family will eat.  If you intend to preserve or can some of your crops, plan ahead and plant more of those varieties.  You might find our article Feeding a Family from the Garden useful in planning your garden.


I hope you enjoyed another educational article. If you have additional questions, please comment below or send an email to mary@marysheirloomseeds.com

http://www.facebook.com/pages/Marys-Heirloom-Seeds/229833070442449

Sign up for our E-Newsletter


Mary's 2018 Planting Guide for the US Posted on 14 Dec 10:06 , 1 comment

Mary's Heirloom Seeds
Quick Links
Join Our List
December 14, 2017
I know it's still 2017 but we have had so many request lately that we just had to share.

How is this different than our previous planting guides???

We've added a few new regions by request AND we've added quite a few articles from 2017

Now you can plan your 2018 garden from one convenient article link!

If there is a specific region that you'd like us to share, please reply to this email.  If you have additional question, please ask

MARY'S 2018
PLANTING GUIDE  

 
FLORIDA has been split into 3 sections for a more thorough planting guide
 

SOUTH FLORIDA

CENTRAL FLORIDA

NORTH FLORIDA


ADDITIONAL PLANTING GUIDES

When to Plant Organic Garlic

When to Plant Potatoes

As always, if you have additional questions please feel free to ask!
This data has been compiled from our own research as well as feedback from our customers.
 
RECENT ARTICLES &
GETTING STARTED    
If you have additional questions please feel free to ask. 


Happy Planting,


Mary's Heirloom Seeds, P. O. Box 3763, Ramona, CA 92065


Colorado Vegetable Seed Planting Guide Posted on 14 Dec 09:31 , 2 comments

As promised, we are expanding our vegetable seed planting guide and including Oregon.  This is one of many region-specific guides offered here at Mary's Heirloom Seeds.  Find a complete list on our Growing Tips & Videos page.
This planting guide is from the Old Farmer's Almanac & customer suggestions and is slightly different than our Central Midwest / North Central & Rockies Planting Guide


COLORADO PLANTING GUIDE 2018

***Seed Planting Guide***
Please note: Planting times may be altered depending on elevation, location, and the use of a cloche or row cover

FEBRUARY

Sow Indoors: Eggplant, Leek, Onion,

MARCH

Sow Indoor: Broccoli, Brussels Sprouts, Cabbage, Cauliflower, Eggplant, Leeks, Lettuce, Onions, Peas, Peppers, Swiss Chard, Tomatoes and tomatillos

APRIL

Sow Indoor: Basil, Broccoli, Brussels Sprouts, Cabbage, Cauliflower, Celery Eggplant, Leek, Lettuce, Okra, Onion, Peas, Peppers, Swiss Chard and Tomato

Sow Outdoors: Broccoli, Brussels Sprouts, Cabbage, Carrots, Cauliflower, Kale, leek, Lettuce, Onion, Parsnips, Peas, Radish, Spinach and Swiss Chard

SWISS CHARD

MAY

Sow Indoor: Basil, Beans, Celery, Corn, Cucumber, Melon, Okra, Pepper, Pumpkin (5/15), Summer Squash, Tomato and Watermelon

Sow Outdoors: Arugula, Basil (5/15), Beans (5/15), Beets, Broccoli, Brussels sprouts, Cabbage, Chinese Cabbage (pak choy), Carrots, Cauliflower, Celeriac, Celery, Chard, Cilantro, Collards, Corn (5/15), Cucumber (5/15), Dill (5/15), Eggplant (5/15), Fennel, Kale, Kohlrabi, Leek, Lettuce, Okra, Onion, Parsnips, Peas, Peppers, Radicchio, Radish, Rutabaga, Salad greens, Scallions, Spinach, Squash, summer (5/15) Squash (winter), TOMATOES (5/15), Turnips and Watermelon (5/15)


JUNE

Sow Outdoors: Arugula, Basil, Beans, Beets, Carrots, Celery, Chard, Cilantro, Corn, Cucumbers, Dill, Eggplant, Endive, Kale, Lettuce, Melons, Okra, Onion, Peas, Peppers, Pumpkins, Radish, Scallions, Spinach, Squash (summer & winter), Tomatoes and Watermelon

JULY

Sow Outdoors: Arugula, Basil, Beans, Beets, Cabbage (early), Carrots, Chard, Cilantro, Collards, Fennel, Lettuce, Radish, Spinach, Squash (summer) and Turnips

AUGUST

Sow Outdoors: Arugula, Broccoli raab, Cabbage, Chinese Cabbage (pak choy), Cauliflower, Chard, Cilantro, Collards, Kale, Lettuce, Mustard greens, Radish, Salad greens, Spinach and Turnips

SEPTEMBER

Sow Outdoors: Arugula, Chinese Cabbage (pak choy), Endive, Lettuce, Radish and Swiss Chard

HEIRLOOM TOMATOES

HELPFUL LINKS


I hope you have enjoyed another educational article.  If you have additional questions, please leave a comment below or send an email to mary@marysheirloomseeds.com

http://www.facebook.com/pages/Marys-Heirloom-Seeds/229833070442449

Sign up for our E-Newsletter