I have yet to meet a pickle that I did not like. When I was a kid, my granny kept her fridge stocked with different types of pickles for us grandkids (mostly me and my cousin Liz).
This recipe is for refrigerator pickles but stay tuned and I'll have a canning recipe for Pickled Onions as well. The ingredients are simple and the recipes are easy.
I used 2 different types of onions so that I can do a side-by-side tasting once all of them are ready. You can use whichever you prefer or whatever you are growing.
Both are short day onions since that is what grows best in our area. Long Day onions are recommended for growing in Northern states
As an added bonus, I have 2 ways to make these delicious pickled onions.
Just a reminder, when you are canning, pickling and preserving food, it is very important to clean your work area very well and clean your produce very well before getting started.
Spicy Refrigerator Pickled Onions
Ingredients:
1 medium onion, sliced very thin
1/2 cup water
1/4 cup white vinegar
1/4 cup apple cider vinegar (or white vinegar instead)
1 - 1 1/2 tablespoon maple syrup or honey
1 1/2 teaspoon pickling salt or sea salt
1 teaspoon cayenne pepper flakes
Directions: Start with clean, sterilized jars
Pack onions into 1/2 pint or 1 pint mason jars (or similar jars)
In a saucepan, mix water, vinegar, maple syrup, salt and pepper flakes. Bring the mixture to a simmer and stir well.
Carefully pour the brine into the jar over onions.
At this time, you can use a butter knife or small spoon to remove any air bubbles.
Place the lid and ring and on each jar and refrigerate. Serve chilled after 24 hours.
Dill & Garlic Refrigerator Pickled Onions
Ingredients:
1 medium onion, sliced very thin
1/2 cup water
1/4 cup white vinegar
1/4 cup apple cider vinegar (or white vinegar instead)
1 tablespoon maple syrup or honey
1 1/2 teaspoon pickling salt or sea salt
2-3 cloves of garlic per jar, sliced in half or thinly sliced
1 teaspoon dried Dill
OR 2 teaspoons fresh dill
Directions: Start with clean, sterilized jars
Pack onions into 1/2 pint or 1 pint mason jars (or similar jars)
Add Garlic and Dill to your jars.
In a saucepan, mix water, vinegar, maple syrup and salt. Bring the mixture to a simmer and stir well.
Carefully pour the brine into the jar over onions.
At this time, you can use a butter knife or small spoon to remove any air bubbles.
Place the lid and ring and on each jar and refrigerate. Serve chilled after 24 hours.
If you have additional questions, please feel free to ask!
Cooking can be great therapy. I prefer simple recipes with local, homegrown ingredient and I hope you enjoy this one.
Hungarian Mushroom Soup
Ingredients:
1/4 teaspoon paprika pepper powder
Directions:
Melt butter in a pot over medium-high heat.
Add onion and saute 5 minutes.
Add mushroom and garlic, cook for 3 minutes.
Pour in broth, coco aminos, paprika and dill. Reduce heat, cover & simmer for 10 minutes.
Whisk together milk and flour. Stir into the soup. Cover and simmer for 10 minutes.
Stir in sour cream, parsley, lemon juice, salt and pepper. Simmer for 5 minutes, stirring frequently.
Serve with a dollop of sour cream and garnish of fresh dill and parsley
I love that this dish is savory and can be eaten as a meal or a side. Prep time for Hungarian Mushroom Soup is fairly short, making it a perfect meal after a day in the garden.
If you have additional questions, please feel free to ask!
Earlier this year during a live chat we discussed different ways to preserve garlic.
It is important to mention that after you harvest garlic from your garden, it is important to properly cure it before storing. If you're not sure, please read Harvesting & Curing Organic Garlic.
There are quite a few options to preserve your garlic. My favorite is freezing with herbs and oil. Another option is dehydrating. Below is a recap from the video and a link to the video.
If your garlic is dirty from the garden, peel off the outer papery husk prior to getting started. I usually do this outside so I'm not bringing in too much dirt into the kitchen. The extra papery part of the bulbs can be tossed into the compost.
Before you use any preservation method, it is important to clean your garlic cloves well.
Ways to Preserve Garlic:
Refrigerator Pickled Garlic
Dehydrator
Freeze Dry
Mix with Oil and freeze
Freeze whole cloves
Ready for my recipes?
Refrigerator Pickled Garlic
*This is not a shelf stable recipe* The National Center for Home Food Preservation states that the garlic and vinegar mixture may be refrigerated for up to 4 months.
Brine recipe:
1/4cupcanning salt or sea salt
5cupswhite vinegar
2pounds fresh garlic peeled
2 cups fresh dill
Combine canning salt and vinegar in a large saucepan. Bring to boil; reduce heat and simmer 10 minutes (180 degrees). Meanwhile, pack garlic into 4 sterilized pint jars (about 8 ounces per jar) leaving 1/2-inch of headspace. Add 1 dill to each jar.
Oil & Herb Garlic Cubes
This is an easy recipe and only requires a blender. You can use just oil and garlic or add any herbs you'd like. Keep in mind that this is a very strong (concentrated) garlic recipe so you'll want to adjust accordingly when you defrost.
Ingredients:
2 cups garlic cloves
2 cups olive oil (or avocado oil)
1 cup water
1 teaspoon sea salt
herbs of your choice (fresh from the garden oregano, Rosemary and thyme is my favorite combination)
Add all ingredients to your blender and blend until smooth.
Pour the mixture into ice cube trays and freeze. Once the cubes are fully frozen, remove and store in a freezer safe container.
How do you like to preserve your garlic?
If you have additional questions, please feel free to ask!
My favorite way to celebrate fall is with Pumpkin Pie (and planting garlic of course). We're harvesting pumpkins so it's the perfect time to share an easy recipe.
This is another delicious creation from Michelle @ heirloom_farm_country_table
Pumpkin Pie
Ingredients:
9 inch deep pie crust
1/3 cup sugar
1 tsp ground cinnamon
1/2 tsp ground ginger
1/4 tsp ground cloves
2 eggs + 1 yolk
2 cups pumpkin puree
1/3 cup sweetened condensed milk
2 tsp maple syrup
2 tsp vanilla
Instructions:
1. Preheat over to 425
2. Wisk together ingredients and pour into pie crust
3. Bake at 425 for 15 minutes
4. Reduce temperature to 350 and bake for 40 minutes
5. Enjoy!
Ready for a few fun facts about pumpkin?
Although we often think of pumpkins as vegetables, they're actually fruits! ...
Pumpkins are also a type of winter squash. ...
Each pumpkin contains about 500 seeds.
Once they sprout, pumpkins take between 90 and 120 days to reach maturity.
Tomato Cucumber salad is a classic, easy to make dish (or meal). It's perfect for a refreshing snack during summer and a great way to use up homegrown veggies.
Tomatoes and cucumbers are already abundant in the garden so of course I'm making a few batches of this delicious salad.
This salad can be made ahead in the morning and placed in the fridge to marinate all day for an evening meal. Yum!
The dressing is something I like to switch up every now and then so I am including 2 different dressing options below. I like the second dressing the best.
Tomato Cucumber Salad
Veggie ingredients:
1 large cucumber or 5 miniature white cucumbers, sliced
I like easy recipes. If you've seen my previous recipes you've probably noticed that they contain easy to find ingredients and homegrown produce.
With the garden here in full swing, we stay pretty busy so this is a nice, quick meal (or side dish). If you aren't growing Ronde de Nice Squash, you can substitute Round Zucchini, Tatume, Rampicante or even a larger zucchini to give you nice "rounds."
I love using Ronde de Nice because I can harvest it tiny or let it grow a bit larger. These are about the size of a baseball. From seed to harvest, Ronde de Nice squash is ready in as few as 55 days.
Tomato and Mozzarella Ronde
Ingredients:
1 medium tomato, sliced (homestead or marglobe would be perfect)
fresh mozzarella, sliced
Ronde de Nice squash, sliced
Seasonings of your choice: rosemary, thyme, oregano, salt and/or pepper
Directions:
Cut squash into 1/4-1/2 inch round discs.
Add a thin layer of olive oil to your pan (Optional). Layer ingredients.
Bake at 350 for 10 to 15 minutes.
Garlic Scape and Parmesan Ronde
Ingredients:
Garlic Scapes (use garlic if you don't have scapes)
shaved parmesan cheese
Ronde de Nice Squash, sliced
Directions:
Cut squash into 1/4-1/2 inch round discs.
Add a thin layer of olive oil to your pan (Optional). Layer ingredients.
Bake at 350 for 10 to 15 minutes.
Jalapeno - Artichoke Ronde
Ingredients:
Jalapeno - artichoke dip (pre-made or homemade)
Ronde de Nice Squash, sliced
Directions:
Cut squash into 1/4-1/2 inch round discs.
Add a thin layer of olive oil to your pan (Optional). Layer ingredients.
Bake at 350 for 10 to 15 minutes.
If you are looking for something a little sweeter, check out our Mock Apple Crisp recipe using zucchini. Enjoy!
The scent of lavender is delicate and calming. This is another once of my favorite herbs. It may be somewhat difficult to grow but this Lavender infused Oil recipe is easy to make.
It is important to mention that we use dried lavender flowers for this recipe. Fresh Lavender flowers have a higher water content.
While not as concentrated as pure essential oils, there are many wonderful ways to incorporate lavender-infused oil into your household and beauty recipes. I often add lavender oil to my calendula oil for a soothing foot cream and insect repellent.
#1 Place ingredients into a slow cooker for 3 to 6 hours.
#2 Place ingredients in a glass jar and place in a sunny windowsill for 6-8 weeks. This method requires more time but does not require a slow cooker
After your infusion is complete, strain out the oil from the flowers. Pour infused oil into a clean, glass container. Our Lavender Oil Kit includes an able dropper bottle. Label each jar with ingredients and date.
Store infused oil out of direct sunlight. I prefer to store in a closed cabinet.
If you have additional questions, please feel free to ask!
My garden is overflowing with basil right now! One great way to preserve basil for year round use is by making basil vinegar.
Herb vinegars are super easy to make and can be used in salad dressings, marinades, sauces, and nearly anywhere you would use plain vinegar. You can use this method with any fresh herbs to make a variety of vinegars. Have fun and mix & match. They look and smell so good!
1. Wash your freshly harvested herbs. I picked tons of basil buds and blooms along with the leaves.
2. Place 2 cups of vinegar in a pot on medium high heat and bring to a simmer. Remove from heat.
3. Fill a 1 pint glass jar with your clean fresh herbs.
4. Carefully pour hot vinegar over the herbs until the jar is full.
5. Cover and let steep for up to 3 weeks.
6. Strain vinegar and pour into a clean glass bottle.
Keep refrigerated.
Uses for herb vinegars go beyond culinary applications. Get creative with your new vibrant vinegar! Basil vinegar and water mixed in a spray bottle make a great multi surface cleaning spray. Vinegar can be used in homemade cosmetics too. And, they make great gifts, especially when you find beautiful bottles to showcase your product!
Do you ever run your hands along the basil leaves in your herb garden? I do it every time I pass by them, I can't resist the sweet smell! Pesto is a great way to incorporate fresh basil into your meals. I use this recipe as a guide and substitute with whatever nuts and basil varieties I have on hand.
Wash and dry basil leaves, remove stems. Place basil, nuts, garlic, and grated parmesan in blender or food processor and blend about 1 minute.
Drizzle olive oil into blender or food processor while on low. Add salt and blend until smooth, about 30 seconds.
While planning my Spring garden I love to look back at last year's recipe photos for inspiration.
Sweet basil and Purple Opal basil are staples in my herb garden and I always like to try a new-to-me variety, this year I'll probably plant the increasingly popular Lettuce Leaf Basil.
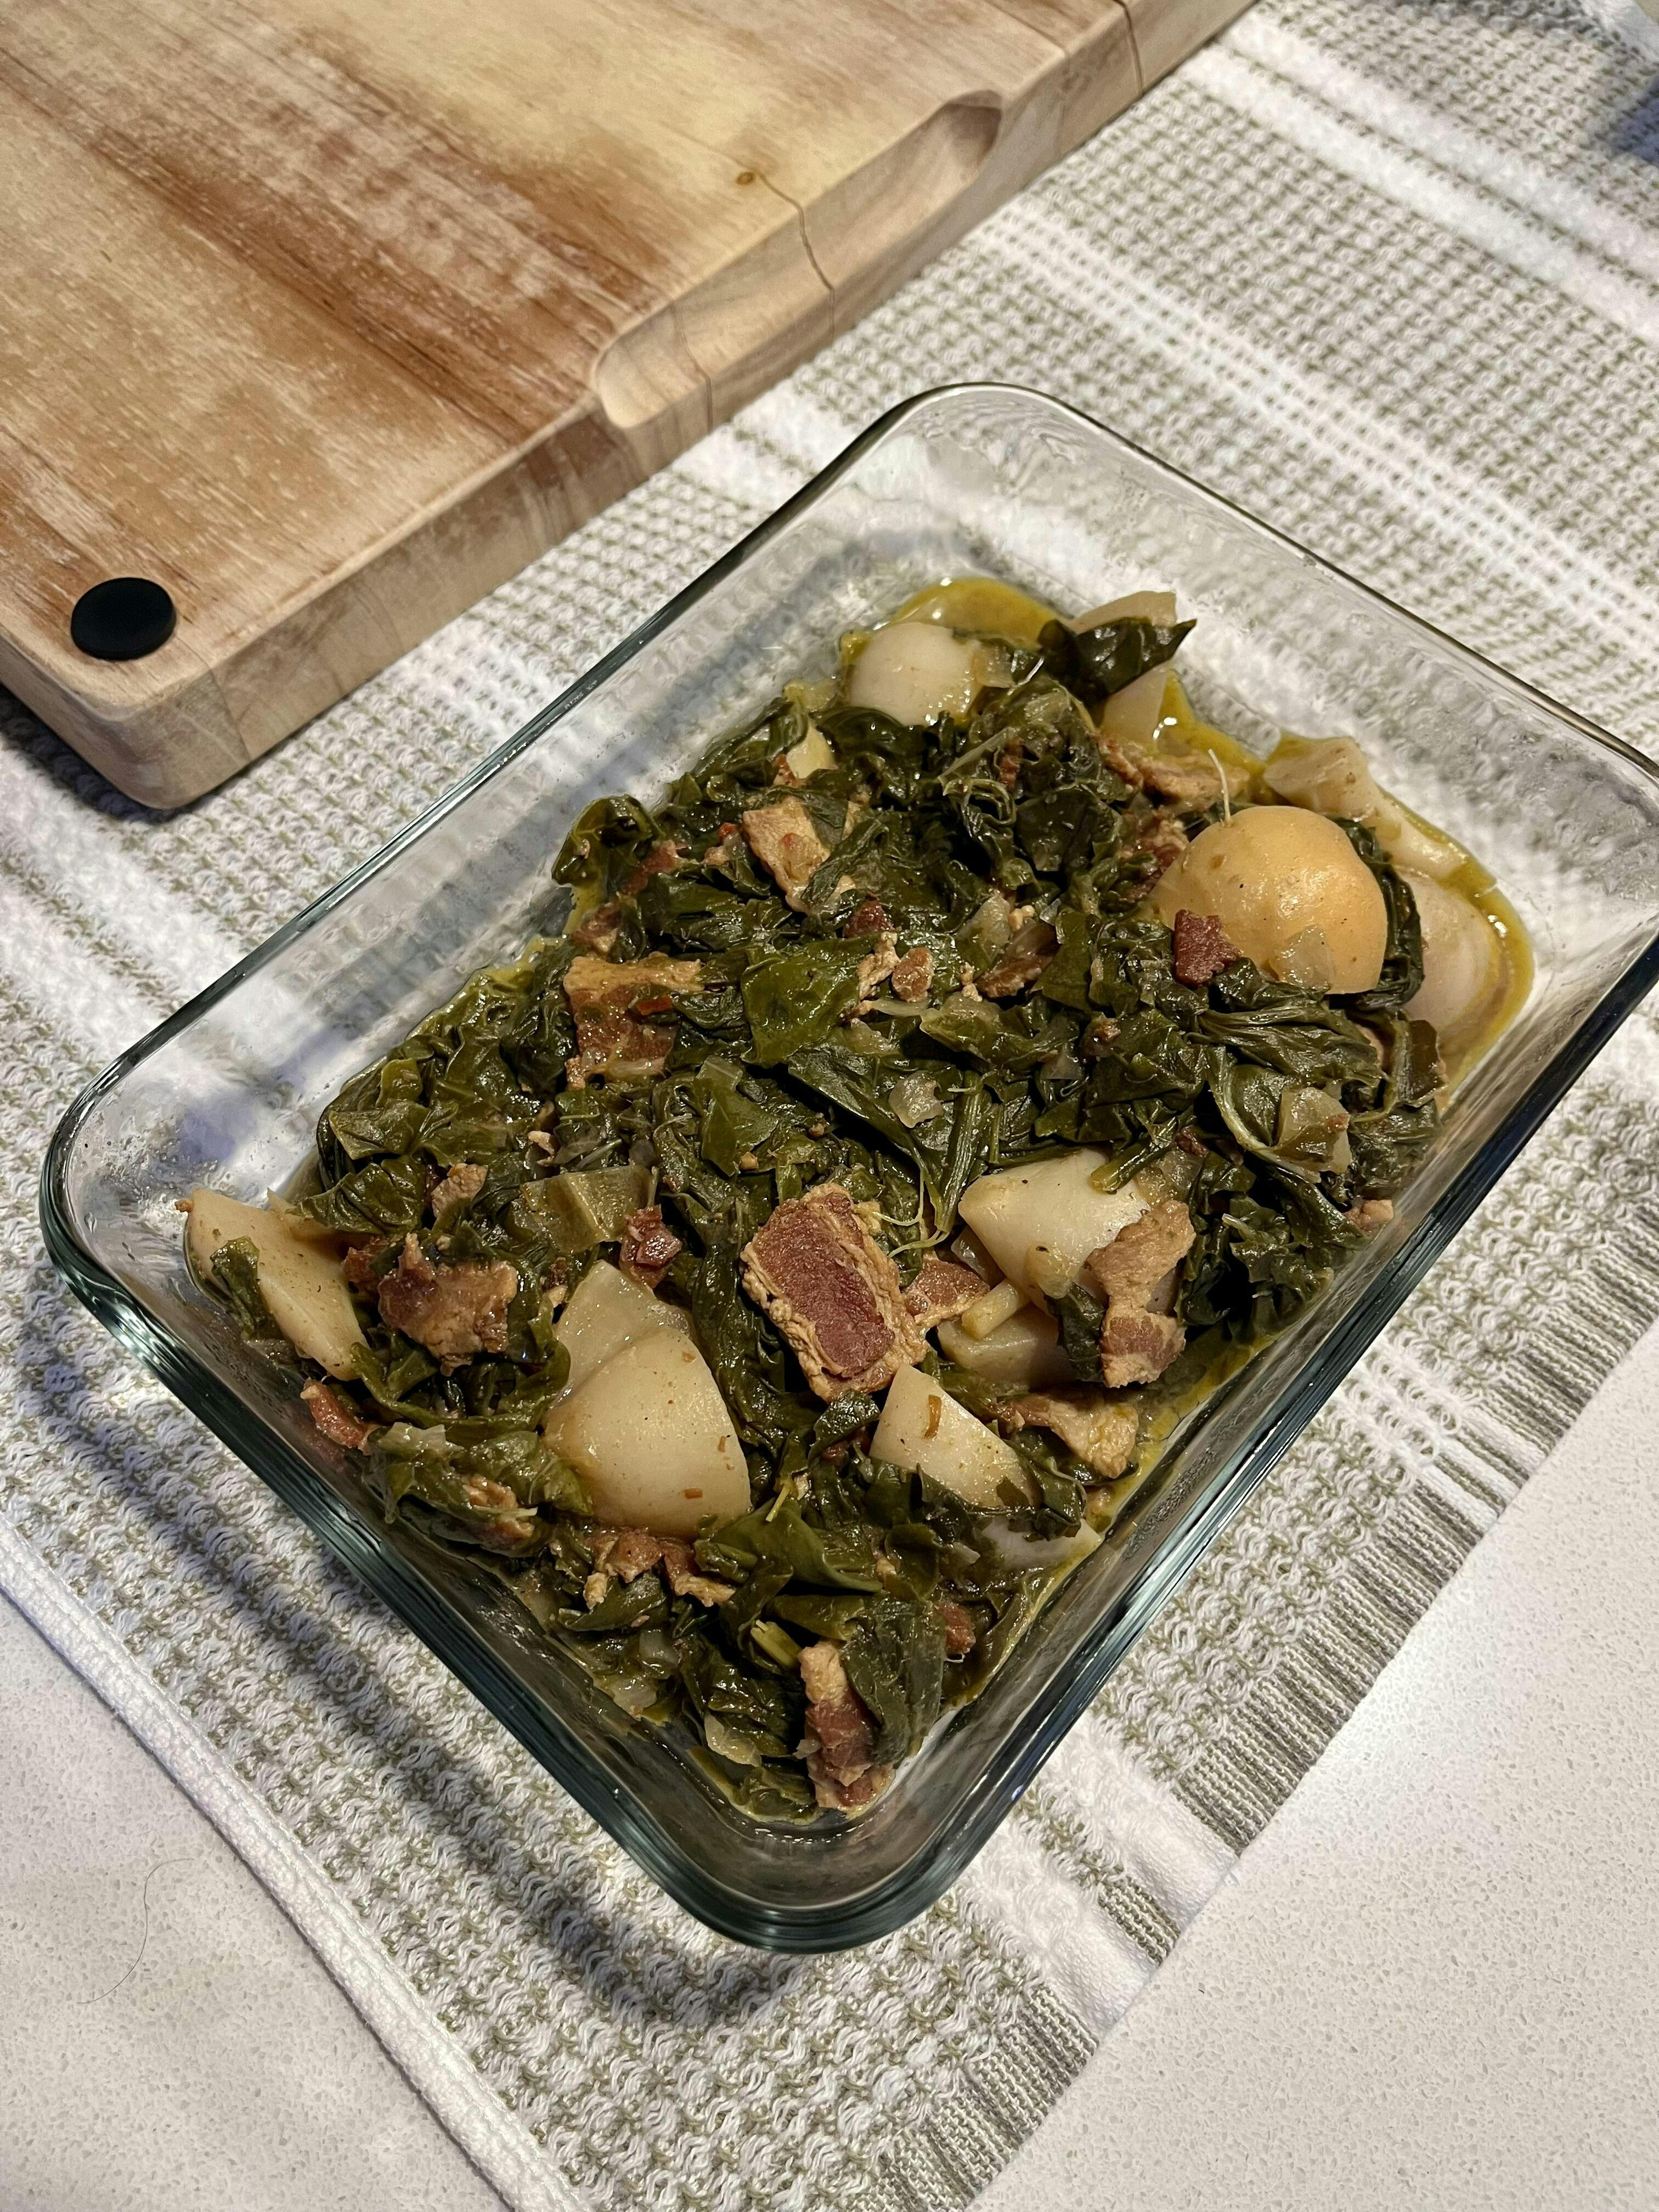
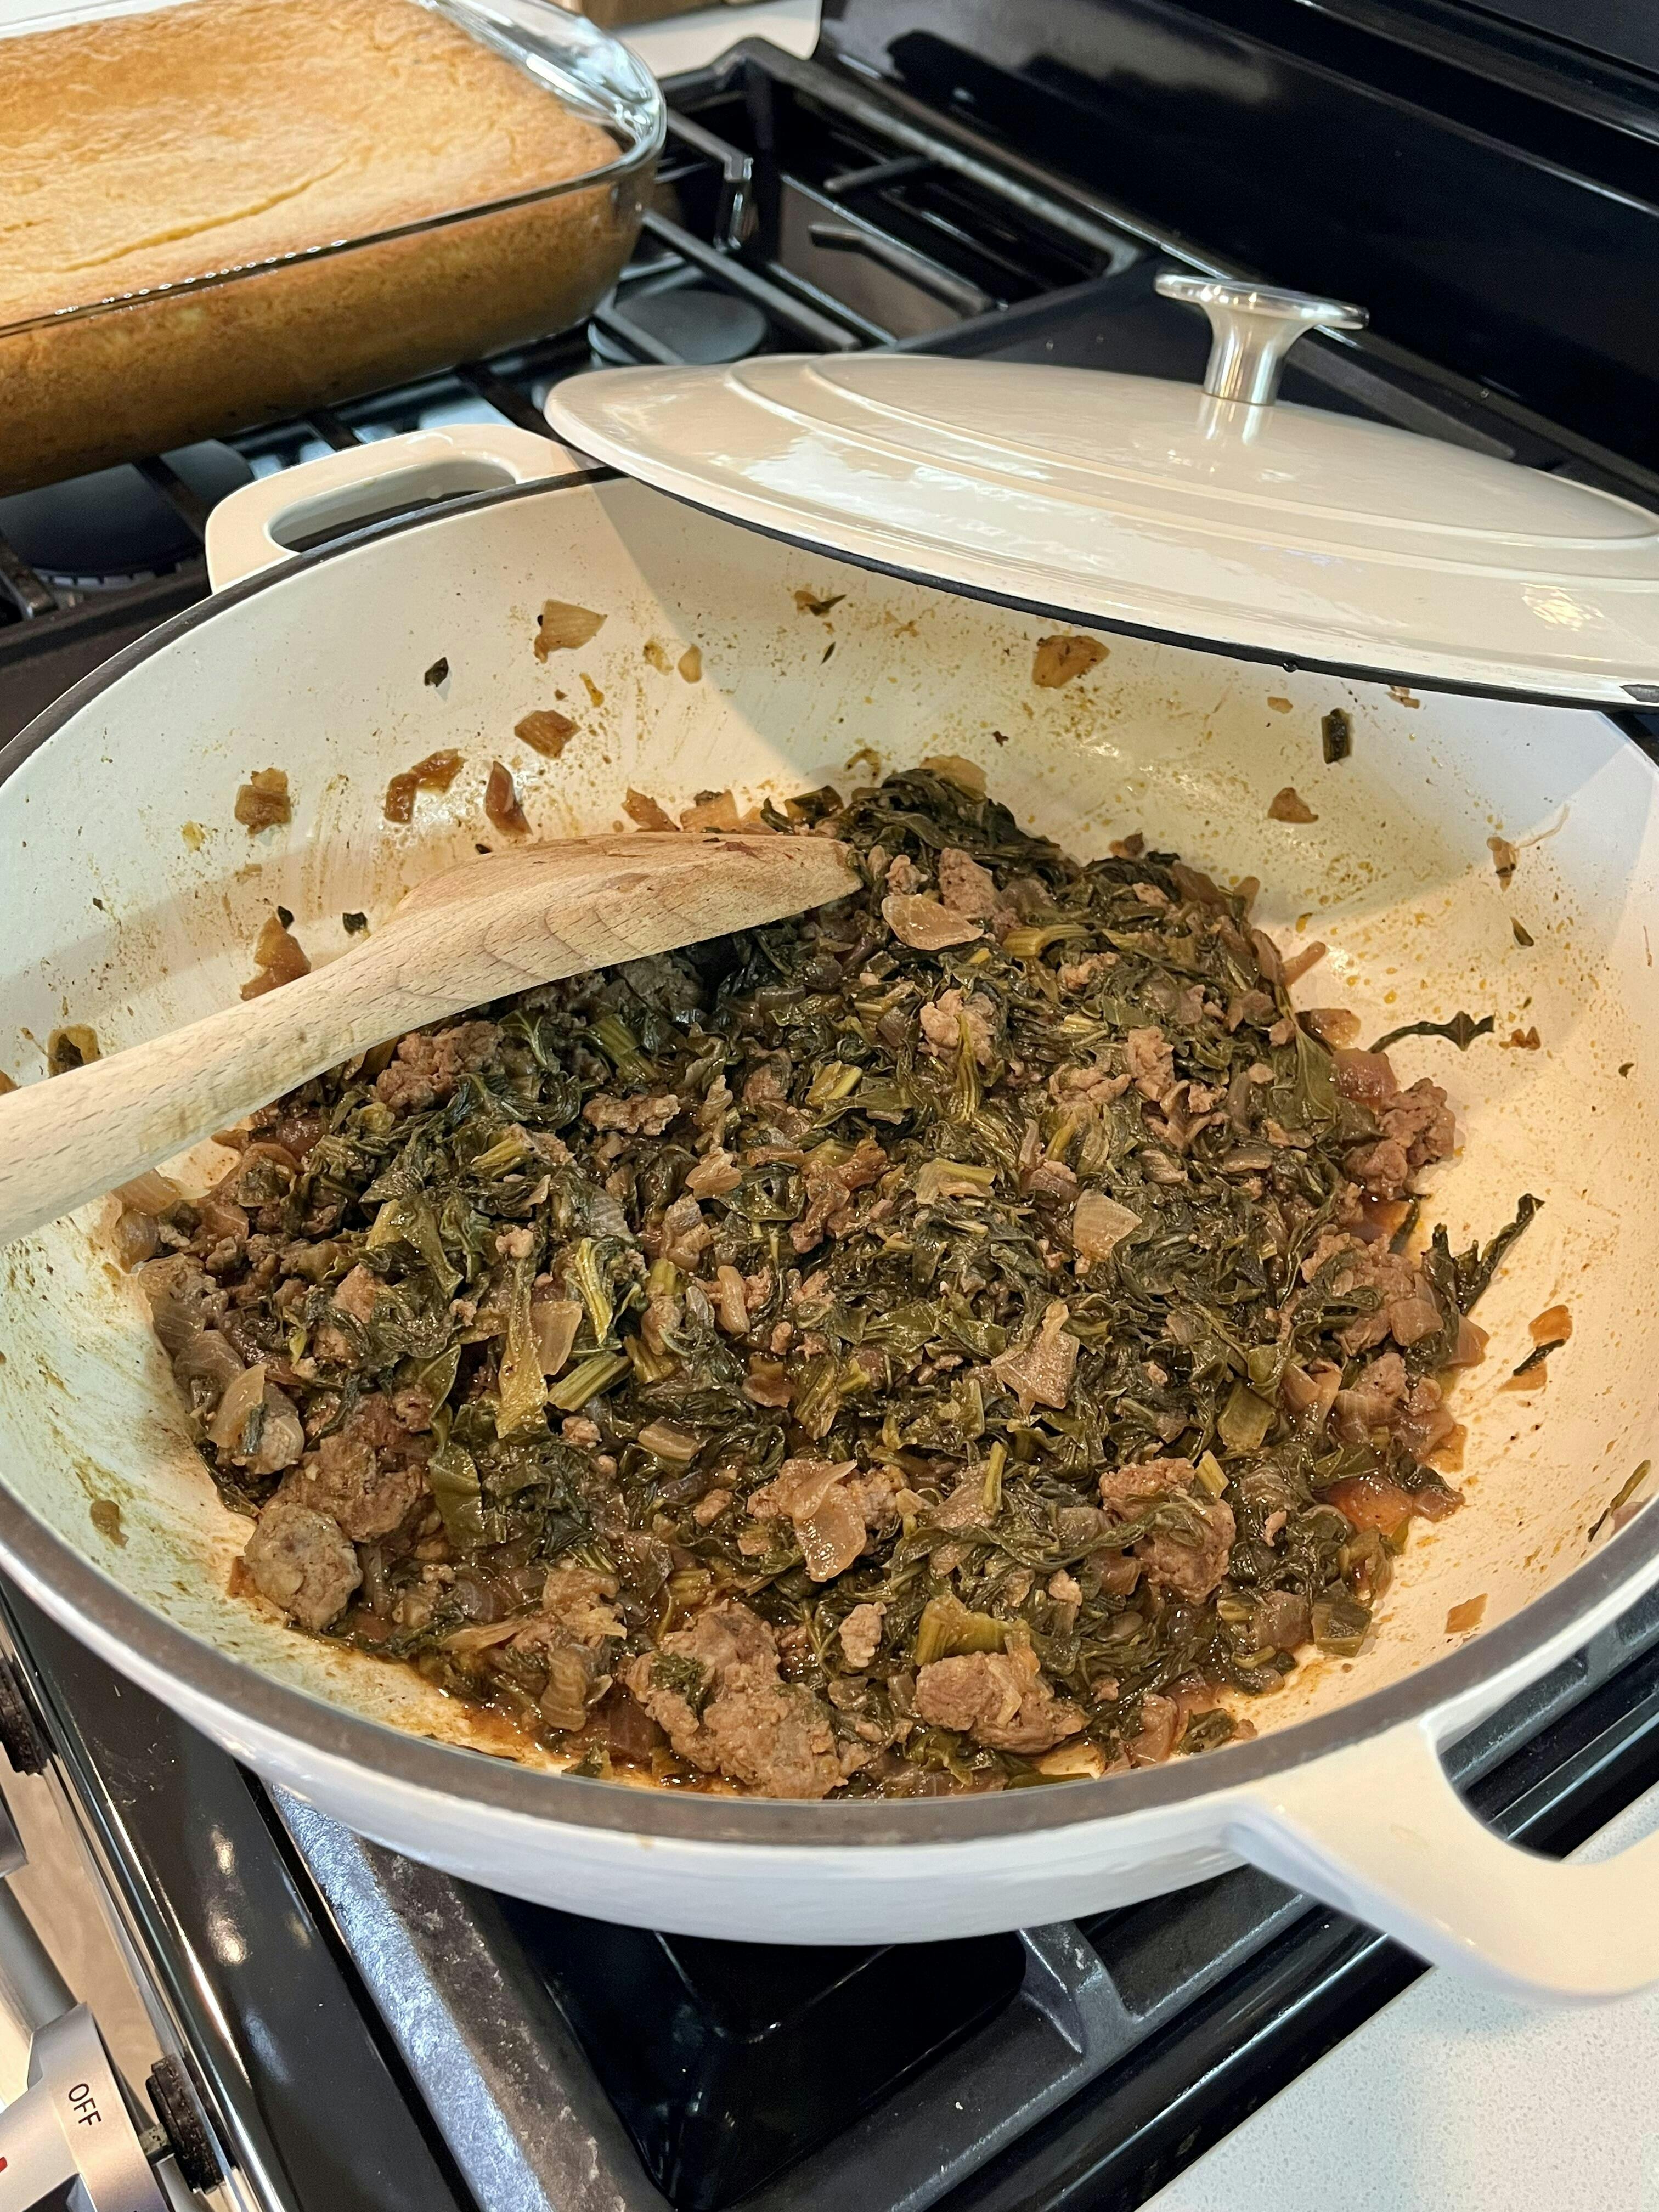
These were fast to mature and really tasty. I am new to gardening and didn’t thin my seedlings well enough so many of them did not produce much of a root but that’s okay because we definitely got to use the greens! Photos are of the turnips from the garden to my kitchen and the dish we made with them. Some turnips in the photo are not the purple top variety but overall I think the purple top got larger than the others I planted.
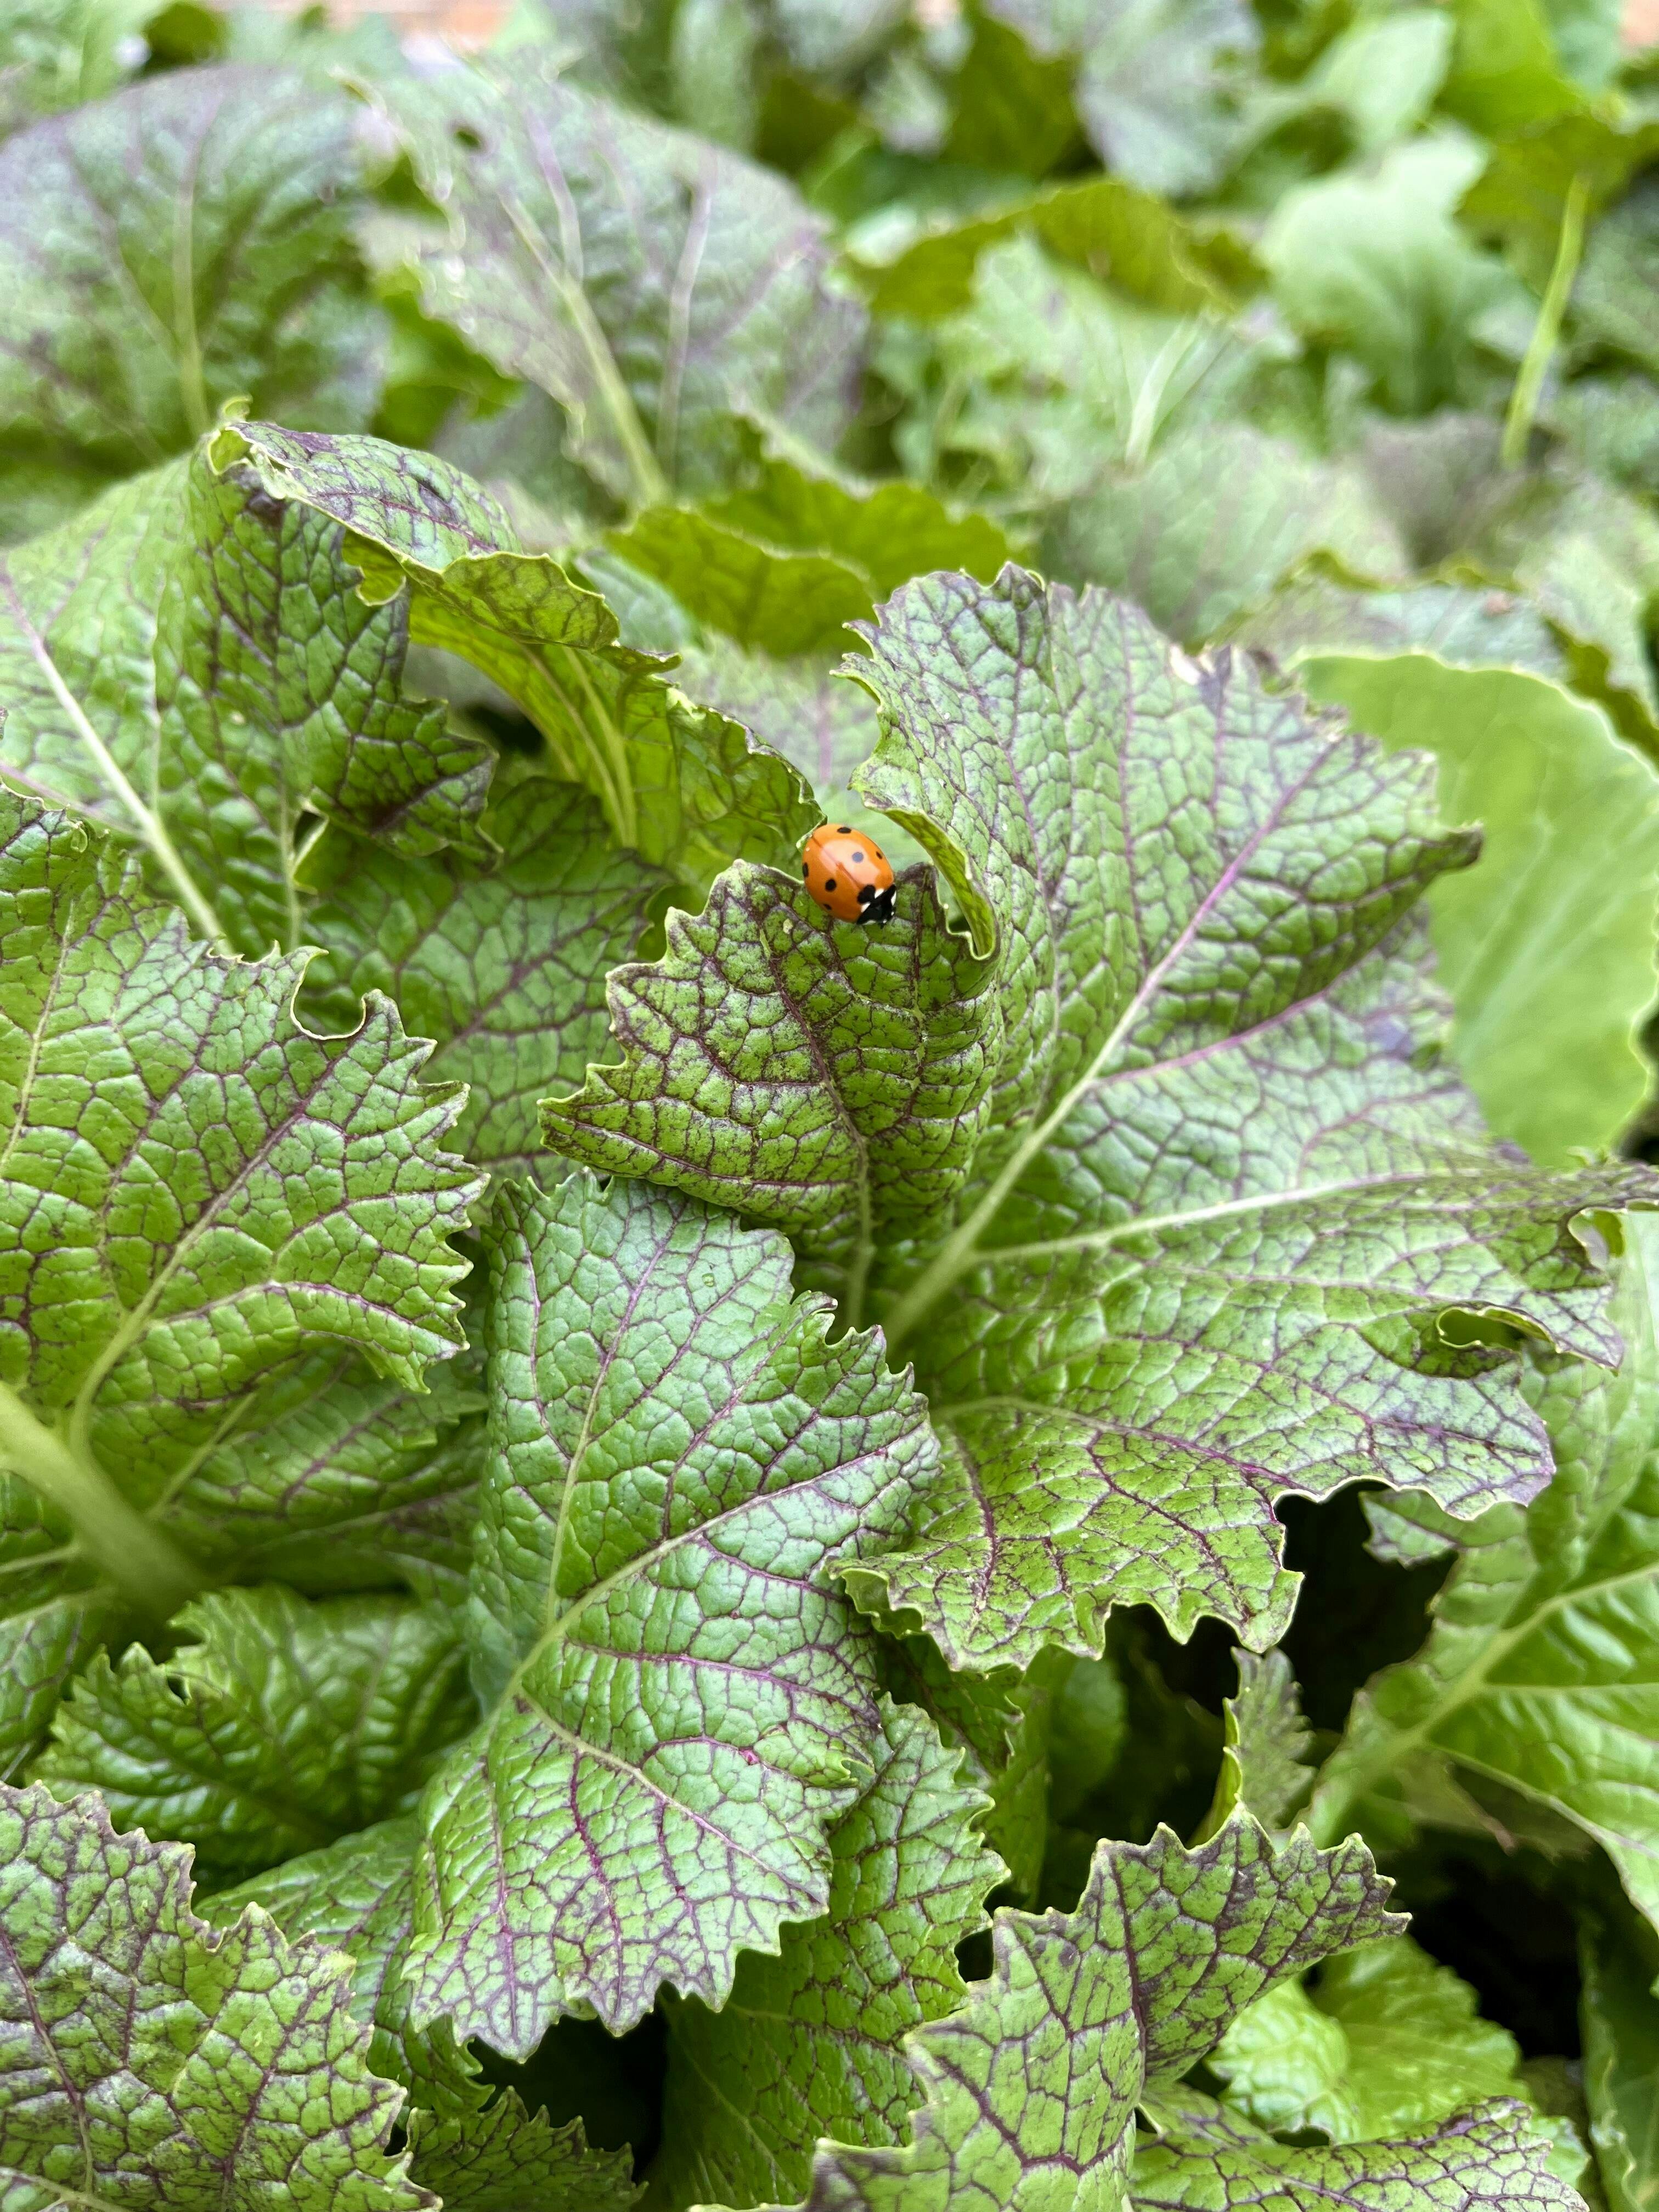
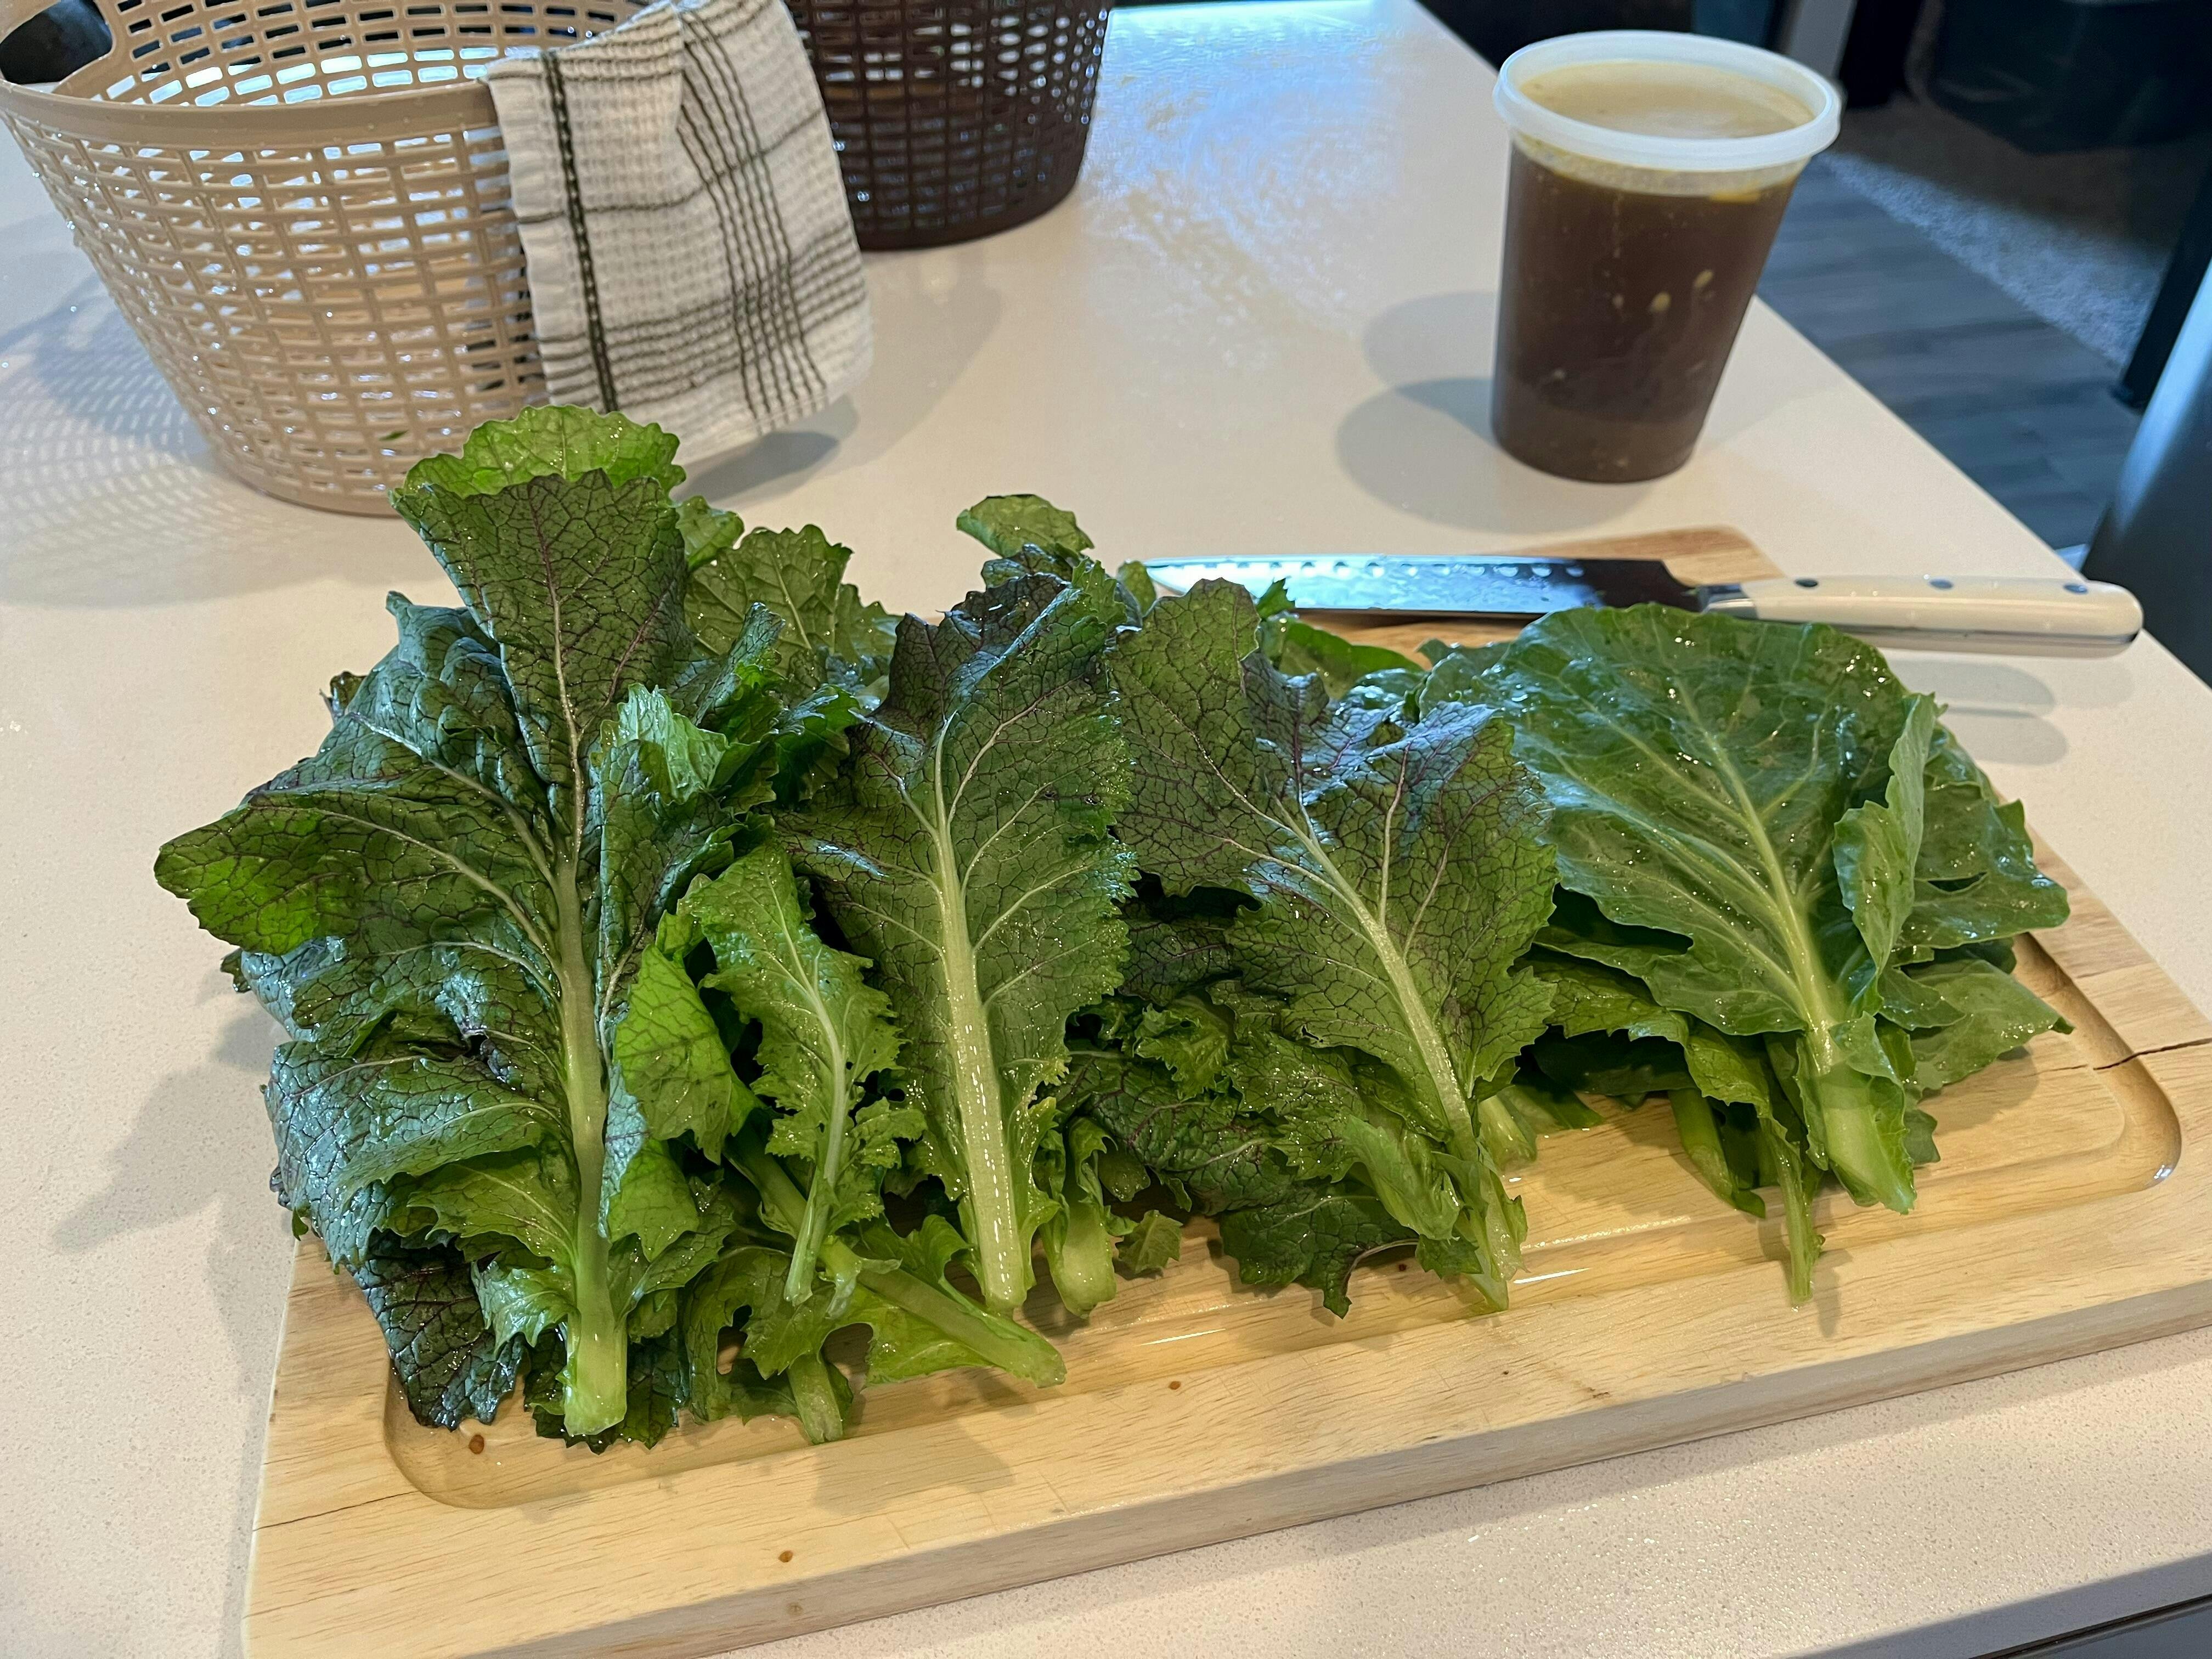
This was the first time I have grown greens of any kind and it was a success! The plants are beautiful with the purple veins. I over crowded my raised bed with these accidentally but they still did really well. I started seeds indoors and had a hard time germinating (due to my own fault being new to seed starting) but still planted what I had outside when the time came. I was surprised when I saw the seeds that didn’t germinate indoors started coming up shortly after being outdoors. That’s how I ended up overcrowding my raised bed but on the plus side I now have a ton of healthy great tasting food in my backyard. Photos are of the greens from my garden to my kitchen.
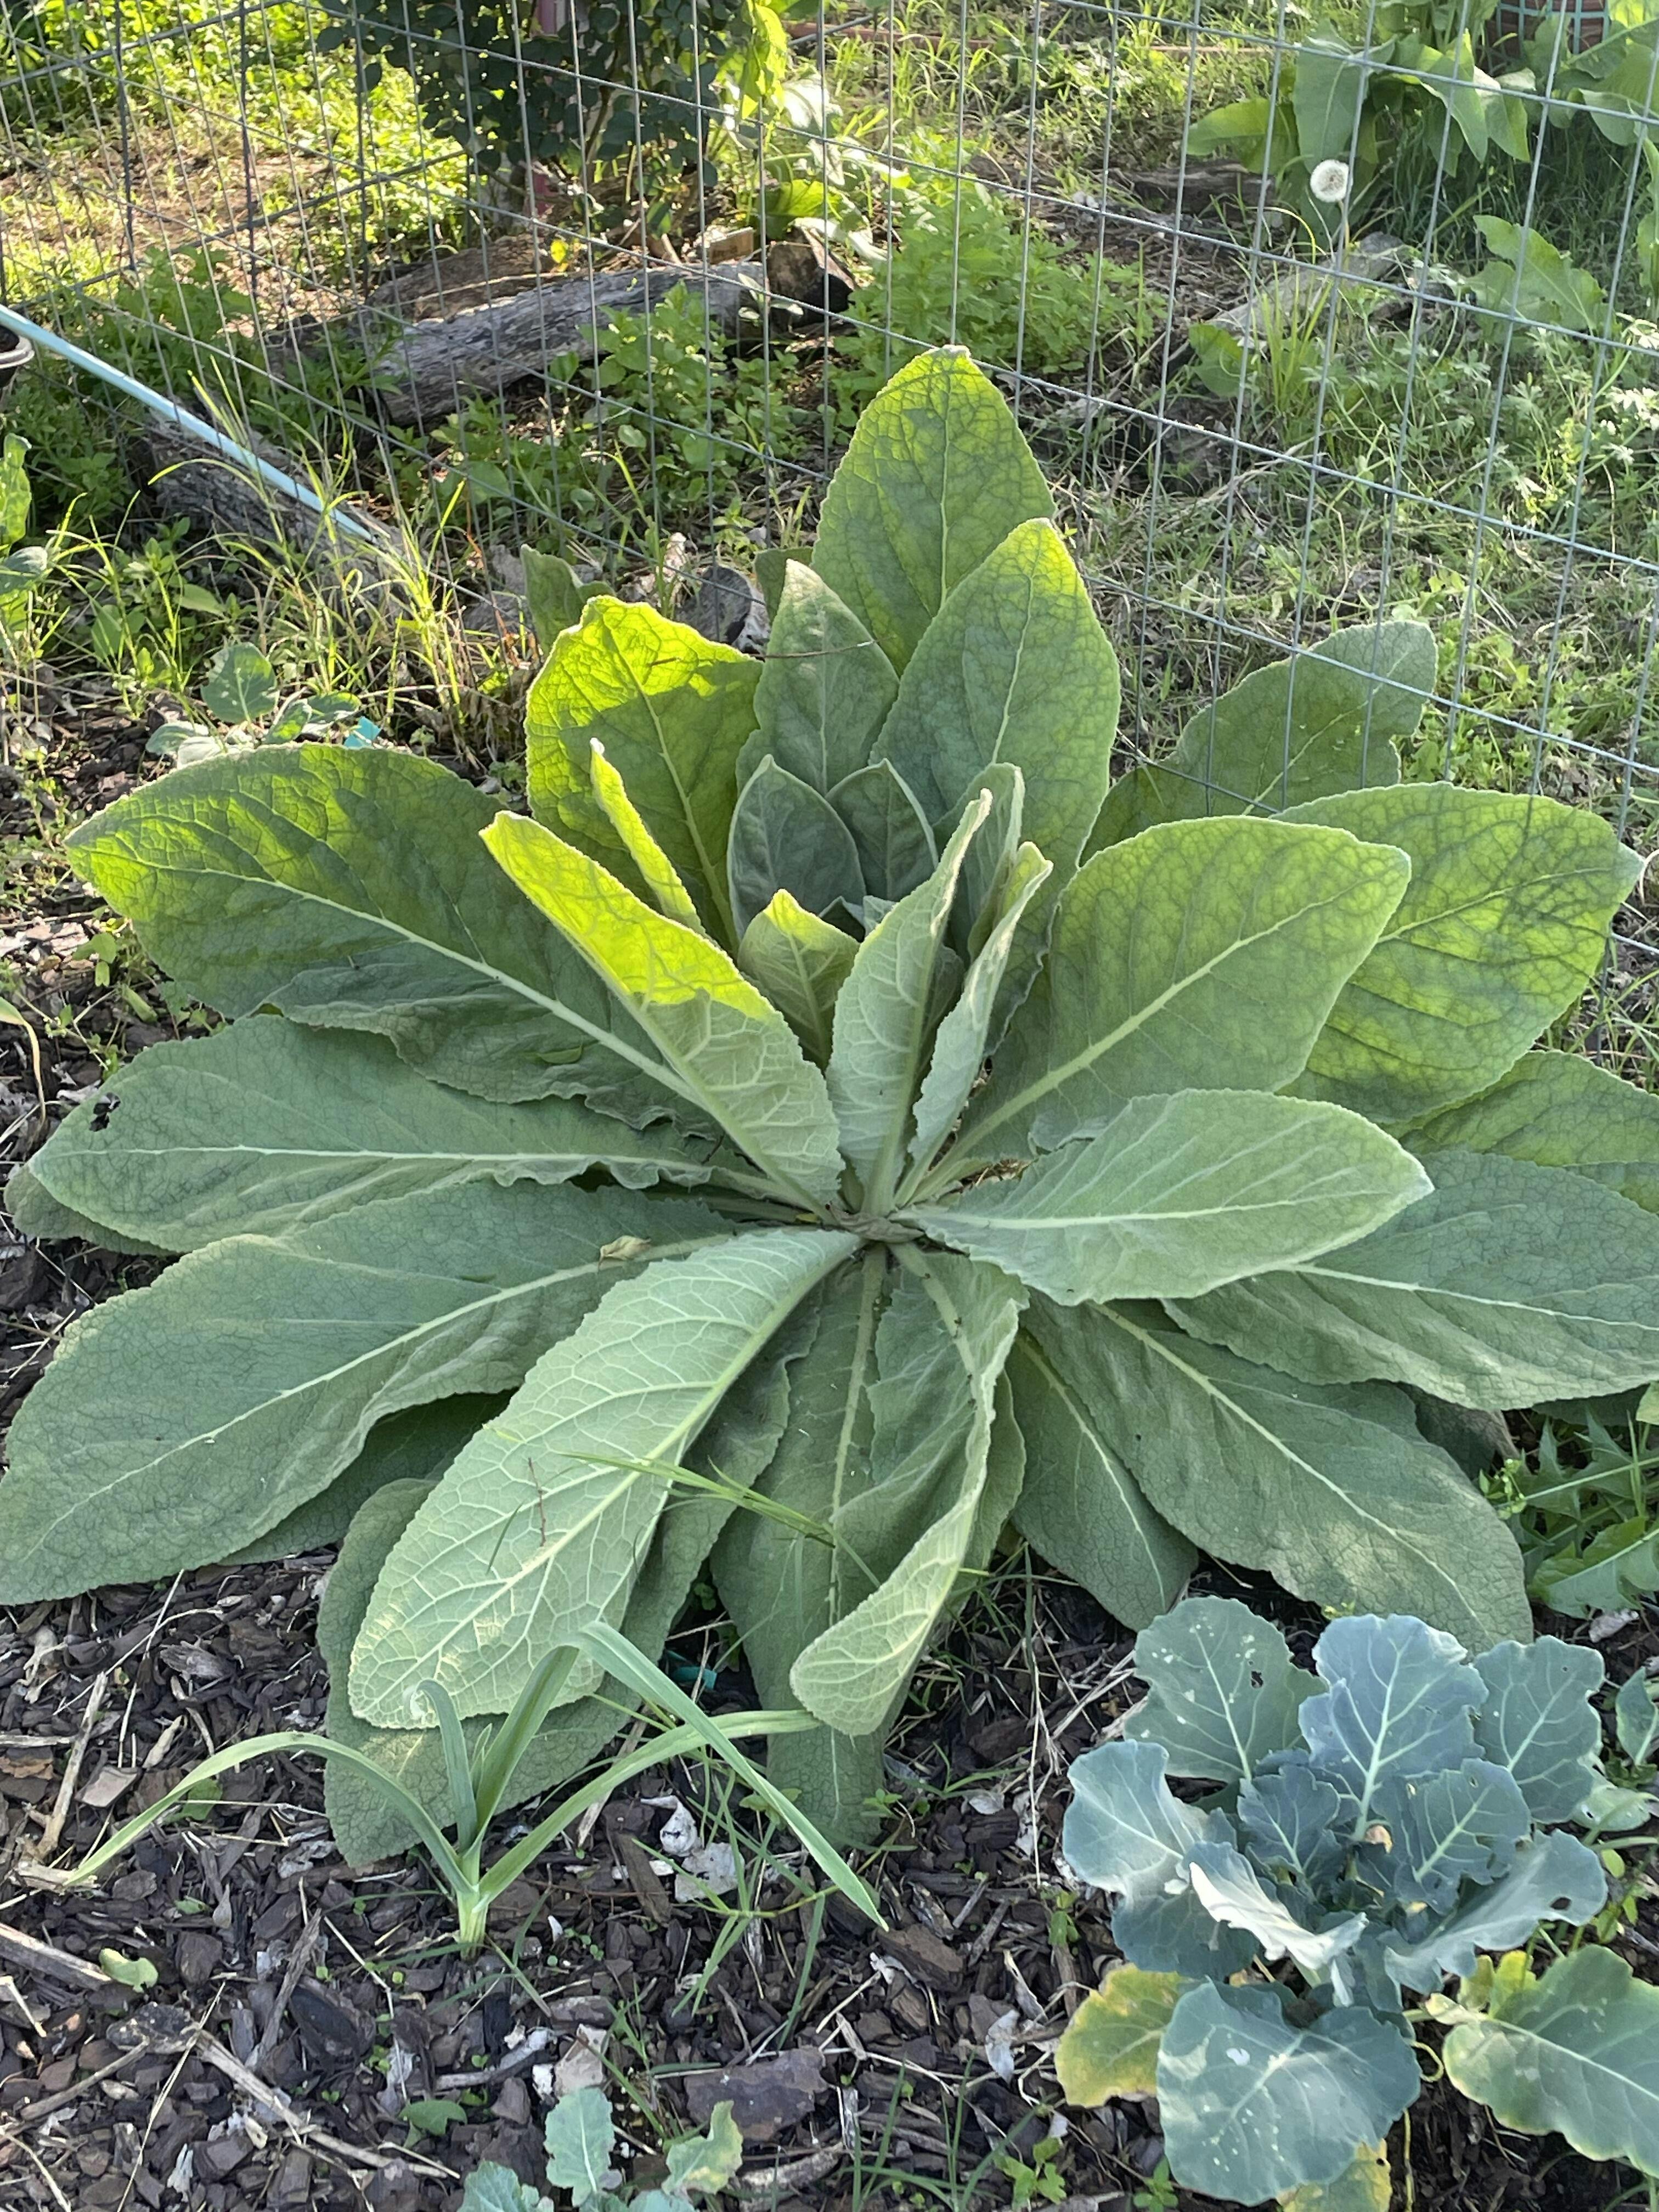
This is my favorite plant in my garden right now. I started my seeds last winter (2022) and planted in spring 2023. My mullein survived the insane high temperatures over summer and was a refreshing pop of green all winter. I am eagerly awaiting the flower!
These are so much fun. They sell out fast and I try to get at least 1 every year. Last year I was lucky enough to grab 2. I love trying new things and these are a mixture of flower, herbs, and vegetable. One of my favorite carrots came from here. It’s one of three that I grow every year because it’s fun!
When I bought these I had the intention of testing Mary’s seed Garlic with the sprouting store bought garlic from my fridge. I will be doing another review later after I harvest and I’ll post a picture then. So planted these in raised beds. Both in full sun and planted in different beds. I did the exact same thing to both. My store bought sprouted garlic all died. My Mary’s is still alive and forming it’s bulbs. This was just too good not share!