Seminole Pumpkins are a Florida native variety grown by Native American tribes for hundreds of years.
The shapes and sizes can vary. Some look like a traditional pumpkin, others can resemble a gourd "tear drop" shape, and other shapes resembling a butternut squash.
Seminole Pumpkin is prized for it's heat tolerance and pest resistance. From seed to harvest, Seminole pumpkins take 90 to 130 days to mature.
Planting Seminole Pumpkin Seeds
Direct sow: Plant seeds after your last frost date when soil is warm.
Indoor sow: Plant seeds 2 weeks before your last frost date and transplant within 3 weeks.
Plant seeds 1/2 to 1 inch deep. Pumpkins do well in "mounds" of well amended soil (compost, worm castings, aged manure, coconut coir). Plant in a spot that receives plenty of sun and will receive plenty of water.
From UF, The Seminole people gave the name "Chassahowitza" to a region on the gulf in Southwest Florida. The name means "pumpkin hanging place."
Seminole Pumpkin plants can climb up trees, fences and trellis. If grown on the ground, Seminole Pumpkin plants can easily grow 25 feet long.
Companion Plants for Pumpkins
Pumpkin pals are corn, melon and squash. Marigold deters beetles. Nasturtium deters bugs, beetles. Oregano provides general pest protection. Dill may help repel those frustrating squash bugs.
Seminole Pumpkin Plant Care
Pumpkins require pollination of the female flowers to produce fruit. It is recommended to encourage pollinators to your garden by planting flowers nearby. Nasturtiums, Marigolds and Sunflowers are easy to grow and will attract a variety of pollinators to your garden.
Seminole Pumpkins are naturally adapted to HOT, humid climates but require plenty of water. If you are growing in an arid climate, you will need to water regularly.
If you have struggled with pests in your pumpkin patch, I highly recommend trying Seminole Pumpkin. While not completely immune to pests, this variety seems to be more pest tolerant.
Harvesting Seminole Pumpkins
Growing pumpkins takes a bit of patience. Depending on your region, Seminole pumpkins can take up to 130 days to fully mature.
Once the Seminole pumpkins are mostly orange in color, they are ready to harvest. If stored in a cool, well-ventilated area, the pumpkins can last anywhere between six to twelve months with no effect on the taste or quality.
During our Food Storage Prepping in the garden series we discussed Pumpkins!
If you have additional questions, please feel free to ask!
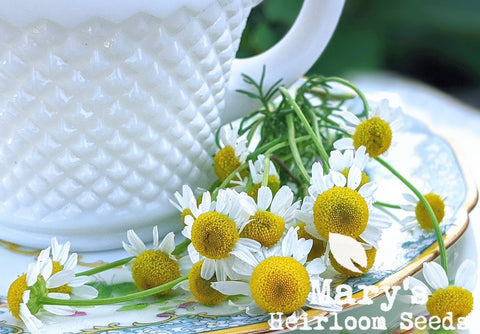
Did you know that there are 2 types of Chamomile? The first is Roman chamomile (Chamaemelum nobile) and the other is German chamomile (Matricaria recutita). At Mary's Heirloom Seeds, we carry both and the growing conditions are almost the same.
German Chamomile is the most popular herb used in medicinal teas and tinctures.
Roman Chamomile is a perennial, while German Chamomile is an annual that easily re-seeds.
Roman Chamomile grows like a creeping ground cover while German Chamomile grows up about 1 to 2 feet tall.
Chamomile likes to grow in a semi-shady spot with well-drained soil.
Sprinkle seeds lightly over moist soil and gently top with seed starter mix or coconut coir, no more than 1/4 inch deep. Keep soil moist and warm but not waterlogged. Seeds should germinate in 7-14 days.
Once established, Chamomile is a pretty hearty herb that makes a great companion plant. It can also be grown in containers so this is a great plant for just about any gardener.
From seed to harvest, Chamomile can be ready in as few as 8 to 9 weeks. Chamomile can easily re-seed so if you don't want it to spread, harvest often.
Companion Planting with Chamomile
Companion planting with herbs can increase vegetable yields, repel pests, and provide "trap crops" depending on your planting goal. We use companion planting in all of our gardens as our first line of defense.
Are you ready for this awesome list? Chamomile is a companion plant for garden vegetables like cabbage, onions, beans, cucumbers, broccoli, kale, Brussels sprouts, cauliflower, kohlrabi, tomatoes, and potatoes.
Flowers also benefit, such as Bee balm, Phlox, Roses, lilacs, zinnias, petunias, and snapdragons.
Beneficial insects and friendly pollinators are attracted to chamomile while helping to rid your garden of pests and improve pollination. Poor soil is no problem for chamomile, so plant it generously in, around, and near your garden.
Harvesting Chamomile
Chamomile flowers are ripe when the petals curl back toward the center in late summer or early fall.
Allow flowers to fully dry on a drying rack or screen away from direct sunlight in a well ventilated area. Store fully dry flowers in a labelled container.
If you have additional questions, please feel free to ask!
Acorn Squash is a winter squash variety with a tough skin, making it an excellent crop to store for extended periods.
What's the difference between Summer Squash and Winter Squash? The physical characteristics between summer and winter squash are stark. Summer squash tend to have very thin skins that are edible and easily damaged. The seeds of summer squash are present in the flesh and are edible raw. The flesh of the summer squash is very tender and very perishable. The skins of winter squash varieties are thick, inedible and tough. Winter squash have hollow cavities in the center where hard seeds are located. The flesh of the winter squash is very dense.
Ebony Squash: Prolific 8' vines produce 1.5-2 pound fruits.
The Table Queen Bush Squash (pictured) is a great option for smaller spaces. As a bonus, it matures faster than it's vining counterparts.
One squash can easily be made into an entire meal for 2!
Planting Acorn Squash Seeds
Direct Sow squash seeds after your last chance of frost. Soil should be 60F or warmer for optimal germination. Sow seeds 1/2 -1 inch deep and keep soil moist but not waterlogged.
Vining squash varieties will need more space than bush varieties so plan ahead when planting. Bush varieties should be planted 20 inches apart, while vining can be planted in hills.
Squash is a heat tolerant crop that can be grown in Spring, Summer and into Fall. From Seed to harvest, Ebony Acorn Squash can take 80-110 days depending on weather, soil health and variety of squash.
Companion Plants for Acorn Squash
Beans, corn, cucumbers, icicle radishes, melon, mint, onions and pumpkin. Helpers: Borage deters worms, improves growth and flavor. Marigolds deters beetle. Nasturtium can deter squash bugs and beetles.
Oregano provides general pest protection. Dill may repel the squash bug that will kill your squash vines. Generously scatter the dill leaves on your squash plants. Keep squash away from potatoes.
Acorn Squash is ready to be picked when the skin is tough. You can use a fingernail to test it.
Once your acorn squash has been harvested, store them in a cool, dry area. It will keep for several months if given the right temperatures. Usually this is between 50F and 55F.
We have a delicious harvest recipe for Baked Acorn Squash. There is a vegetarian and omnivore option.
Toothache plant is an often overlooked herb. It is so unique and colorful.
What is Toothache Plant?
Spilanthes oleraces, Toothache Plant, is a medicinal herb that's been used for generations to manage the pain of toothaches. Both the leaves and the colorful flowers can be used.
Toothache plant is a native plant to Brazil and Africa. In warmer climates, Toothache plant is a tender perennial. In areas with frost, grow as an annual.
Growing Toothache Plant from seed
Toothache plant is quite easy to grow and is resistant to disease, insects and even rabbit.
For transplanting: sow seeds indoors 6 weeks before your last frost. Seed should be sown 1/4 inch deep in individual containers to keep from crowding. Keep soil moist but not waterlogged. A heat mat would be helpful if you are starting seeds indoors during winter or early spring.
Direct sow: Plant seeds 1/4 inch deep in well drained soil after your last frost date. Space seeds out approx 6-12 inches apart.
Toothache plant can grow in full sun.
Harvesting Toothache Plant
Both the leaves and the flowers can be harvested from the Toothache Plant. Once the plant reaches 1 foot in height, it should be ok to start harvesting.
Leaves and flowers can be used fresh or dried. To dry, use a dehydrator or allow to naturally dry in a warm, dry spot with plenty of airflow.
Store fully dried plant matter in an airtight jar and label your container.
If you have additional questions, please feel free to ask!
Okra is a beautiful, heat loving plant that is oh-so-easy to grow from seed. Fun fact, Okra belongs to the same plant family as hibiscus. Check out the beautiful bloom on this Burgundy Okra below!
Okra is the seed pod of the Abelmoschus esculentus plant. It's filled with tiny white seeds and is sometimes called lady's fingers due to its long, slender, tubelike shape.
Okra is a fruit, though it is eaten as a vegetable. Okra can be cooked whole or sliced and can be prepared in a number of unique ways including frying, grilling, sautéeing, pan-roasting and even pickled.
Growing Okra from Seed
Prior to planting, soak the okra seeds in water for 12 to 18 hours to soften its hard seed coat. Soaking aids moisture absorption and germination.
Sow Okra seeds in warm soil approx 1/2 to 1 inch deep in coconut coir, seed starting medium or directly in the garden. If planting directly in the garden, space seeds 6-12 inches apart.
Okra seeds can germinate in as few as 2 days and as many as 12 days. Soil should be warm and moist but not soggy.
Plant okra in full sun and water regularly, especially during flowering and pod development.
Harvesting Okra
This heat loving crop is ready to harvest in as few as 60 days. Use scissors to harvest Okra pods from the stem. Pulling them off may damage the plant.
Start harvesting a few days after the okra blooms fade. At that point the seed pods should be soft and two to three inches long. Harvest daily or every other day to avoid woody/tough pods.
Harvesting Okra Seeds
Okra seeds are very easy to harvest. Very important: harvest seeds from your healthiest plant and make sure the pod is overripe.
Store harvested seeds in envelopes or jars. Label your storage containers with the variety of seeds and date harvested.
RECIPE
Roasted Okra is probably one of the easiest recipes. Roast them whole or slice.
Preheat oven to 425 degrees F
Arrange the okra slices in one layer on a foil lined cookie sheet. Drizzle with olive oil and sprinkle with salt and pepper. *Add additional spices to your liking* Bake in the preheated oven for 10 to 15 minutes.
YUM!
If you have additional questions, please feel free to ask!
A common question I see asked in gardening groups is "what herbs can I plant to deter Mosquitoes?" We'll have a complete list very soon but for now we're going to talk about Lemon Balm.
Lemon Balm (Melissa officinalis) is an herb in the mint family and is grown for it's culinary and medicinal properties. It is considered a calming herb.
The lemon scent in Lemon Balm can deter a few different pests including gnats and mosquitos. As a companion plant, Lemon Balm grows well around Melons, Tomatoes, summer & winter squash, onions, fennel, basil, rosemary and sage.
Growing Lemon Balm from Seed
Sow seeds outdoors when soil is warm and temperature does not drop below 65°F. Can also be started indoors 4-6 weeks before planting out. Prefers rich well-drained soil.
For shorter growing seasons, seeds can be starting indoors 2 months before your last frost date but will need a light.
For optimal germination, cold stratify Lemonbalm seeds prior to planting.
Sow Lemon Balm seeds on the surface of your seed starting medium and gently scratch them into the soil. OR, broadcast the seeds over the soil and lightly cover with soil. Lemon Balm needs light to germinate.
Lemon Balm seeds should germinate in 5 to 10 days under optimal conditions, preferably when soil is 65 to 70 degrees F.
It is recommended to plant lemon balm in full sun but it will tolerate shade.
If planting indoors or in containers: Once seedlings have their second set of true leaves, you can thin them to one or two per pot or repot individual seedlings into larger containers. After all danger of frost has passed, seedlings should be set in the garden 12 to 18 inches apart.
Harvesting and Using Lemon Balm
There are so many useful herbs to grow in the garden. If you've grown Lemon Balm and now you're wondering what to do with it, we can help!
To harvest, cut each stem just above a pair of leaves using a very sharp pair of scissors or pruning shears. You can cut the plant down to within six to eight inches of the soil.
Once you have harvested from your Lemon Balm, you can dry the leaves on the stems or removed the leaves to dry. TIP: stripping the leaves from the stems makes drying a little easier. Place your Lemon Balm Leaves on a screen or drying rack in a well ventilated area away from direct sunlight.
Store your fully dried leaves in an airtight jar or container.
Using fresh leaves for tea: chop leaves (2 tablespoons) and boil water. Mix the leaves and water in a mug and allow to stand 10 minutes to steep.
For tinctures and salves, use Lemon Balm fresh or dried depending on the recipe.
If you have additional questions, please feel free to ask!
Stevia, Stevia rebaudiana, also called sweet leaf, flowering plant in the aster family (Asteraceae), grown for its sweet-tasting leaves. Stevia is native to Paraguay and Brazil, where people have used leaves from the stevia bush to sweeten food for hundreds of years.
If you've seen the "zero calorie sweeteners" in the grocery store then you have probably already heard of Stevia. Spoiler alert: homegrown Stevia is much different than store bought. Most stevia products you’ll find in the grocery store are heavily refined powders.
Stevia can be grown as a houseplant as well as a garden plant, which means you can plant seeds anytime for houseplant use.
Growing Stevia from Seed
Before planting your stevia seeds or transplanting, choose the right spot for your Stevia plant. Stevia does not like to be disturbed once planted.
Stevia seeds should be cold stratified prior to planting.
Stevia can be challenging to grow from seed. Stevia Seeds are tiny and germination can be inconsistent but usually take 10-21 days under optimal conditions.
Sow stevia seeds ¼ inches deep in coconut coir or seed starting medium.
Stevia likes to stay evenly moist, not too dry and not too wet. Make sure the soil drainage is excellent. Stevia likes full sun and does not require fertilizer if planted in fertile soil. If you are unsure, a single watering of diluted liquid fertilizer after transplanting should be enough.
During the first 2 months of the growing season, pinch the tips of the plant every 3 weeks. This will result in a bushier, better-branched plant. If possible, pinch in the early morning.
Harvesting and Preserving Stevia
It is best to harvest Stevia before the plant starts to flower. This can be around 40 days after transplanting. Harvest in the morning, when the plant's sugar content is highest. Hang branches in a cool, dry spot with plenty of ventilation and away from direct sunlight.
Make sure your stevia is completely dry before storing. You can grind or blend the dried leaves to make your own powder or just use them whole.
A general rule of thumb is that 2 tablespoons of stevia powder equals 1 cup of sugar.
For tea: add 1 fresh leaf can be added to sweetener your herbal tea
Stevia Syrup Recipe:
2 cups of warm water
half a cup of dried stevia leaves
Put the mixture in a glass jar and let it steep for 24 hours. Strain the leaves from the mixture.
Cook the strained mixture on low heat, reducing it to a concentrated syrup. Store in an air tight container in the refrigerator.
If you have additional questions, please feel free to ask!
Catnip, or Nepeta cataria, is a common perennial herb plant. Native to the United States, and thriving in USDA zones 3-9. Catnip is pollinator friendly and said to repel deer.
Catnip grows to a height of 3 to 4 feet and has featherlike, light green foliage and small clusters of lavender flowers that grow on spikes.
A member of the mint family, catnip is also used in food and herbal remedies. For example, tea made from the leaves and flowers of Nepeta cataria is said to relieve coughs. The oil extracted from catnip plants is even used in natural mosquito repellents. And of course, our cats LOVE Catnip!
If you don't want this perennial plant to spread in your garden, it is best to plant in containers. Catnip can easily re-seed and take over a small garden plot.
For catnip, seed sowing should occur after the seeds about been placed in a freezer overnight. After this period, allow the seeds to soak in water for a period of 24 hours. This will allow for easier and more uniform germination rates.
Once the stratification process is complete, sow in seed starting trays approx 1/8 to 1/4 inch deep. Keep soil warm and moist. Seeds should germinate in 5 to 10 days.
When your plants are ready to be transplanted into the garden, it is best to harden them off for a few days prior to transplanting.
Catnip plants do best in full sun to partial shade and are drought tolerant. Catnip can be watered regularly but does not do well in soggy soil. It's a pretty low maintenance plant and does not need to plant food/fertilizer.
Harvesting Catnip
Are you harvesting for your feisty feline? The best time for picking catnip leaves is when the plants are flowering, around mid-summer. This is when the compounds that cats love most are at peak levels in the leaves. Catnip leaves should be dry when you harvest so you minimize the risks of the harvest getting moldy.
Harvest stems instead of individual leaves. Catnip will continue to produce throughout the season. Once you have harvested from your catnip plant, you can dry catnip leaves on the stems or removed the leaves to dry. Place your Catnip Leaves on a screen or drying rack in a well ventilated area away from direct sunlight.
Store your fully dried leaves in an airtight jar or container.
For tea, mix 2 teaspoons of dried catnip leaves or flowers with 1 cup of boiling water. You can make your own teabags or use a tea ball strainer. "Brew" for several minutes. Optional: Add lemon juice and honey then stir and enjoy.
If you have additional questions, please feel free to ask!
Broadleaf Sage, Salvia officinalis, Adds flavor to many meats, stuffing, vinegars and more! Also Called Culinary Sage, Broadleaf Sage produces aromatic, green foliage that is used in for it's culinary and medicinal properties
Depending on your zone and growing methods, Broadleaf Sage is a perennial and can be divided every 3 years. Sage thrives in hot weather.
Sage seeds can take 3 weeks (or more) to germinate even under optimal conditions. Patience is a must! Plant seeds shallow (approx 1/8 inch deep) and keep soil warm and moist.
Sage prefers full sun and well-drained soil. Avoid overhead watering once seedlings emerge. sage can be grown in ground or in containers.
Companion plants for Sage include Tomatoes, Thyme, Brassicas, carrots and strawberries.
Harvesting Sage
Prune the heavier, woody stems every spring. For optimal growth/production, remove flowers as they appear.
Sage’s flavor is best when fresh, but it can be stored frozen or dried. Simply snip or pinch off leaves to harvest. Sage leaves can be harvested and used fresh, stored in the freezer or dried for future use.
Some cooks blend the leaves with oil, pack the ground mixture into ice cube trays to freeze, and then transfer the cubes to a container.
If you have additional questions, please feel free to ask!
Marjoram is an easy herb to grow and grows well in containers as long as the containers are at least 6 inches wide and have a drainage hole at the bottom. Marjoram can be used in many different culinary dishes such as salads and mixed in with vegetables. This versatile herb combines well with garlic, onions, thyme, basil, and bay leaves.
Plant seeds shallow (about 1/8 inch). Keep soil moist but not soggy. Germination can take 14 to 21 days under optimal conditions.
Sow seeds outside after your last frost date. To get a head start, plant indoors under lights 8 to 10 weeks before your last frost date.
Whether you direct sow or transplant, Sweet Marjoram enjoys fertile, well drained soil and direct sunlight.
Harvesting Sweet Marjoram
Harvest marjoram when ball-like tips appear at the ends of the stems. When the plant starts to bloom, cut plants back close to the ground to stimulate a new flush of growth
Leaves can be easily air-dried for later use, but this herb is at its most delicious when freshly harvested.
If you have additional questions, please feel free to ask!
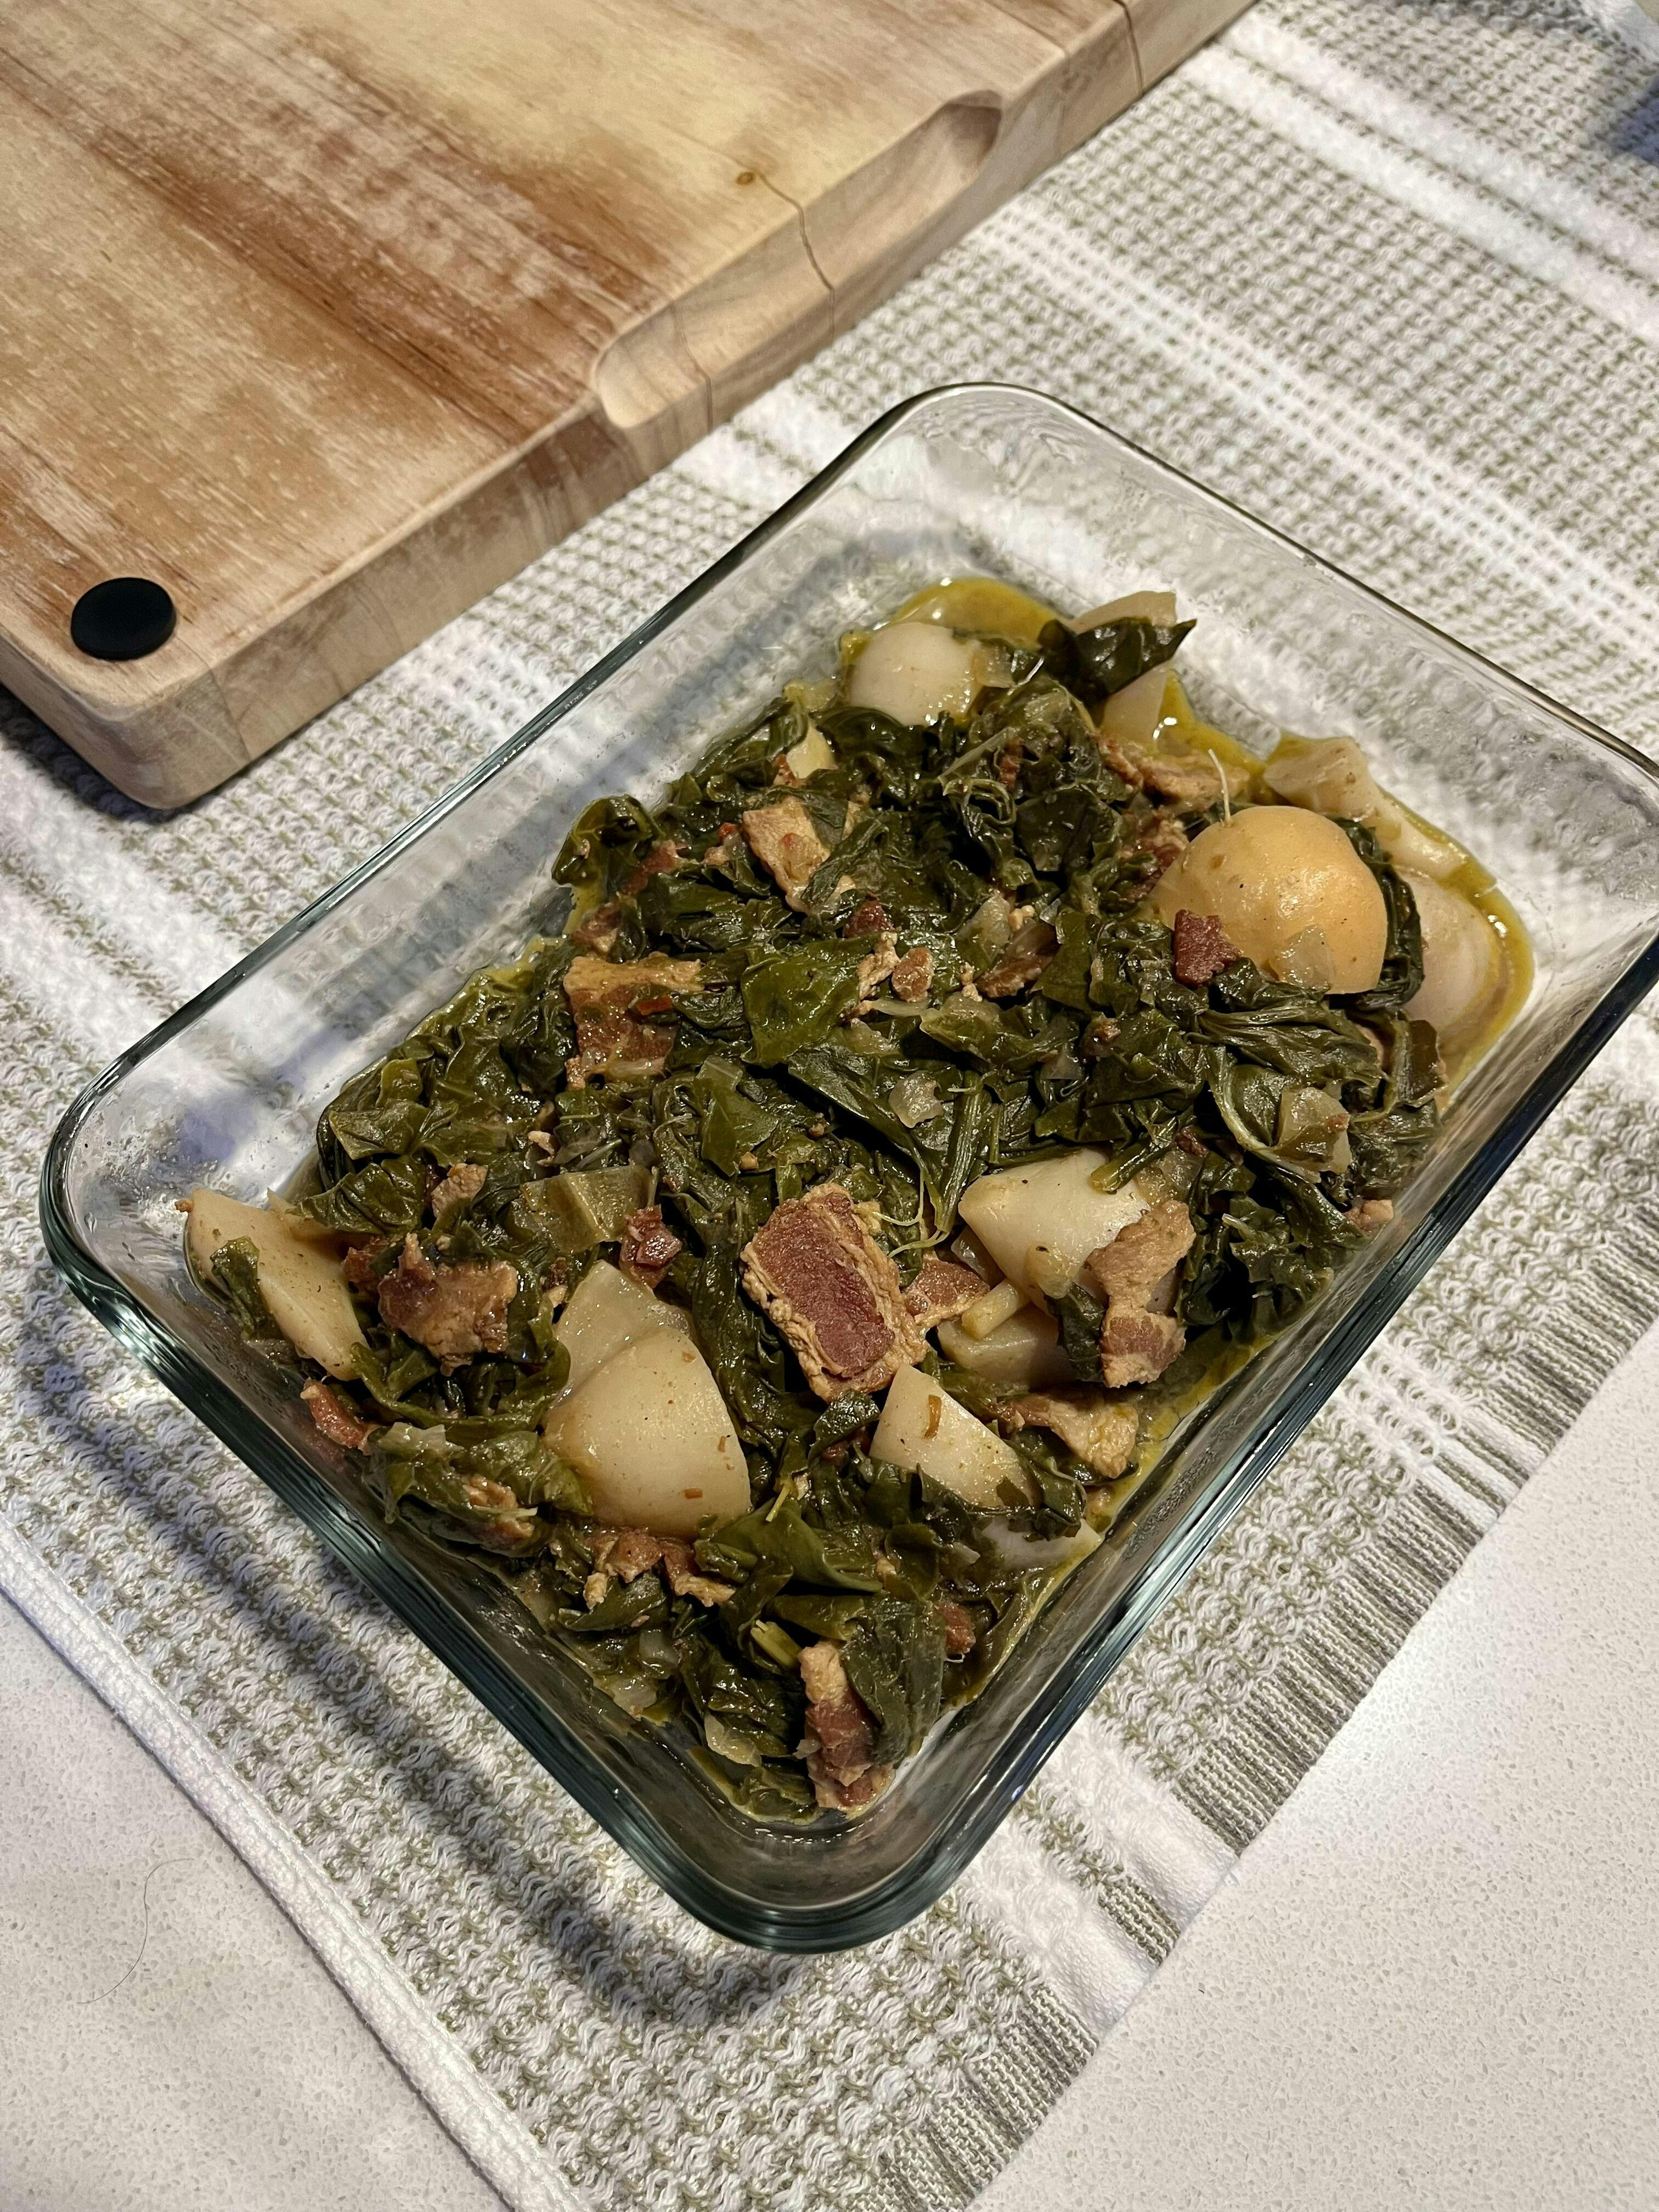
These were fast to mature and really tasty. I am new to gardening and didn’t thin my seedlings well enough so many of them did not produce much of a root but that’s okay because we definitely got to use the greens! Photos are of the turnips from the garden to my kitchen and the dish we made with them. Some turnips in the photo are not the purple top variety but overall I think the purple top got larger than the others I planted.
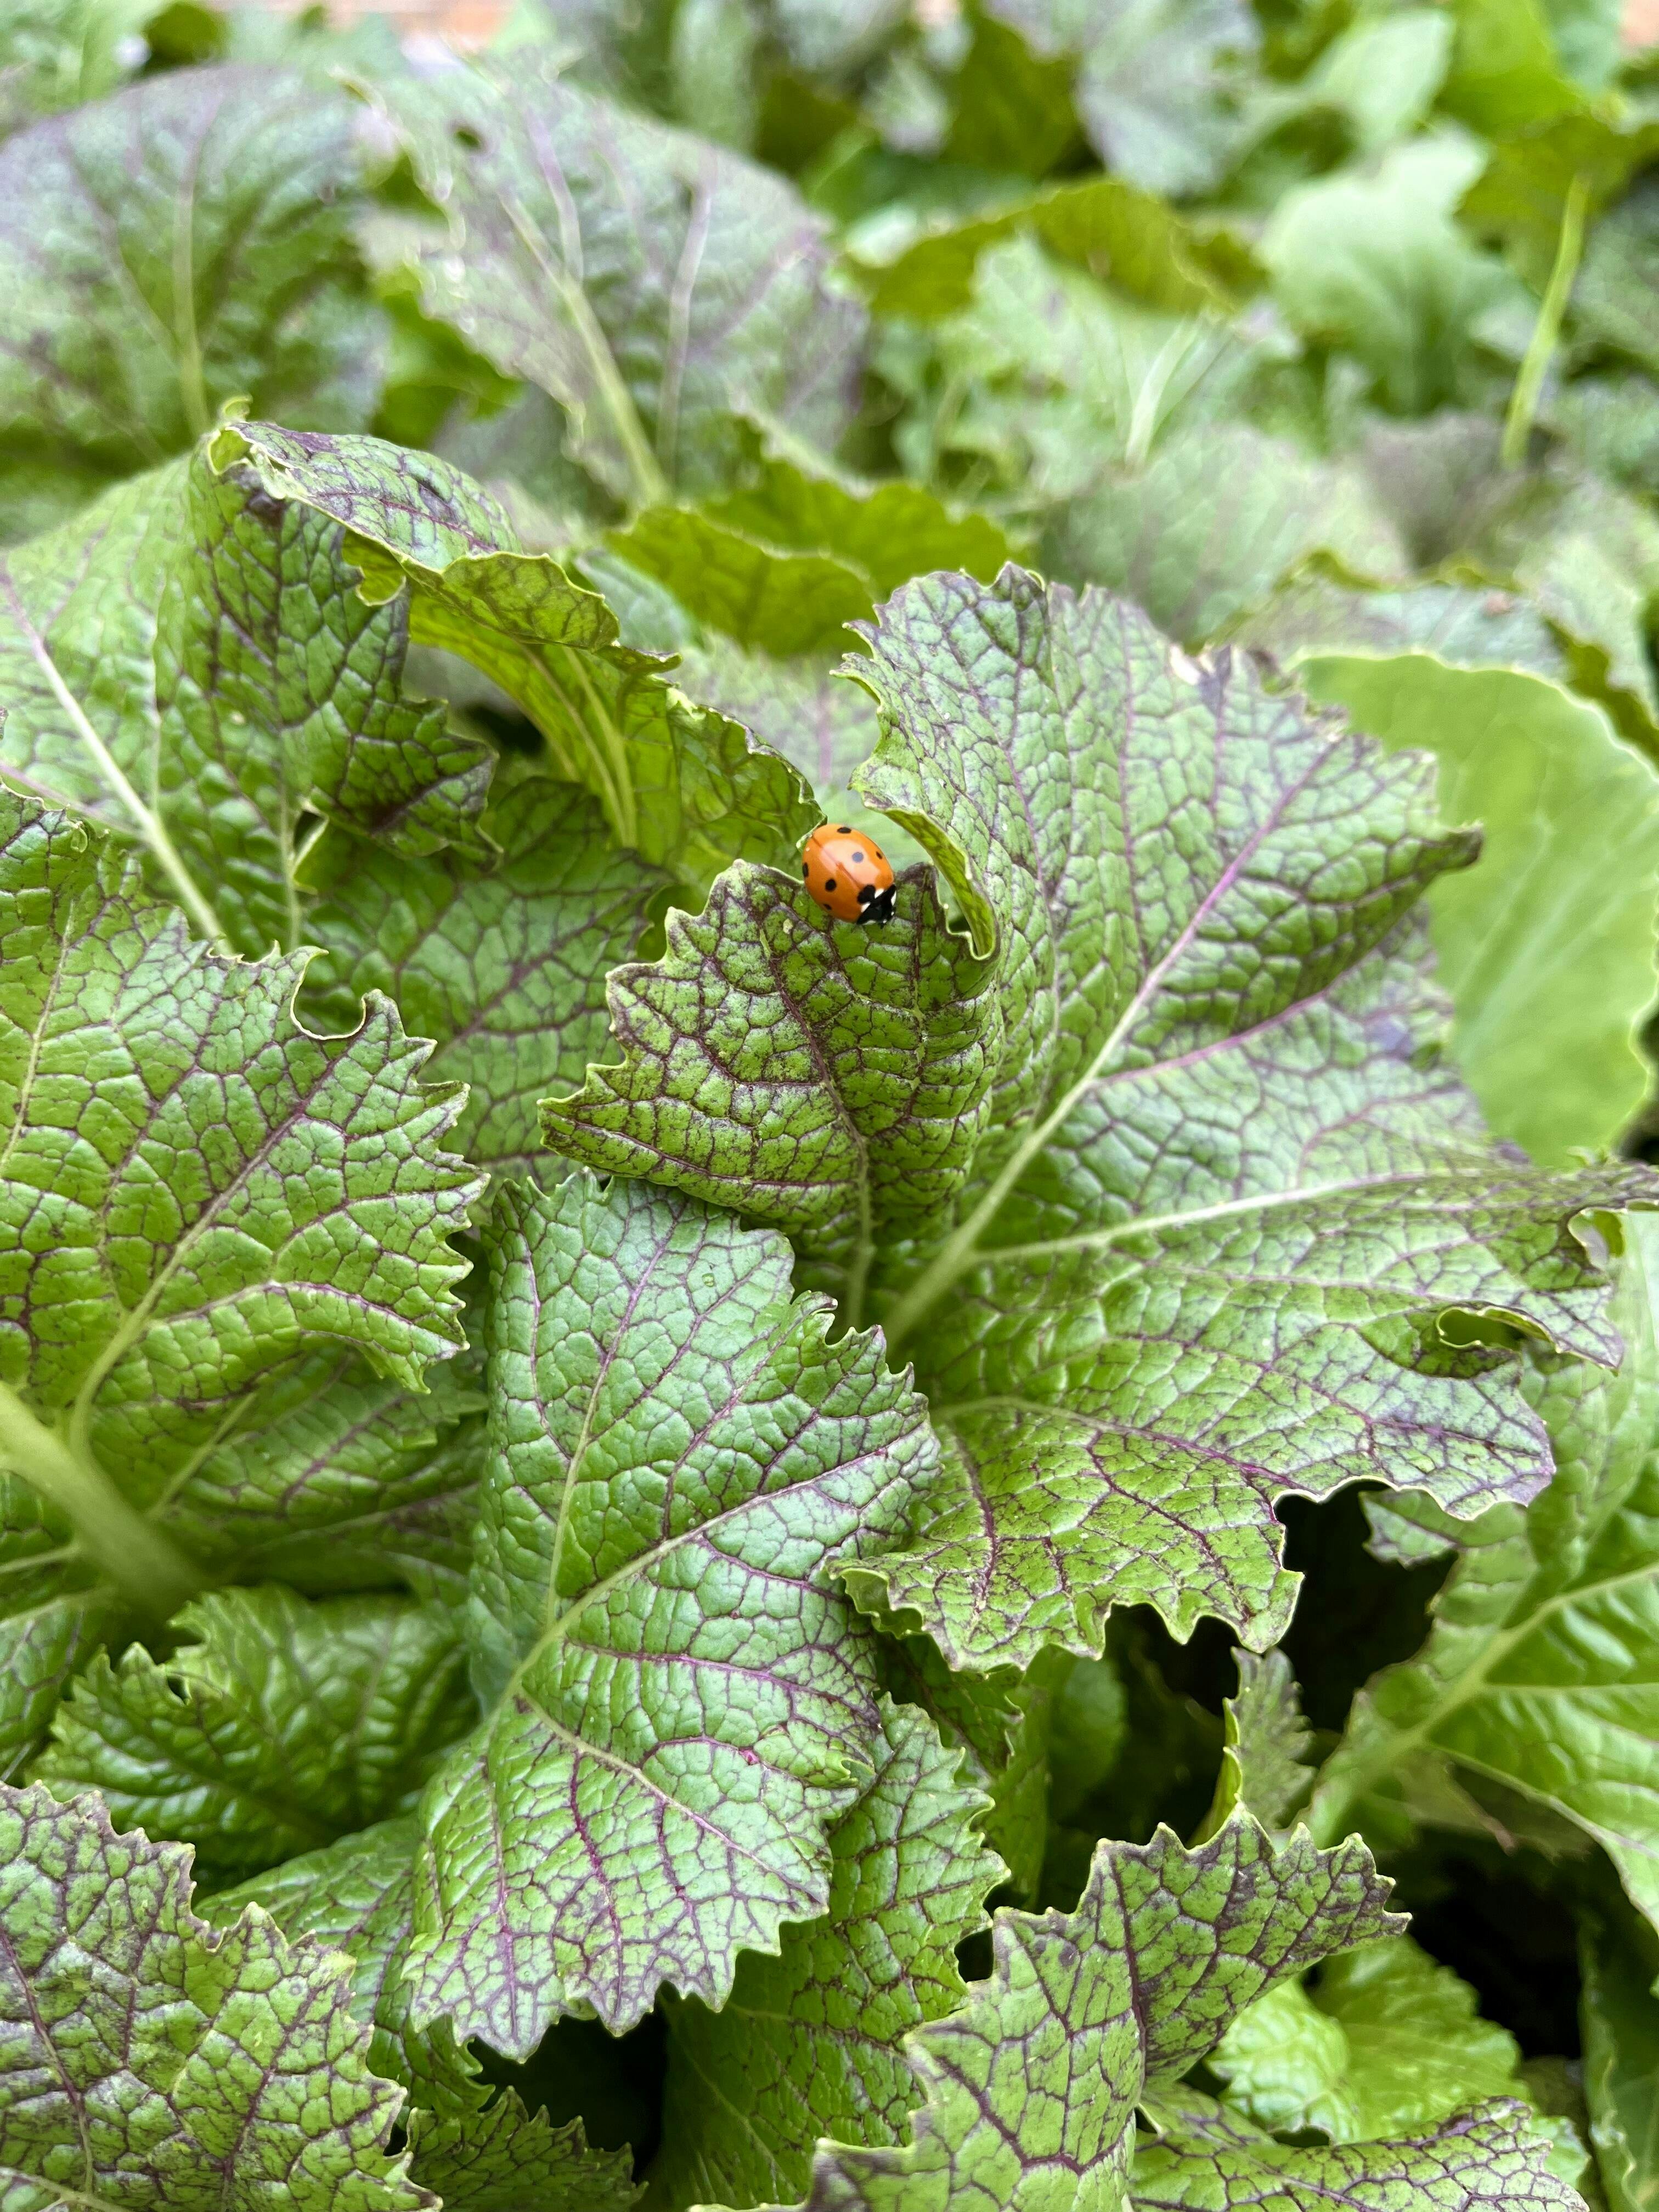
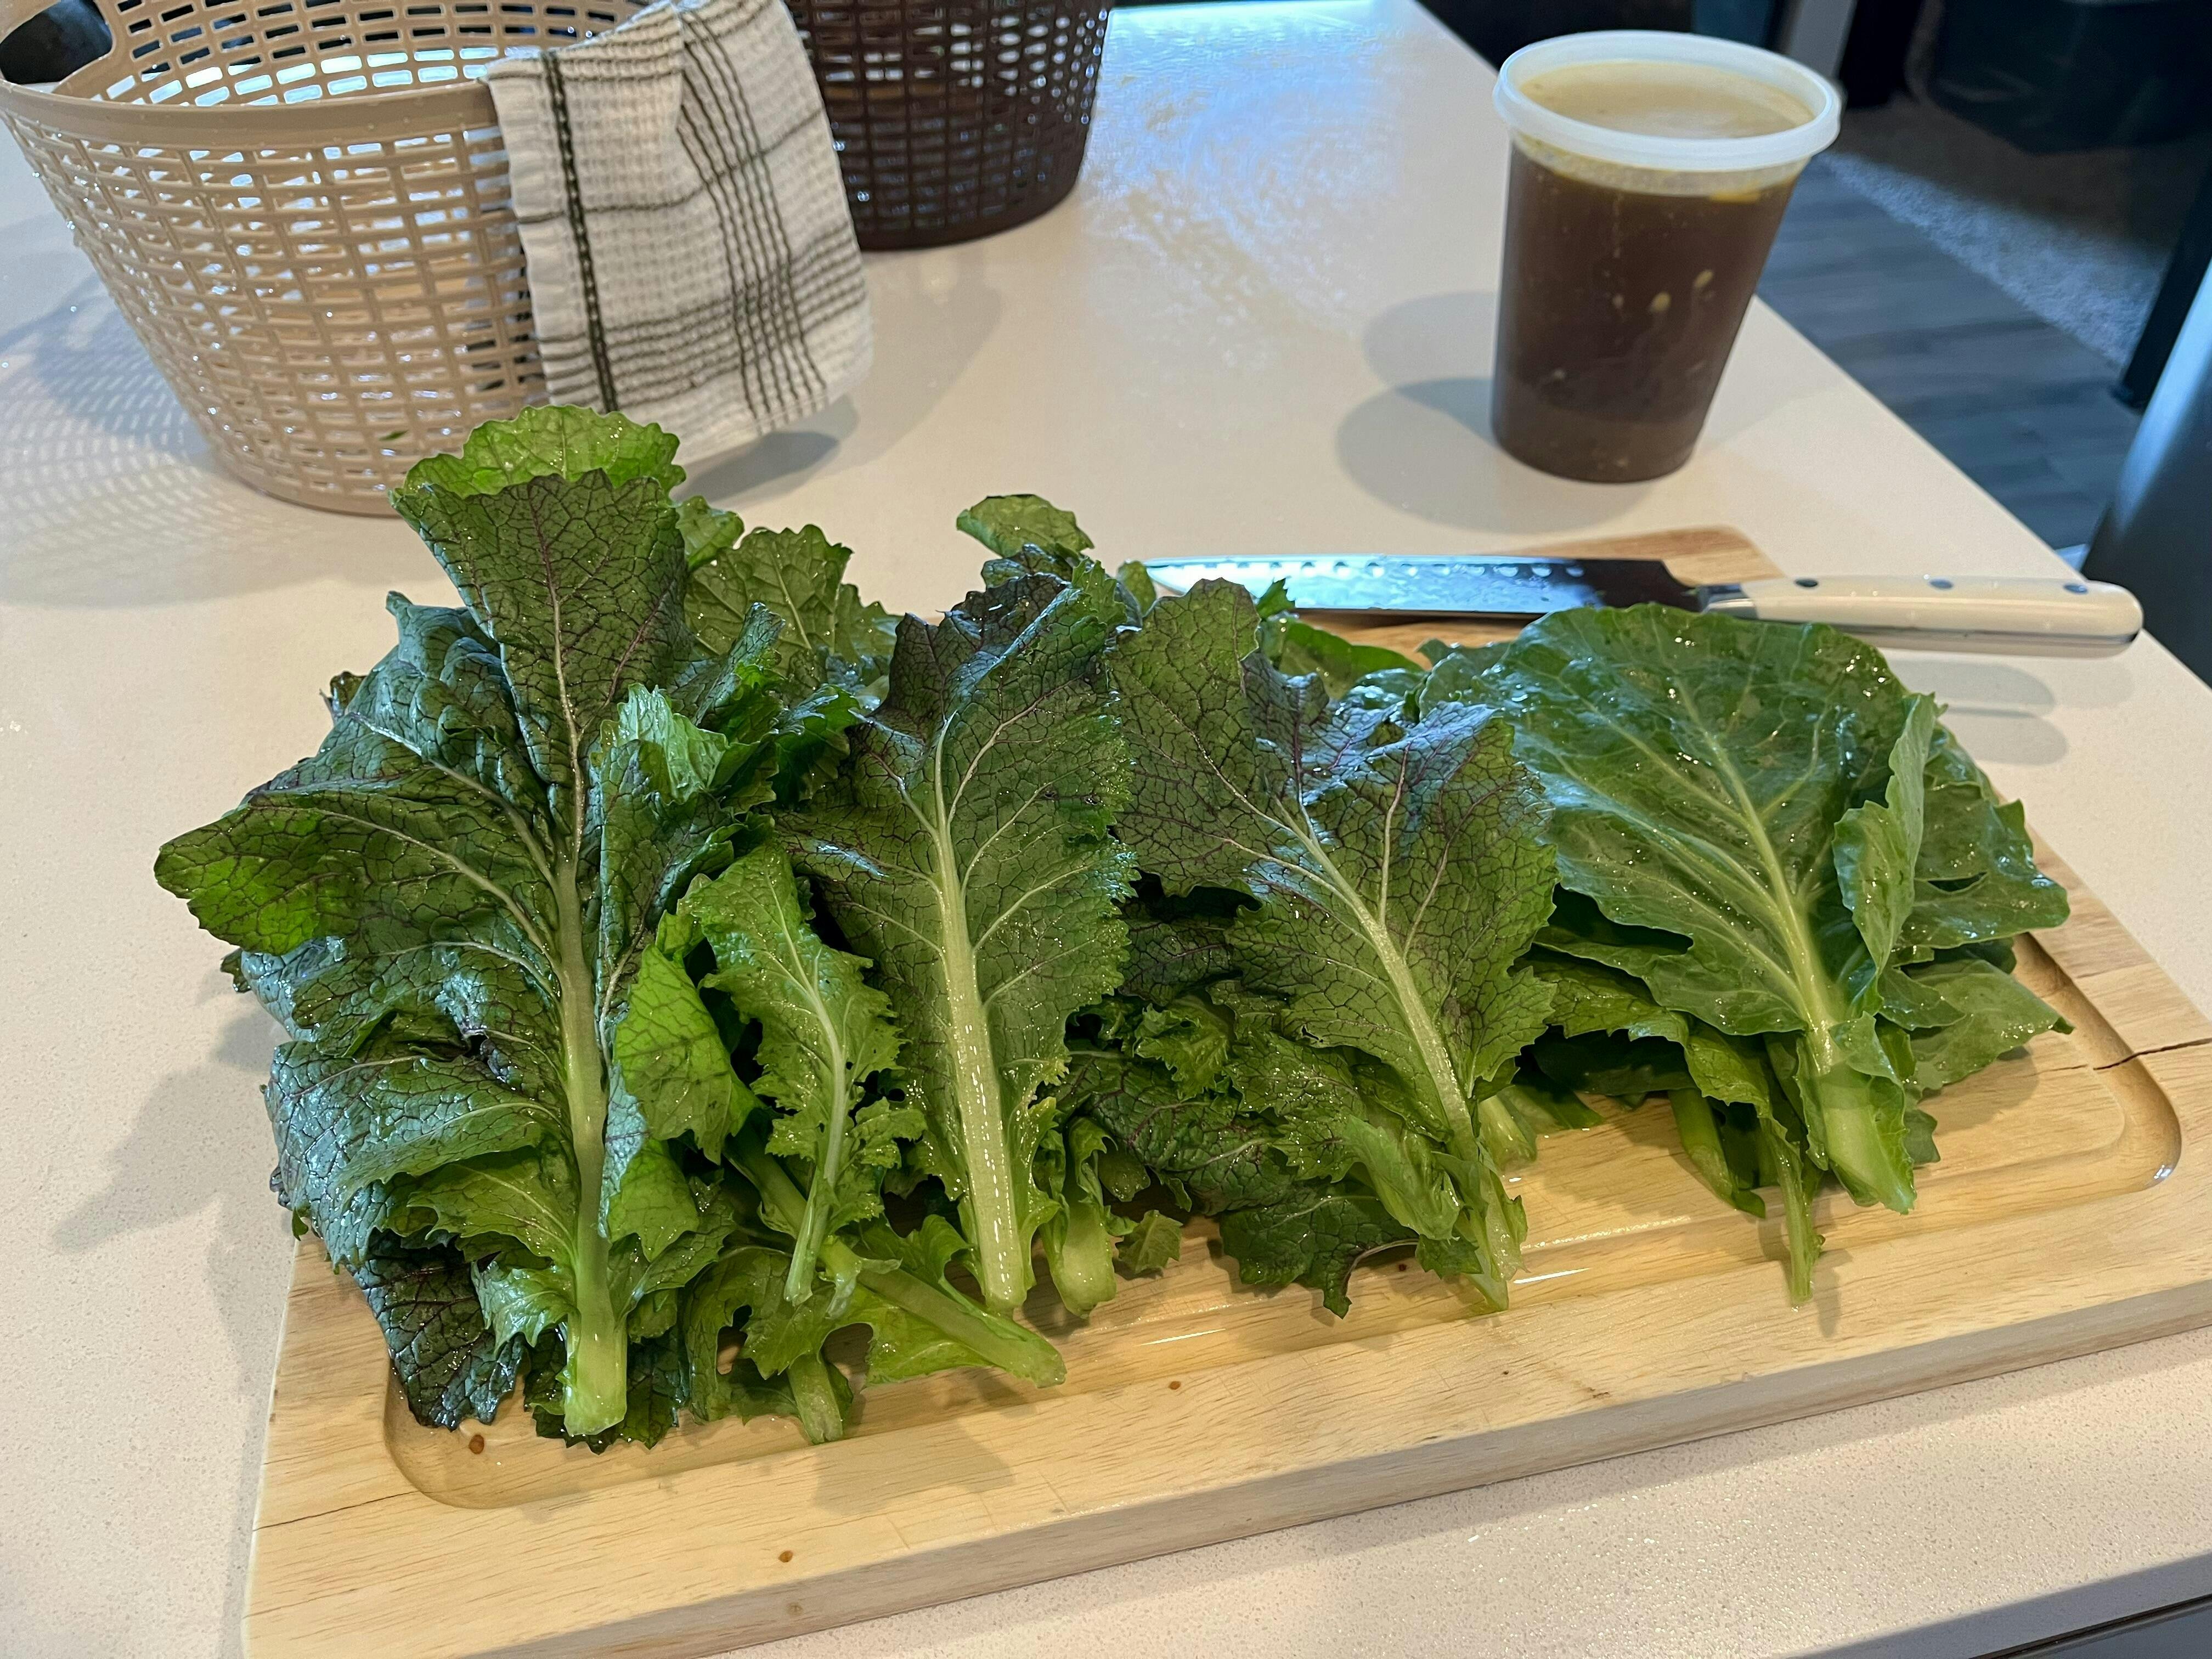
This was the first time I have grown greens of any kind and it was a success! The plants are beautiful with the purple veins. I over crowded my raised bed with these accidentally but they still did really well. I started seeds indoors and had a hard time germinating (due to my own fault being new to seed starting) but still planted what I had outside when the time came. I was surprised when I saw the seeds that didn’t germinate indoors started coming up shortly after being outdoors. That’s how I ended up overcrowding my raised bed but on the plus side I now have a ton of healthy great tasting food in my backyard. Photos are of the greens from my garden to my kitchen.
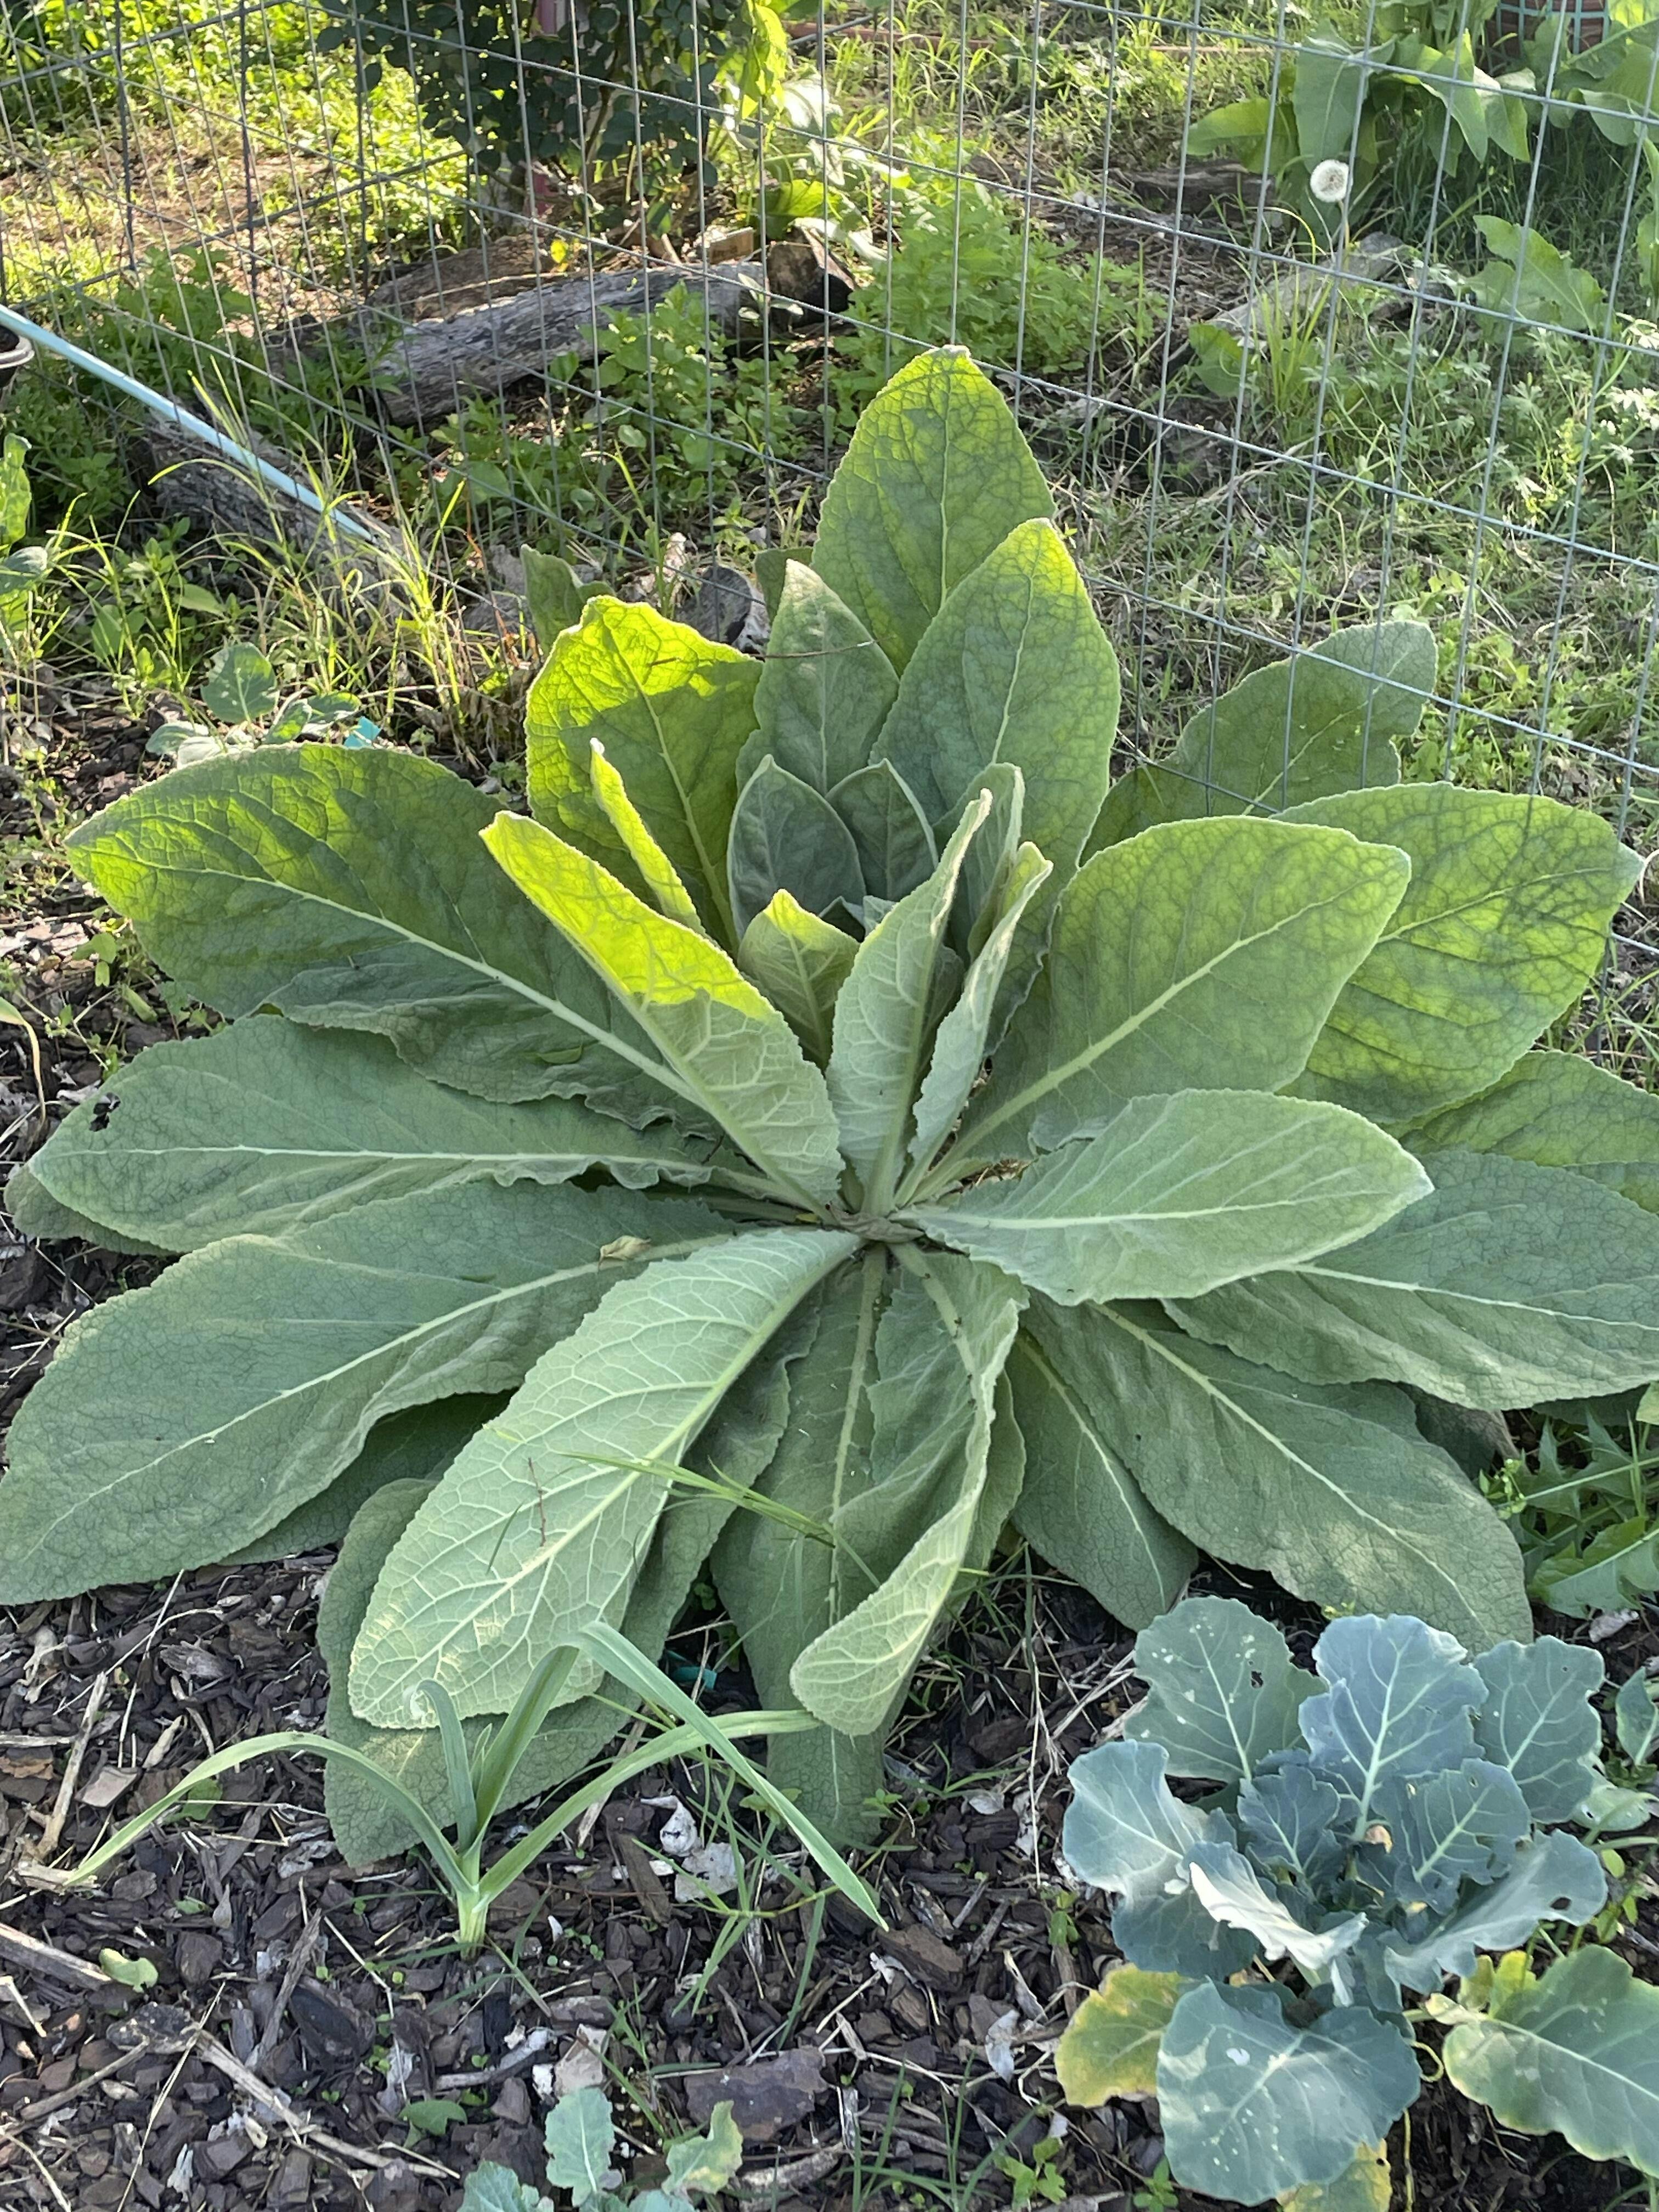
This is my favorite plant in my garden right now. I started my seeds last winter (2022) and planted in spring 2023. My mullein survived the insane high temperatures over summer and was a refreshing pop of green all winter. I am eagerly awaiting the flower!
These are so much fun. They sell out fast and I try to get at least 1 every year. Last year I was lucky enough to grab 2. I love trying new things and these are a mixture of flower, herbs, and vegetable. One of my favorite carrots came from here. It’s one of three that I grow every year because it’s fun!
When I bought these I had the intention of testing Mary’s seed Garlic with the sprouting store bought garlic from my fridge. I will be doing another review later after I harvest and I’ll post a picture then. So planted these in raised beds. Both in full sun and planted in different beds. I did the exact same thing to both. My store bought sprouted garlic all died. My Mary’s is still alive and forming it’s bulbs. This was just too good not share!