Gophers!!! Welcome to Day 6 of our series Grow Your Own food in 100 Days or Less at Mary's Heirloom Seeds On our homestead, we grow 100% of our gardens in raised beds and containers because of the horrible gopher problem. We have natural predators such as hawks, coyotes, cats and owls but they're still abundant. Our neighbors use non-poisonous traps as well. This morning when I went out to water I saw a few scratches in the bed from gophers. Even with gopher wire UNDER the bed, they're trying to get in from the top of the bed. Here's our video update for Day 6
Using Cayenne Pepper in the Garden Many garden pests like gophers do not like strong smells or spicy stuff. There are 2 easy ways to add cayenne pepper to the garden. The first is a spray. We've posted this recipe before in our article Organic Pest Control Part 2: Recipes
Chop, grind, or liquefy one garlic bulb and one small onion.
Add 1 teaspoon of powdered cayenne pepper and mix with 1 quart of water.
Steep 1 hour, strain through cheesecloth, then add 1 tablespoon of liquid dish soap (I use Organic Dr. Bronner's) to the strained liquid; mix well.
Spray your plants thoroughly, including leaf undersides.
Store the mixture for up to 1 week in a labeled, covered container in the refrigerator.
As we have said in previous articles:
Be careful of where and how you use these recipes. Even organic pest control options can work on "good bugs" as well as "bad bugs."
I think I might be planting Luffa in our garden this weekend!
Today we are using a simpler method, cayenne pepper and food grade diatomaceous earth. As we have mentioned numerous times, these pest control options can harm some beneficial insects so it it VERY important to use sparingly and in the right conditions. Do not use food grade diatomaceous earth on flowers, flowering plants or in windy conditions. Do not breathe in cayenne pepper or food grade DE.
For Day 6 we applied approximately 1/2 cup of food grade diatomaceous earth and less than 1/4 cup of organic cayenne pepper powder. Mix the ingredients and apply to the soil around the inside of the bed.
Stay tuned for more info on growing your own food!
Thank you for joining us for another day of Grow Your Own Food in 100 Days or Less. If you have additional questions please send an email to mary@marysheirloomseeds.com Happy Planting!
Welcome to Day 5 of our series Grow Your Own Food in 100 Days or Less. WE HAVE GERMINATION!
Actually, we had germination of the Early Scarlet Globe radish on Day 4 (3 days to germinate) but I'm sharing the update today. Here's our video update for the day. Today topic is Basic Nutrient Requirements to Grow Veggies
Basic Nutrient Requirements to Grow Veggies Well-balanced soil in the vegetable garden will contain a mix of several important nutrients: nitrogen, phosphorus, and potassium. I call those the basics. However, there are 12 essential nutrients that all plants require to grow. Six of these are needed in larger amounts and are called macronutrients. These include Nitrogen (N), Phosphorus (P), Calcium (K), Calcium (Ca), Magnesium (Mg) and Sulfur (S). The other six are called micronutrients and they are iron, copper, zinc, boron, manganese and molybdenum. While these are considered minor, there is nothing unimportant about them. From an older post "Feeding Your Plants"
What does each nutrient do?
In addition to other properties, Nitrogen helps plant foliage to grow strong. Phosphorous helps roots and flowers grow and develop. Potassium (Potash) is important for overall plant health.
We've grown HUGE, organic zucchini using our own recipe for Liquid Fertilizer!
Liquid Fertilizers are favored by most gardeners, regardless of what they are growing. We use our own DIY Liquid Fertilizer mix.Most liquid fertilizers can be applied as a foliar feeding directly to the leaves, hand applied to secondary roots, and included in the water supply of drip or other irrigation systems. Aside from cost(and it is not that much), liquid fertilizers have almost no downside. They include all the macronutrients and micronutrients needed for good growth. In addition, because they are in a water soluble state, they can easily be absorbed by the plant. Here's our video for our DIY Organic Liquid Fertilizer recipe
What do the Macronutrients do for plants? Nitrogen (N) Nitrogen is the fuel that makes plants go. It’s used to synthesize amino acids, proteins, chlorophyll, nucleic acids, and enzymes. Plants need more nitrogen than any other element. It’s the nutrient we most often have to apply. Compost and manure are "free" ways to add nitrogen to your soil Phosphorus (P) Phosphorus is the nutrient responsible for plant rooting, flowering and fruiting. Bone meal is one form of Phosporus that can be added to your garden soil. Potassium (K) Potassium is important to plant growth and development. Potassium helps: Plants grow faster, Use water better and be more drought resistant, Fight off disease, Grow stronger and even Produce more crops Calcium (Ca) Calcium helps to retain and transport other nutrients by providing strength and structure through its cell walls. Oyster Shell is an easy option to add to your soil to increase calcium Magnesium (Mg) Helps activate plants enzymes and part of chlorophyll and photosynthesis. Magnesium works in conjunction with calcium
Sulfur (S)
Sulfur is essential for the production of protein and chlorophyll.
Thank you for joining us for another day of Grow Your Own Food in 100 Days or Less. If you have additional questions please send an email to mary@marysheirloomseeds.com Happy Planting!
Day 3 of our Series Grow Your Own Food in 100 Days or Less is underway!
Water is an important aspect of any veggies garden. Whether you're using coconut coir pellets, containers, growing in ground or in raised beds, it is very important to water the garden.
University of California recommends:
"For vegetables in the summer, we recommend applying about 1 inch of water over the surface area of the garden bed per week. That is equivalent to 0.623 gallons per sq ft."
Layout your vegetable garden so that plants with similar water requirements are grouped together. For example, cucumbers, zucchini, and squash all have similar water needs. Focus on vegetables that produce abundant crops like tomatoes, squash, peppers and eggplants.
Thank you for joining us for another day day of Grow Your Own Food in 100 Days or Less. If you have additional questions please send an email to mary@marysheirloomseeds.com
Thank you for joining us for Day 2 of our series Grow Your Own Food in 100 Days or Less at Mary's Heirloom Seeds. Yesterday we jumped in and planted seeds. On our homestead we already have quite a few established raised beds ready for planting. If you're just getting started you'll need to do a bit of planning first. Let's get planning! Here's our video to get you started on Day 2!
First decide if you're planting in the ground, in Raised Beds or in Containers. You can plant in a combination of the 3 if you have lots of garden space. In Ground Planting in the ground sometimes requires less "extras" if the soil is fertile. If you have hard clay or sandy soil you'll want to amend your soil with compost, manure and even coconut coir. Some people use a no-till method of planting and others prefer tilling the soil each season. Whichever you choose, find a spot for your garden and measure it out. Raised Beds Planting in Raised beds is a great way to avoid certain garden pests such as gophers, rabbits and squirrels. Raised beds also help keep out weeds and usually use less water. If you decide to plant in a raised beds, check out our tutorial to Build Your Own Raised Beds. You can purchase kits but building your own is usually less expensive. To FILL you're raised beds, If you're buying soil, you'll need to figure out how many cubic yards or dirt you'll need. *We always add nutrients, compost and "fluff" like coconut coir to our raised bed soil* Raised Bed Sizes in feet, at a height of of 12 inches with Soil Requirements 2x2 = 0.15 cu. yards 4x4 = 0.59 cu. yards 4x8 = 1.19 cu. yards Containers If you're limited on time, space and resources then container gardening is a great option. Be aware that containers tend to dry out much faster so you need to watch them closely. A few years ago we started a Bucket Garden Project to show how easy and inexpensive it is to grow using recycled buckets. You'll need "potting soil" instead of of "topsoil" and a well drained container. You can grow herbs in smaller containers and larger plants like squash and tomatoes in a 5 or 8 gallon container.
Heirloom Radish is an easy, fast maturing crop Plant Spacing Most plant spacing charts are just a guide. You can plant closer together or farther apart and experiment with what works. Especially if you are in a humid climate, air flow is very important to deter plant diseases like powdery mildew. We have to charts to help you map out your garden Plant Spacing Chart for Veggies Square Foot Garden Plant Spacing Chart
Plant What you Like Especially if you are limited on space, it is important to plant what you know you like or that your family will eat. If you intend to preserve or can some of your crops, plan ahead and plant more of those varieties. You might find our article Feeding a Family from the Garden useful in planning your garden.
I hope you enjoyed another educational article. If you have additional questions, please comment below or send an email to mary@marysheirloomseeds.com
Welcome to Mary's Heirloom Seeds "Grow Your Own Food in 100 Days or Less" In this series we will help you grow food using easy methods, simple instructions and hands-on tutorials. You will need seeds, soil, water and sun. If you are starting from scratch it is important to feed your plants. We'll explain about plant food in a future segment.
WHAT TO PLANT Deciding what to plant can sometimes be difficult because there are so many unique heirloom seed varieties to choose from. Pick veggies and herbs that you know you'll eat. If you plan on preserving your harvest, plan ahead and plant more of those varieties. WHEN TO PLANT We offer a Planting Guide on our Growing Tips and videos page as well as Mary's 2018 Planting Guide for the US. We update our planting guide on occasion with new regions Here's our video to help you get started with Day 1 of Growing Your Own Food in 100 Days or Less
For our first day, we're planting Early Scarlet Globe Radish and Royalty Purple Podded Beans. In our area we have gophers everywhere so all of our planting is done in raised beds and containers. If you don't have those issues you can grow in-ground. If you're interested in building your own beds, check out our tutorial "Build Your Own raised Beds & GROW" From our Plant Spacing Chart for Square Foot Gardens, plant 1 bean seed per square and up to 16 radish per square. Total Seeds used: Royalty Purple Podded Beans- 8 Early Scarlet Globe Radish - approx 128 That means we used less than a 1/2 a pack of beans and less than 2 packs of radish. Those 3 seed packs were a total cost of $2.97 for full packs and you still have more left over Radish should be planted 1/4 to 1/2 inch deep and will germinate in 4-10 days. Beans should be planted 1/2 in deep and will germinate in 7-10 days.
Picture above is a "square" in our garden bed with 16 holes for radish seeds. We used a piece of bamboo to make the holes
Growing food takes patience. Sometimes seeds take less time or more time to germinate. Peppers for example. Usually they germinate in 7-21 days but I have seen some take as many as 30 days or more. Soil should be kept moist but not flooded. If you're in an area that receives a lot of rain sometimes you don't have the option to keep your garden from flooding. If you have flooding issues, it might be a good idea to look into raised beds as these are easier to manage water-wise. Take notes! Especially if you're new to gardening, it is helpful to keep track of what you planted, where you planted, what you planted and when you fertilize. Plant markers are great and we use them but sometimes they get displaced (or gophers eat them).
If you are planting in a large area it would be helpful to map out your garden first, decide which varieties you'd like to plant and how much room they need prior to planting.
Thank you for joining us for our first day of Grow Your Own Food in 100 Days or Less. If you have additional questions please send an email to mary@marysheirloomseeds.com Happy Planting!
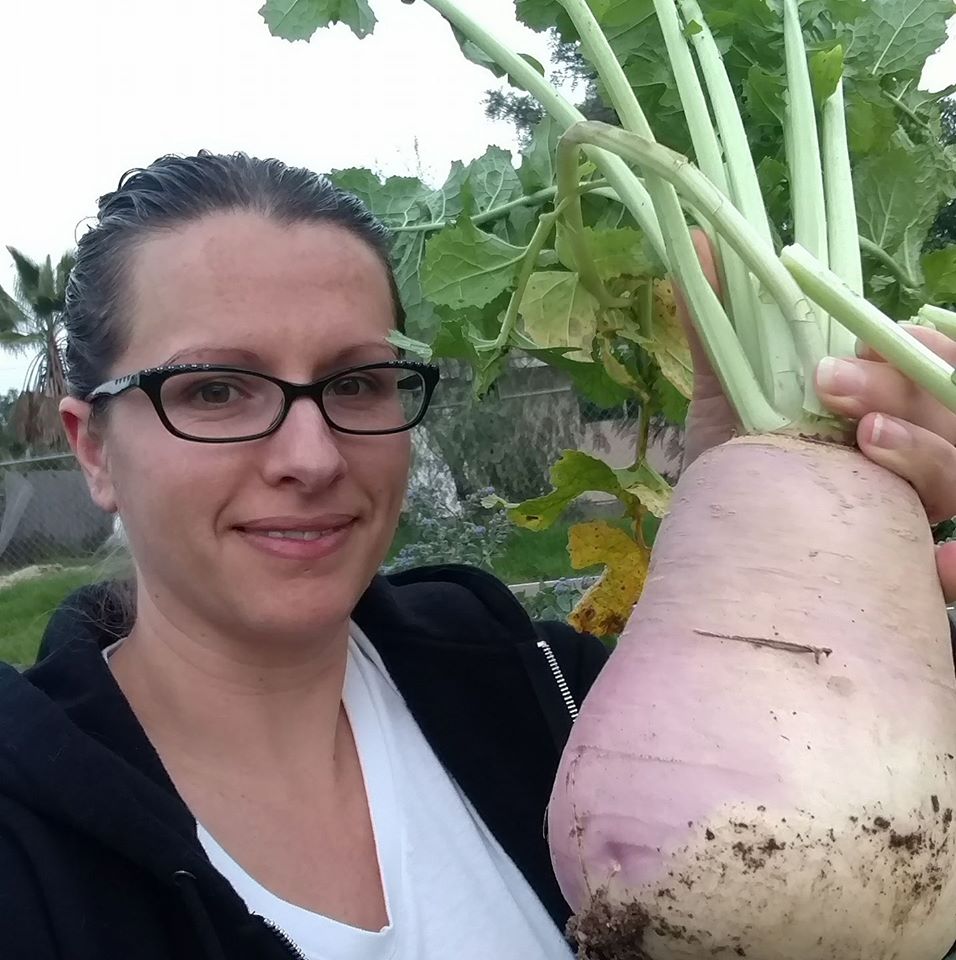
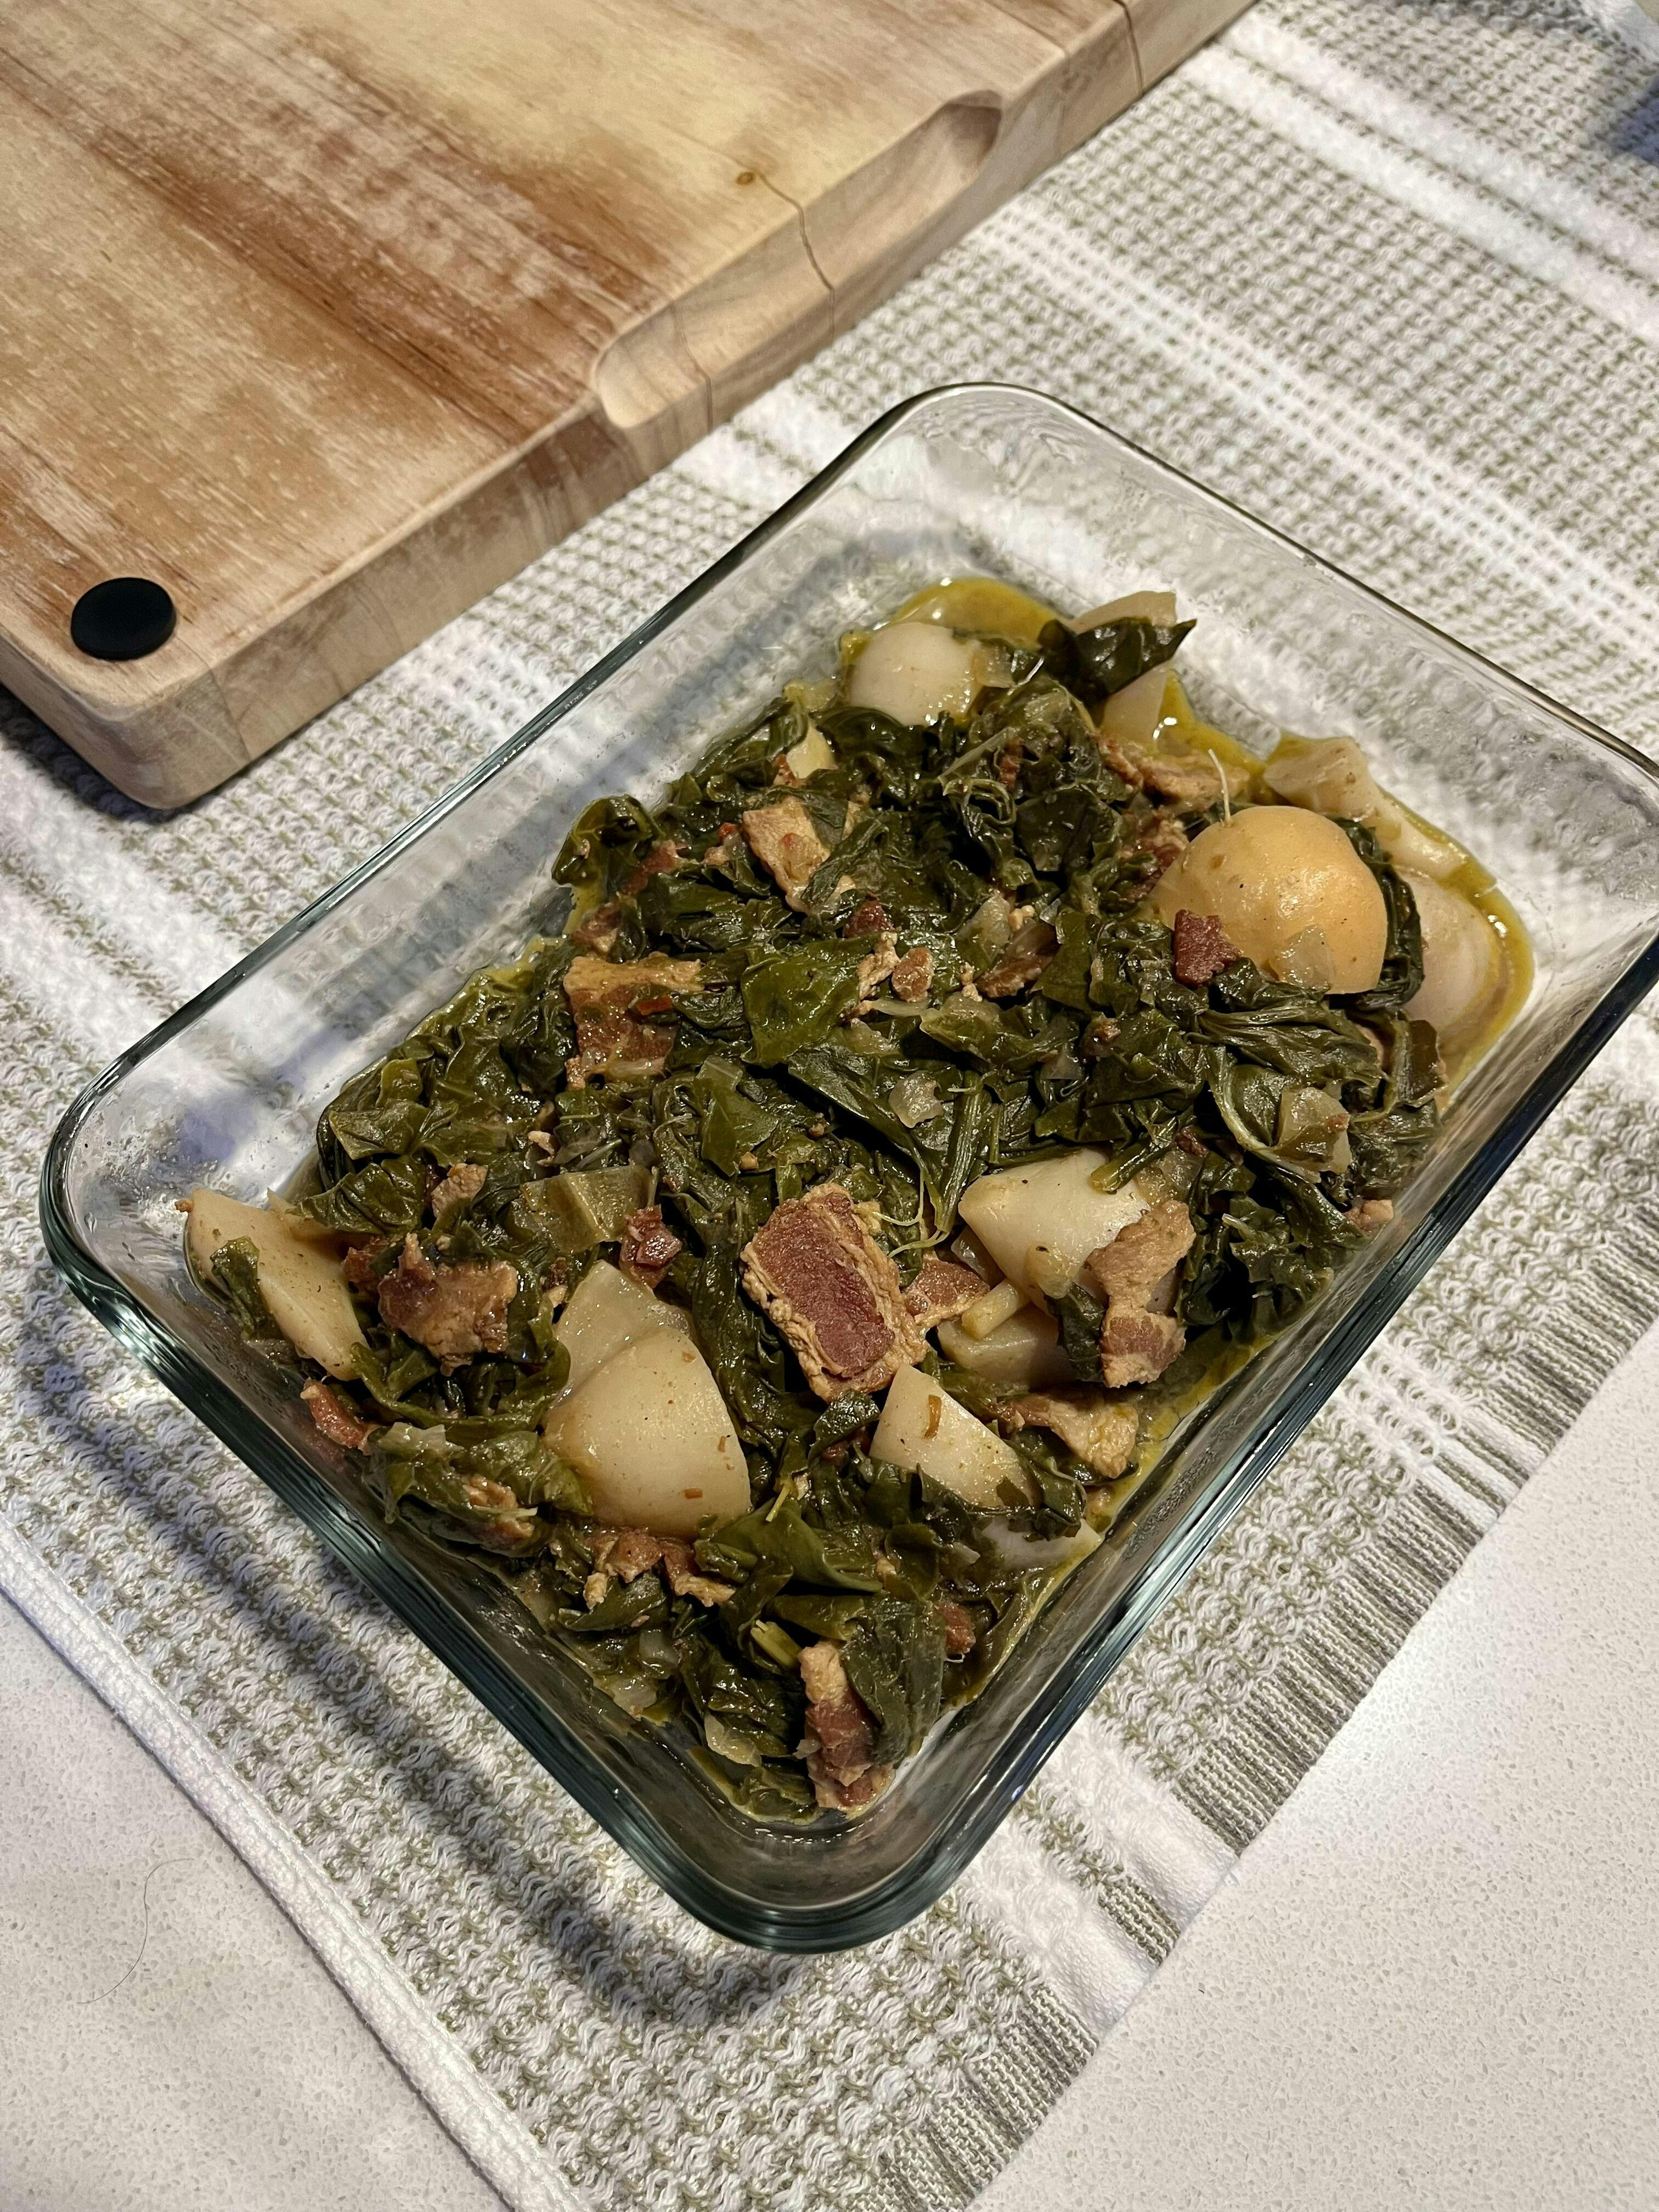
These were fast to mature and really tasty. I am new to gardening and didn’t thin my seedlings well enough so many of them did not produce much of a root but that’s okay because we definitely got to use the greens! Photos are of the turnips from the garden to my kitchen and the dish we made with them. Some turnips in the photo are not the purple top variety but overall I think the purple top got larger than the others I planted.
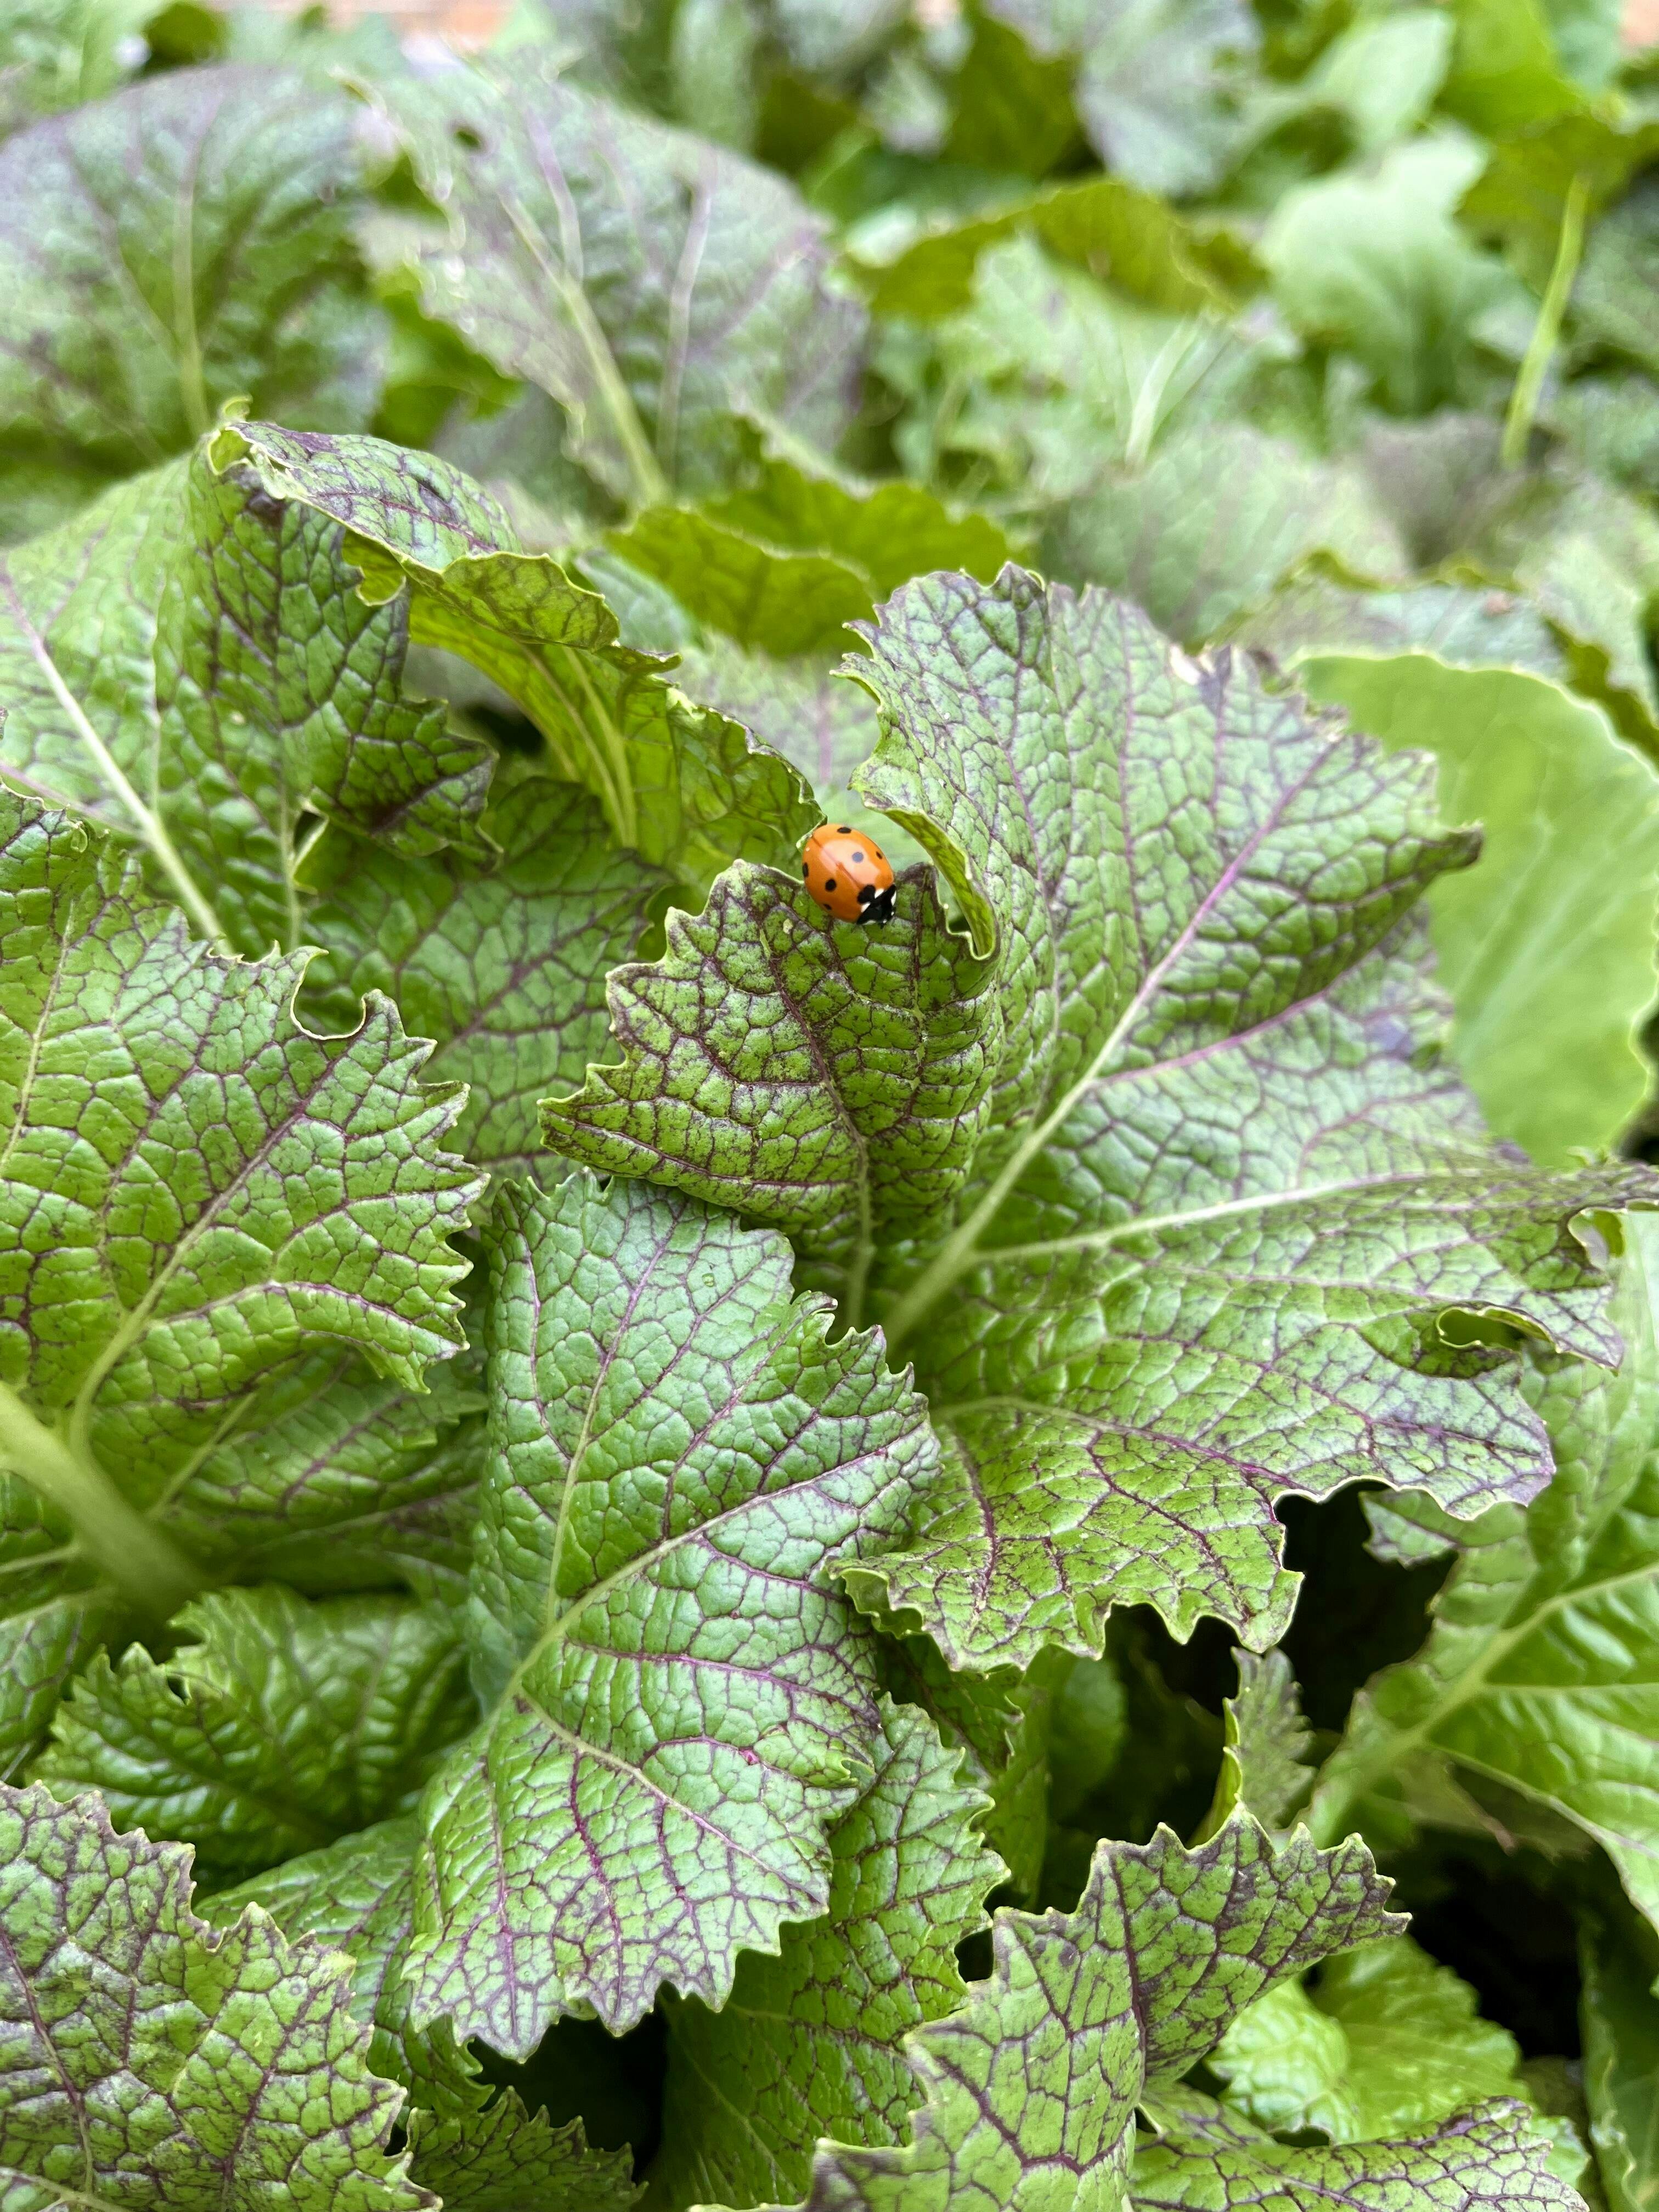
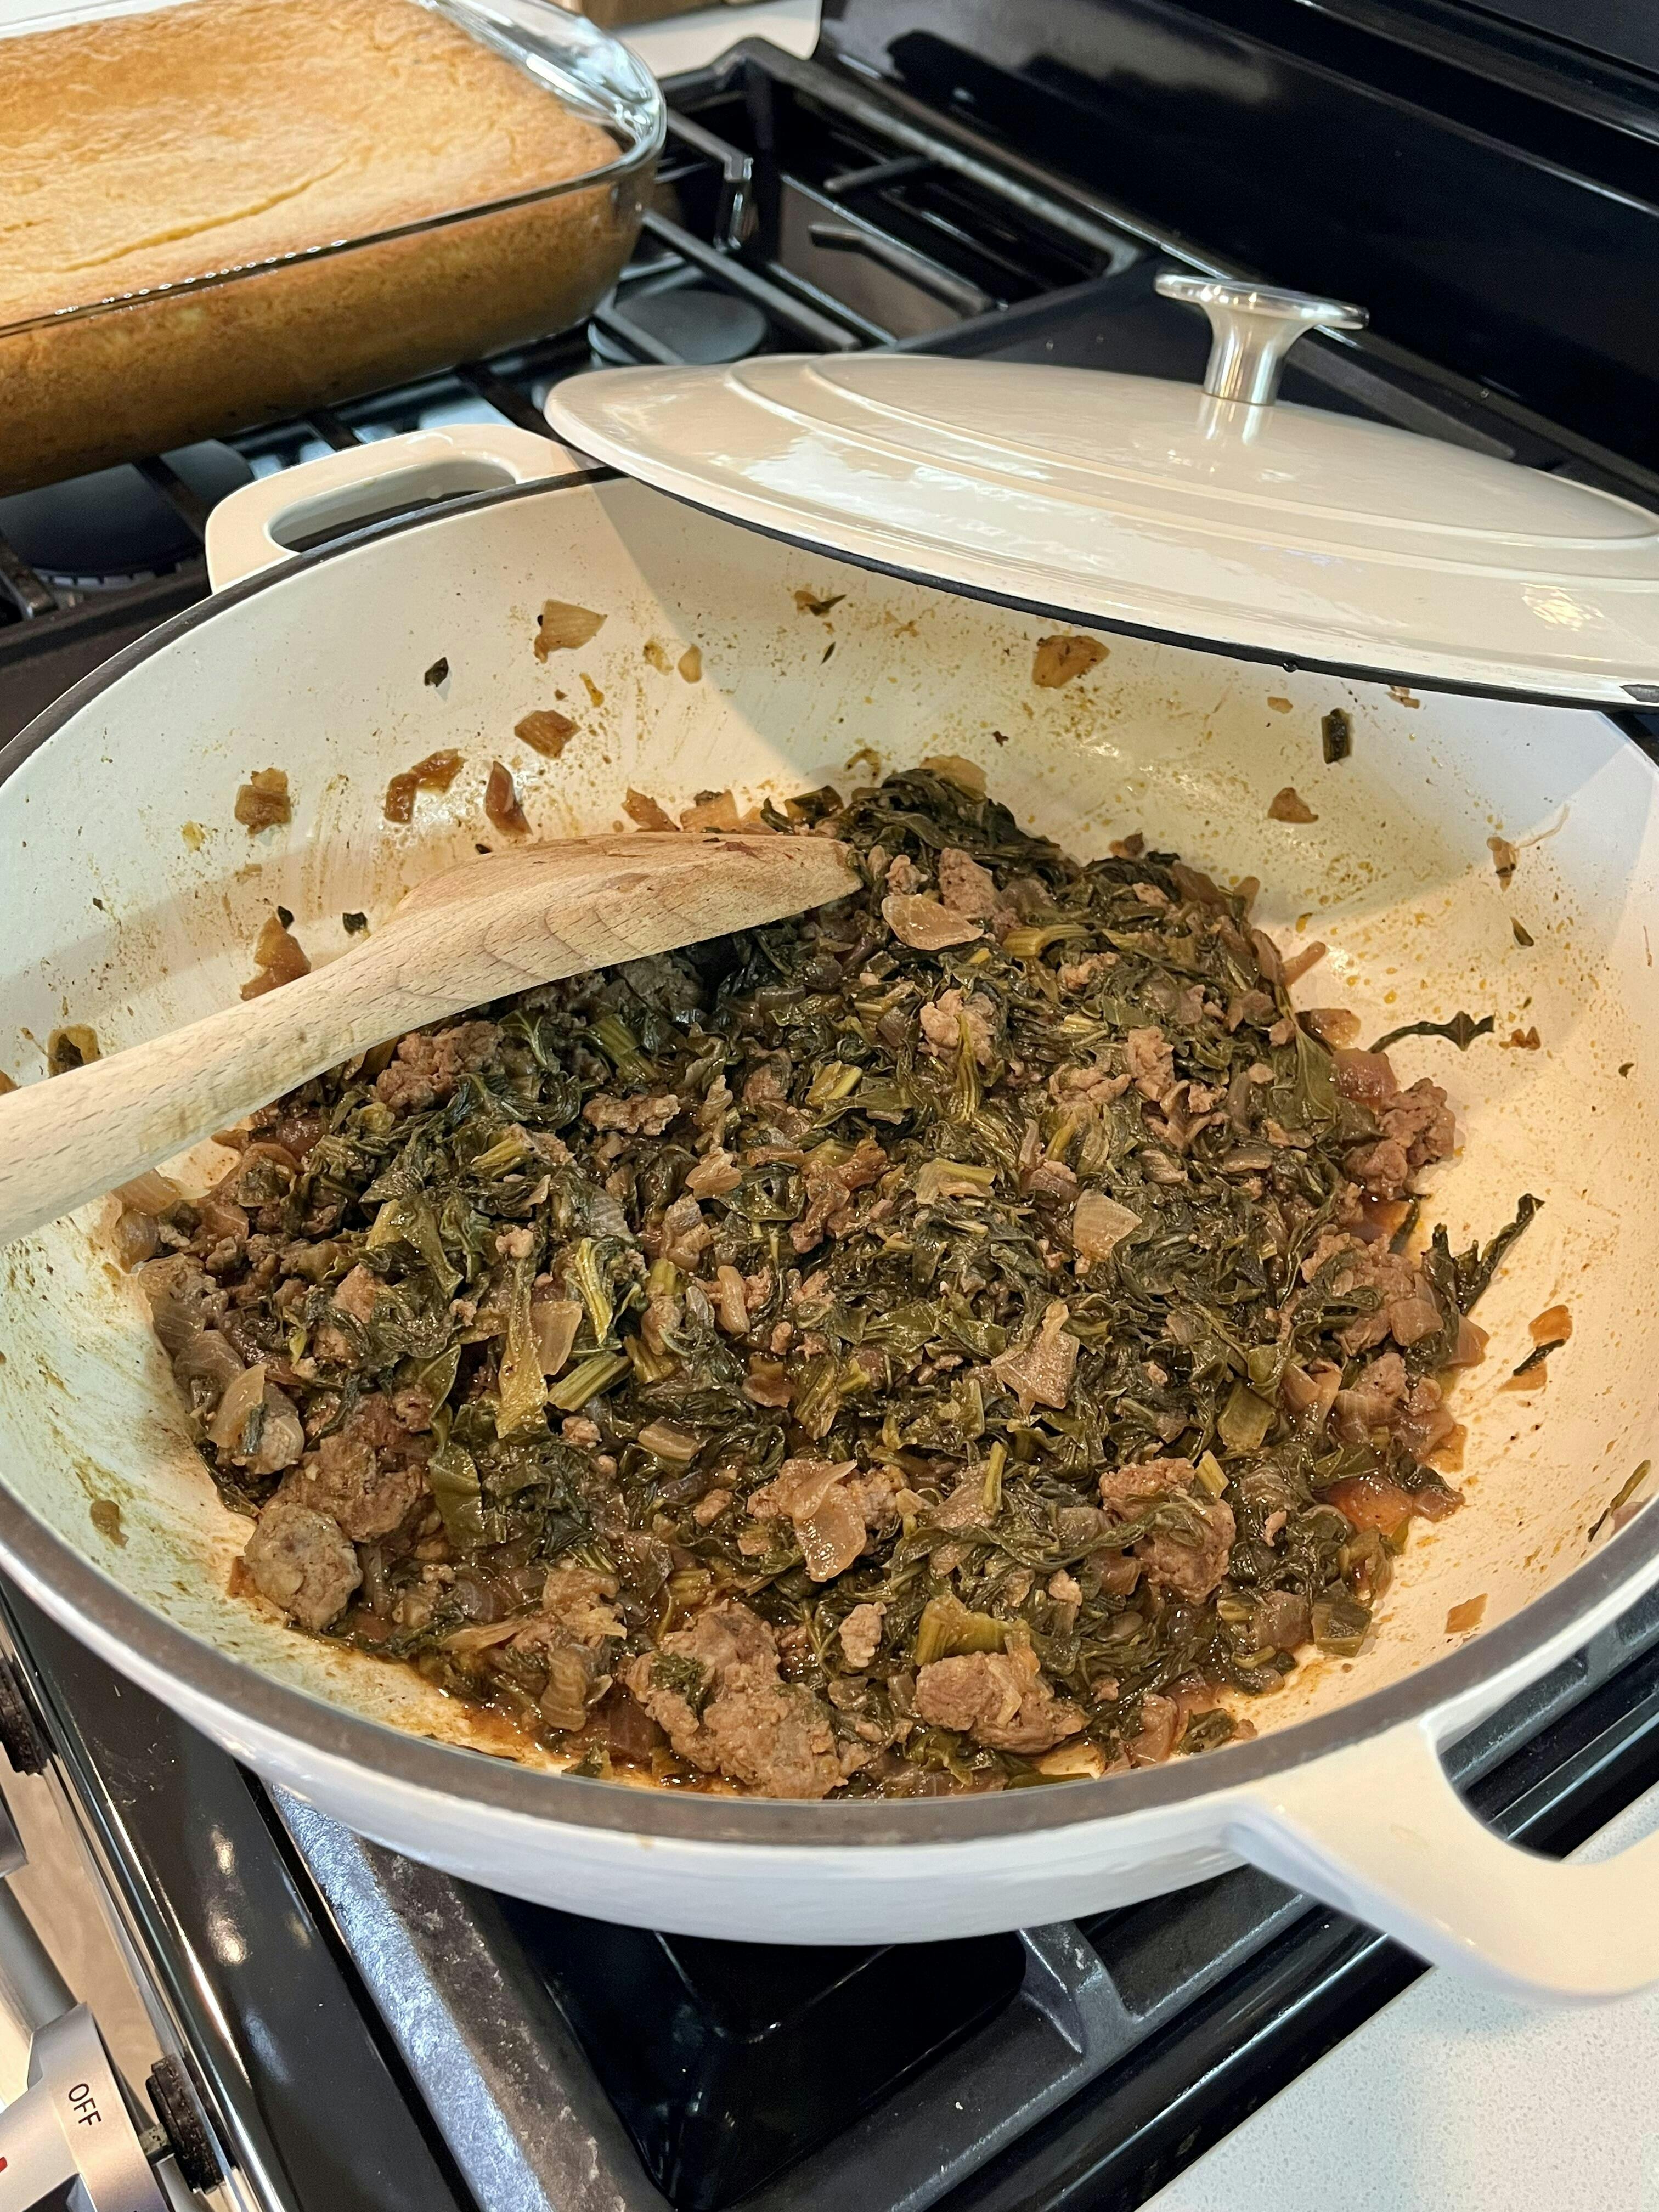
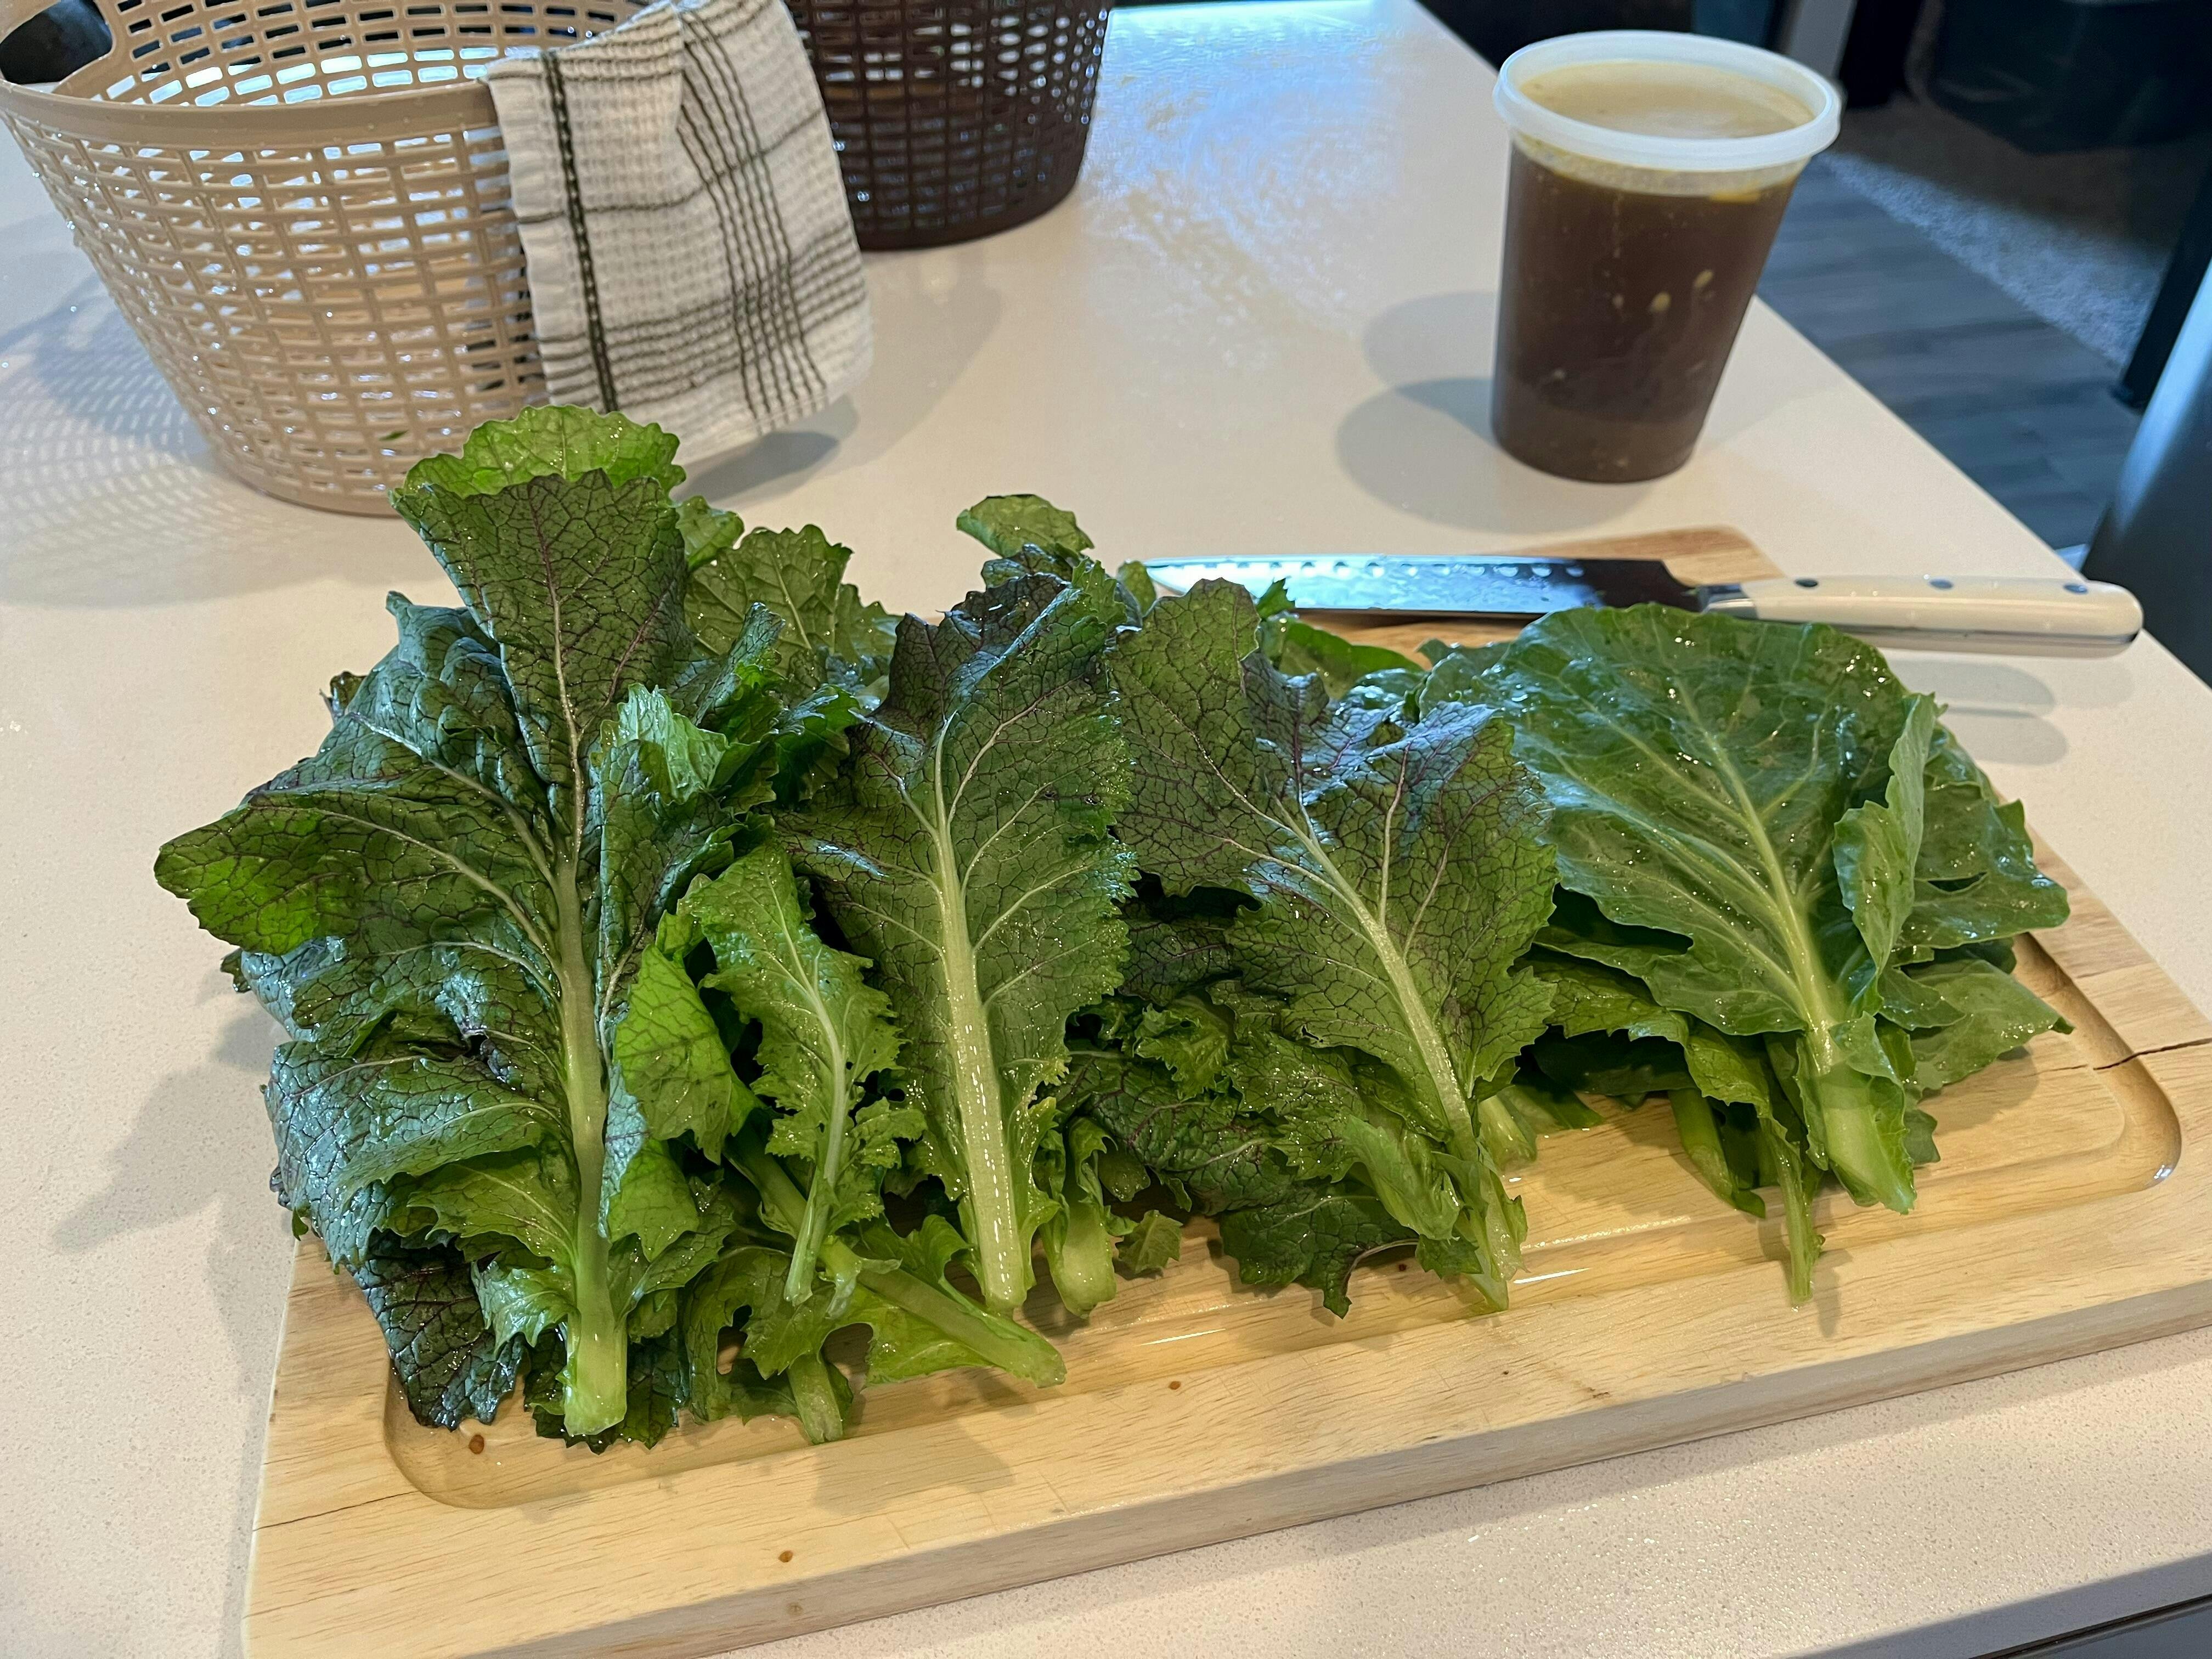
This was the first time I have grown greens of any kind and it was a success! The plants are beautiful with the purple veins. I over crowded my raised bed with these accidentally but they still did really well. I started seeds indoors and had a hard time germinating (due to my own fault being new to seed starting) but still planted what I had outside when the time came. I was surprised when I saw the seeds that didn’t germinate indoors started coming up shortly after being outdoors. That’s how I ended up overcrowding my raised bed but on the plus side I now have a ton of healthy great tasting food in my backyard. Photos are of the greens from my garden to my kitchen.
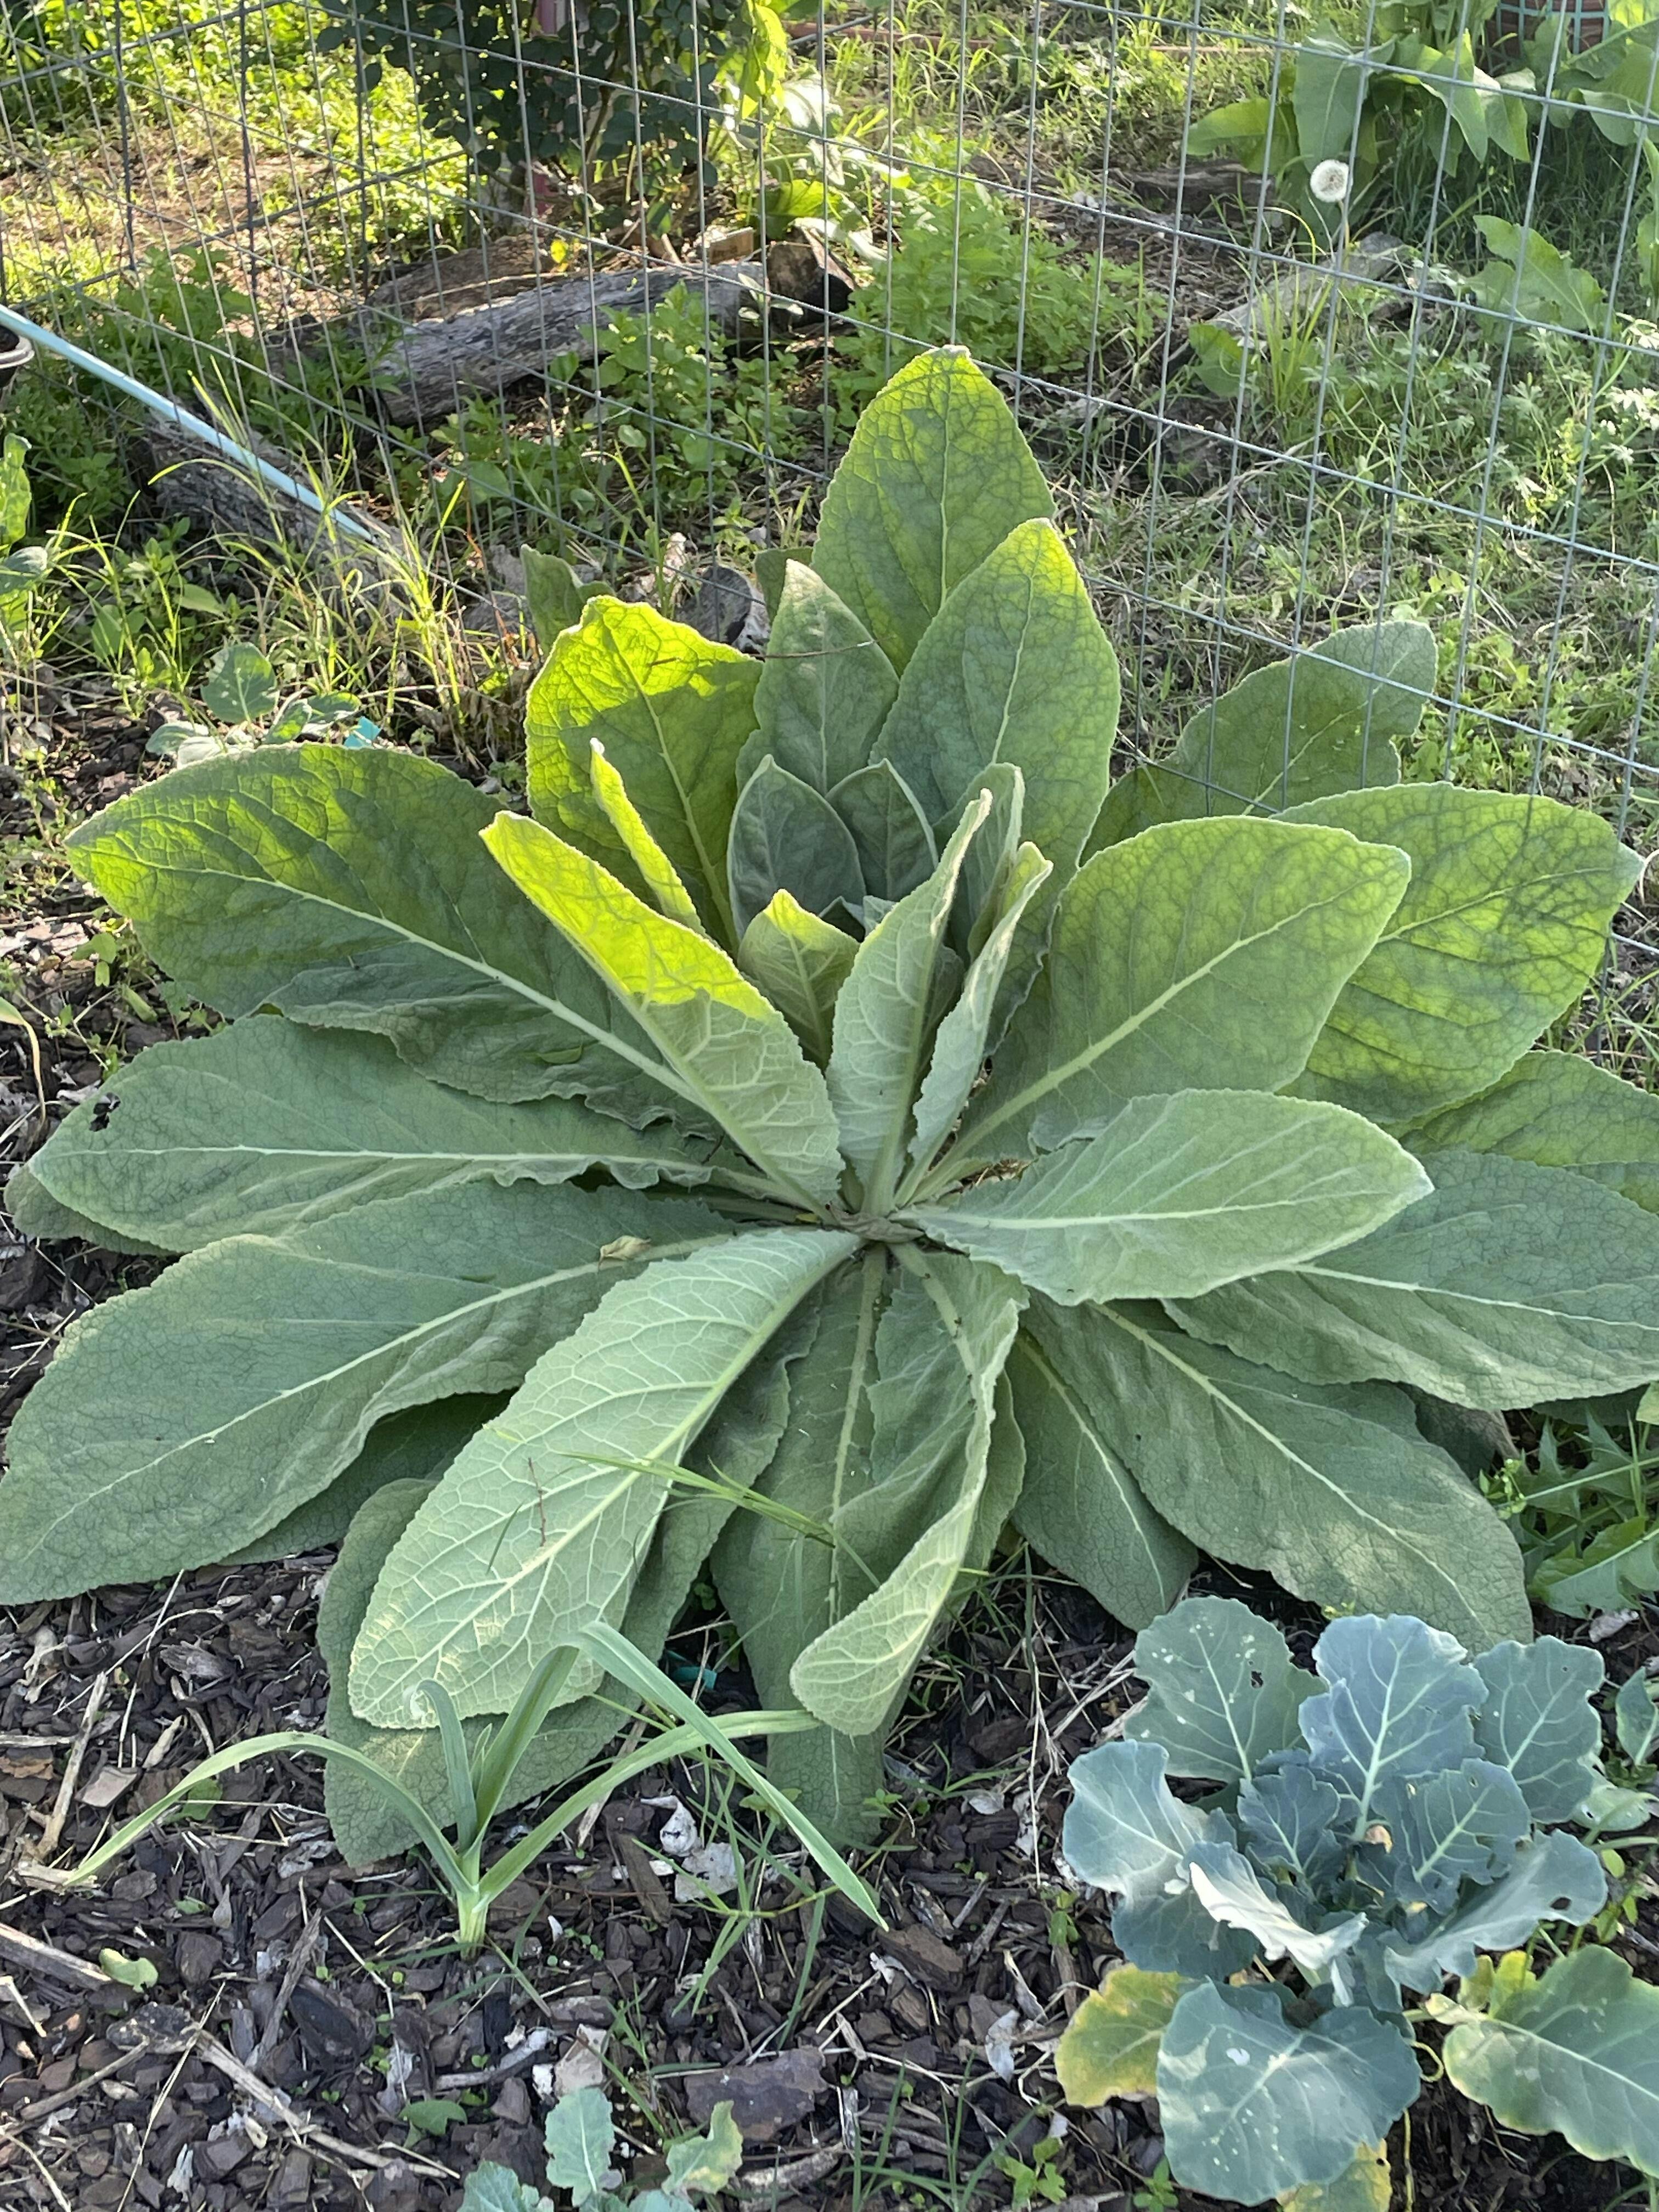
This is my favorite plant in my garden right now. I started my seeds last winter (2022) and planted in spring 2023. My mullein survived the insane high temperatures over summer and was a refreshing pop of green all winter. I am eagerly awaiting the flower!
These are so much fun. They sell out fast and I try to get at least 1 every year. Last year I was lucky enough to grab 2. I love trying new things and these are a mixture of flower, herbs, and vegetable. One of my favorite carrots came from here. It’s one of three that I grow every year because it’s fun!
When I bought these I had the intention of testing Mary’s seed Garlic with the sprouting store bought garlic from my fridge. I will be doing another review later after I harvest and I’ll post a picture then. So planted these in raised beds. Both in full sun and planted in different beds. I did the exact same thing to both. My store bought sprouted garlic all died. My Mary’s is still alive and forming it’s bulbs. This was just too good not share!