
First, Why do we use Coconut Coir instead of Peat?
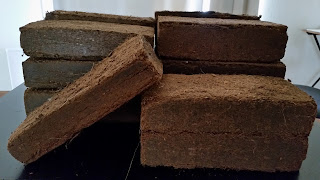
Coconut coir growing medium comes from the coconut's fibrous husk (known as coir) that is bound together by lignin (known as pith). After the husk is immersed in water for 6 weeks, the fiber is extracted mechanically, and the pith is left behind as a waste product and stored in heaps to age. Since the pith comes from the fruit, it is quite naturally rich in nutrients. Coconut coir growing mediums are dehydrated and compressed into a compact form for easy handling. With the addition of water, coir expands to an easy to work with growing medium.
Unlike peat moss, which is highly acidic, coconut coir has a neutral pH level. Most garden vegetables and flowers grow best in neutral to slightly alkaline conditions. When you use peat to amend a garden bed, an addition of agricultural lime is often necessary to combat the higher acidity. With coconut coir, limestone isn't necessary unless the soil naturally has a higher pH level. Coir use results in both a monetary and a labor savings, since you don't need to purchase further pH amendments nor work them into the soil.
-Coir improves soil drainage in the bed while also helping to retain moisture in quick-draining soils. Since coir breaks down slowly, much like peat, it creates air pockets in the soil that allow excess moisture to drain away from plant roots. The coir itself holds onto some moisture so the drainage doesn't occur too quickly and the soil doesn't dry out completely. These dual drainage and retention properties allow coir to improve moisture management in both heavy clay soils and dry, sandy beds.
-Peat moss, which coir replaces as a soil amendment, takes centuries to regrow once harvested. Coir is completely sustainable since it is a natural byproduct of coconut harvests, and coconut trees produce new coconuts every year. Using the coir in the garden keeps it out of the landfill where it would otherwise go. Coir can take a century or longer to fully break down in these landfills, so it's more sustainable to use it to improve your garden soil.
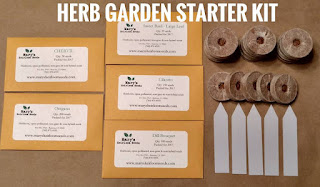
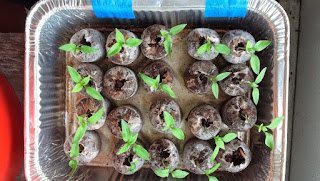
Step 1: Take out your Coconut Coir Pellets. I like to use a large tray
Step 2: Add water to tray and Coconut Coir Pellets. Using warm water might help them "grow" faster.
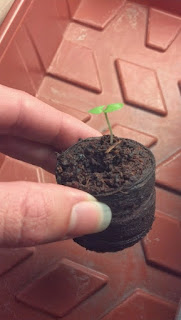
Step 3: Add seeds to the hole and gently cover or "squish" coconut coir.
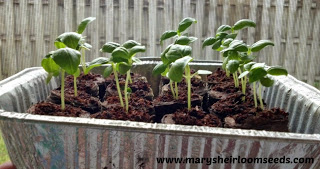
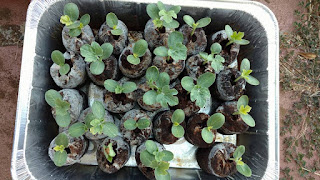
Step 4: Place in a warm sunny place and keep moist. This is where the real growing happens!
Step 4: Place in a warm sunny place and keep moist. This is where the real growing happens!
Common Seed-Starting Issues
GERMINATION
-Incorrect Temperature. Different seeds have different needs.
-Old Seeds. When properly stored seeds can have a very long shelf life. But the older they get, your germination rate will begin to reduce
-Incorrect Watering. Water in a necessity for all plants. In the germination stage you need to make sure you keep the soil evenly moist. If you water too much, you run the risk of your seeds rotting before they germinate. If you let them dry out, they will either never germinate or die trying!
-Planting Depth/Light. When you plant your seeds pay attention to your planting depth. This is important because if planted too deep you plants could run out of energy before reaching sunlight. Planting too shallow can lead to drying out. Some seeds actually need some light to germinate, so instead of digging them down you just press them into your soil.
MOLD or ROTTING
Dampening off, is probably the most common disease when starting seeds. It’s a fungus that can attack the seeds as soon as they germinate or after the seedling has emerged. You will know this is what killed your seedlings when you notice dark spots on the stem right at the soil level and the seedling topples over and withers away.
-Don't over water
-Provide air movement. A small fan will work
-Nutrients: Use a half-strength, organic fertilizer with tiny seedling. Our DIY Kelp Meal Tea is a great option for tiny seedling. You can use this as a foliar feed as well.
OVERCROWDING
For coconut coir pellets, plant no more than 2 seeds per pellet for small seeds and only one per pellet for larger seeds. If both seeds germinate, do not pull one out. Pinch off one of the seedlings at the base to remove. This will give the remaining seedling a chance to survive and thrive.
Once your seedlings are strong and roots start to grow out of the mesh, it's time to transplant them into the garden or into your containers.
Take the entire pellet and plant into the garden. For healthier root growth and to give plants a boost, I add a tablespoon of Azomite into each hole and mix into the dirt before transplanting the coconut coir pellet with growing seedling. I also water with a diluted version of our DIY Kelp Meal Tea when I transplant to help with shock.
We hope you have enjoyed our in-depth article about Seed Starting with Coconut Coir. If you have additional questions, feel free to comment below or send an email to mary@marysheirloomseeds.com
HAPPY PLANTING!

Sign up for our E-Newsletter
4 comments
I truly like the idea of COIR over peat moss however, I am using individual plants for my ground cover. I have clay soil and I have added sand. Can COIR be used mixed into the soil before planting?
Thank you,
Jill
Very detailed description about comparison coconut coir versus peat moss. Thank you it was very helpful. 🌼🙋😄
Very interesting on the Coconut core
Hi Mary
I’ve had great success sowing large seeds into coco peat. I would like to try very fine seed such as snapdragon where the seed remains on the surface. i will use a sheet of glass to keep the moisture in and I have the right conditions for germinating but I was wondering if the peat will not be fine enough. I will use a mist nozzle on the hose to avoid washing the seed down too deep. Any advice form your experience would be great thankyou.
cheers
angela